Therap for Canada 2024.3.0 Released!
| Release Date: 2/12/2024 |
- Activity Tracking
- Billing
- Case Note
- Demographic Dashboard
- Immunization
- Individual Dashboard New!
- Individual Demographic Form (IDF)
- Individual Home Page
- Individual Plan
- Login
- Medication History
- Multi-Individual Event (MIE)
- Personal Finance
- Referral for Oversight Providers
- Secure Communications (SComm)
- Service Directory
Activity Tracking
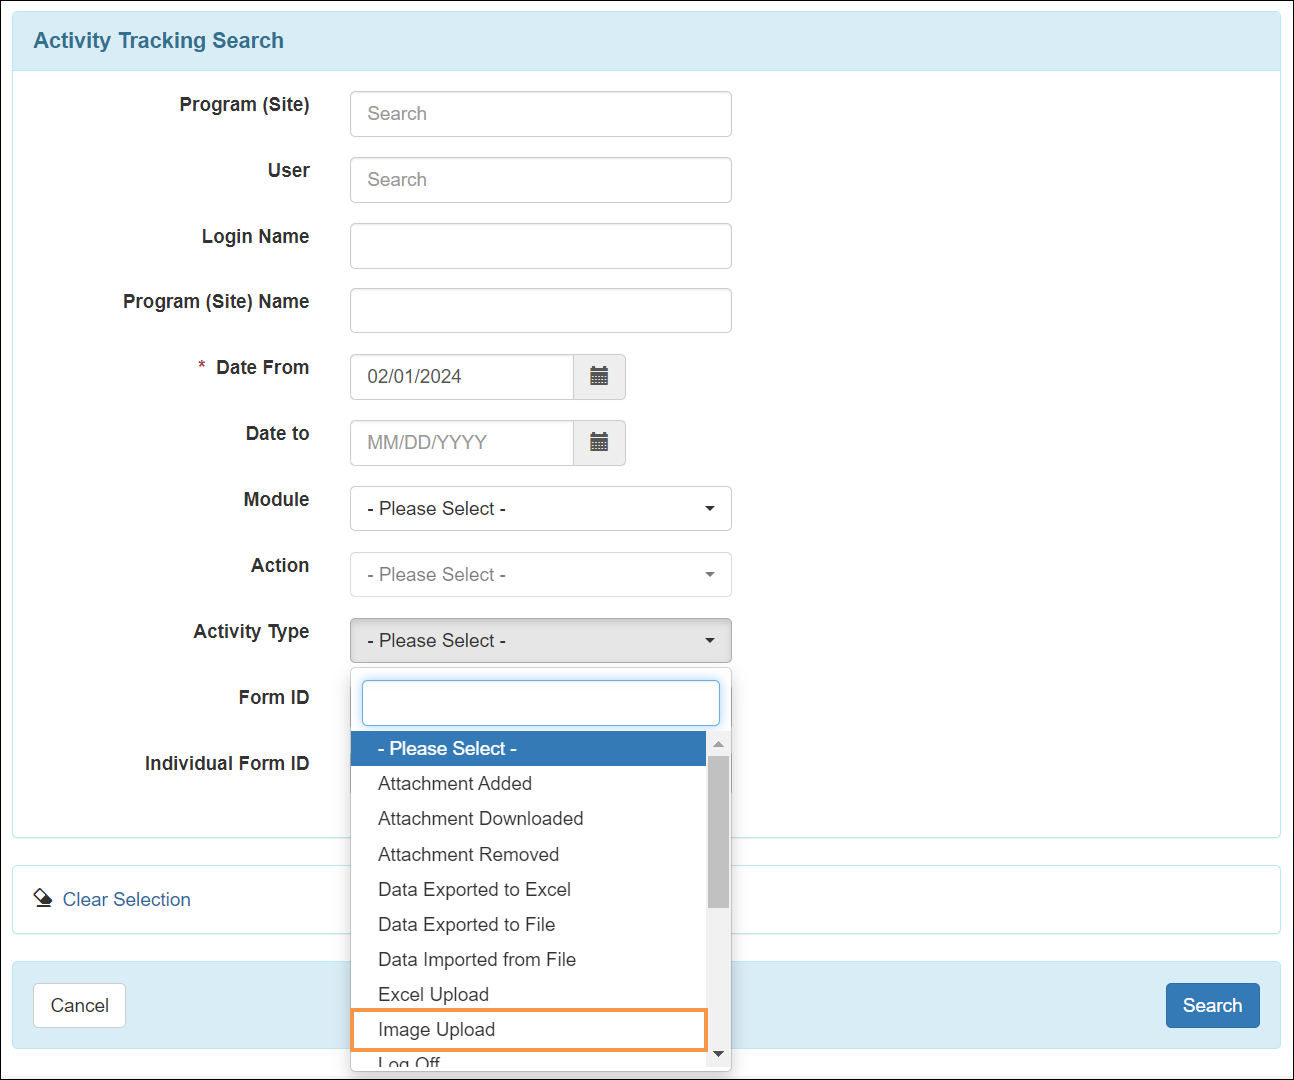
[Back to Top]- In the ‘Activity Tracking Search’ page, a new Image Upload activity has been added to the Activity Type dropdown field.
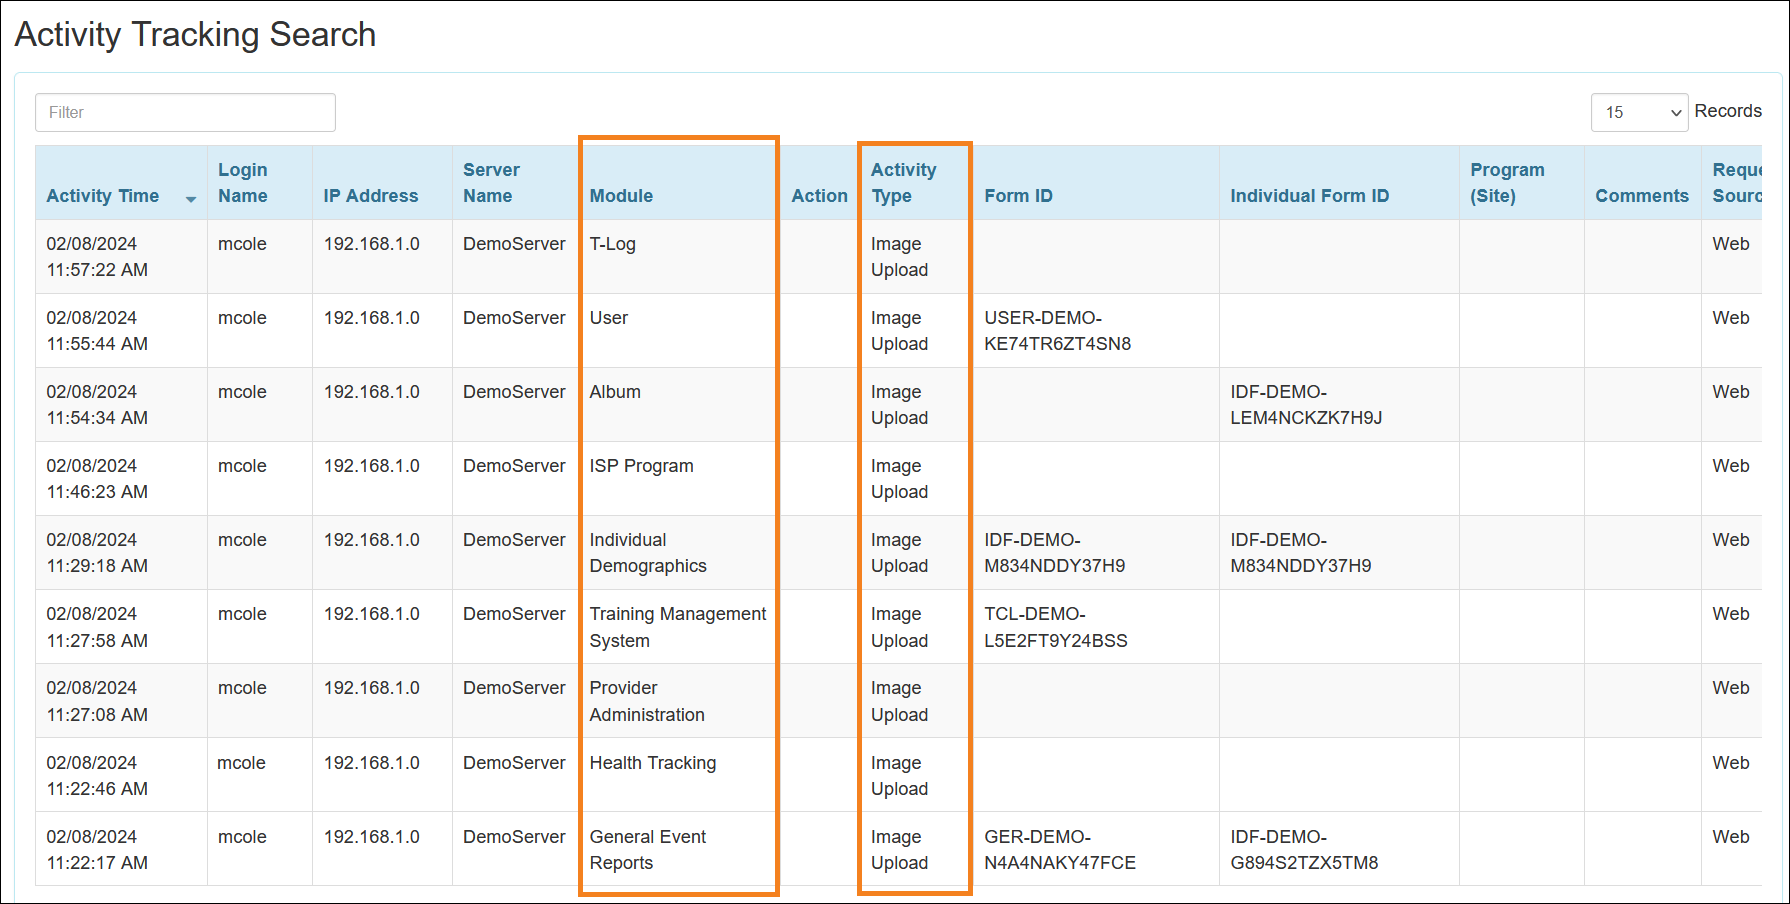
- In the 'Activity Tracking Search’ result page, a new Image Upload Activity Type will be available for the following Module options:
- T-Log
- User
- Album
- ISP Program
- ISP Program Template
- Individual Demographics
- Training Management System
- Provider Administration
- Health Tracking
- General Event Reports
Billing
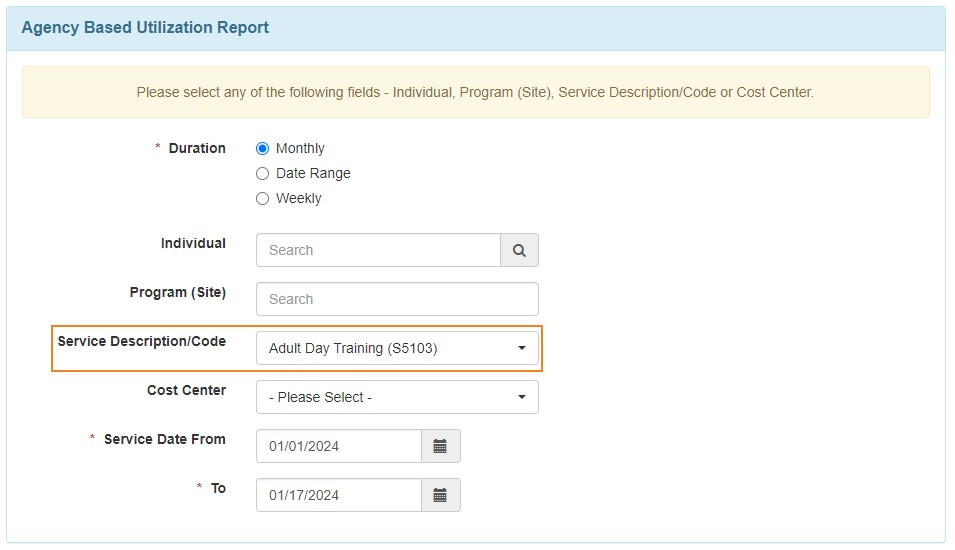
[Back to Top]- The Service Description/Code field throughout the application will now only show Services associated with Service Authorizations.
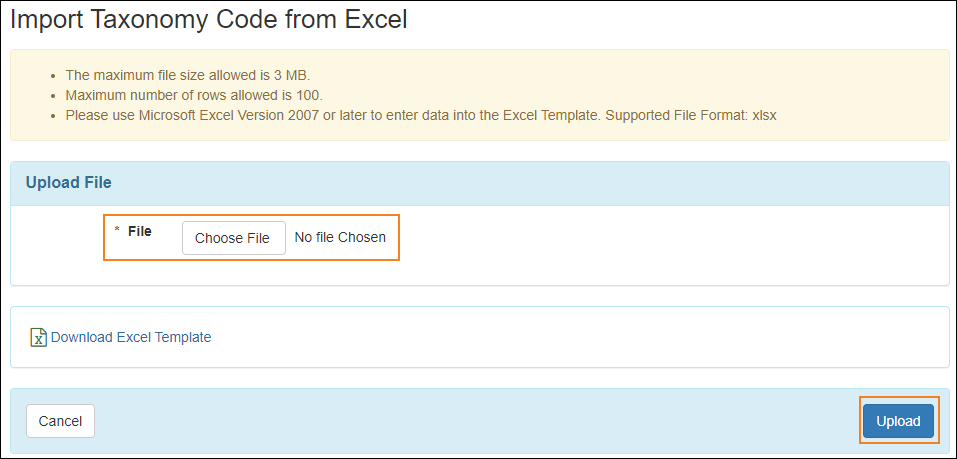
- Users will now be able to add Taxonomy Codes by uploading an Excel file.
Case Note
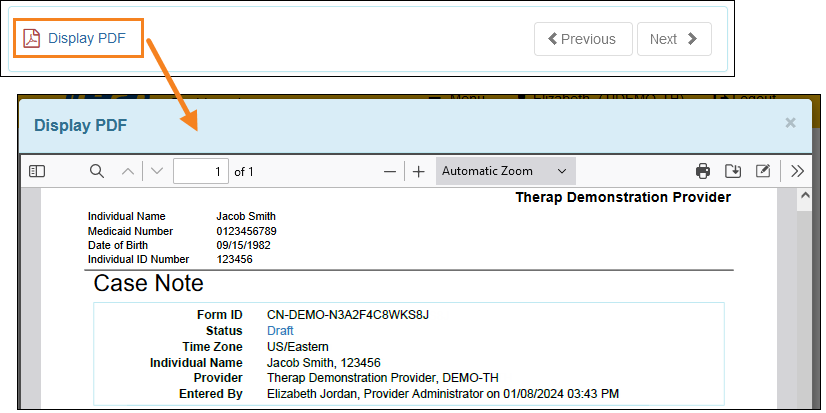
[Back to Top]- The Print PDF link in Case Notes has been renamed to Display PDF. Users will be able to view the PDF in PDF viewer after clicking on this link.
Demographic Dashboard
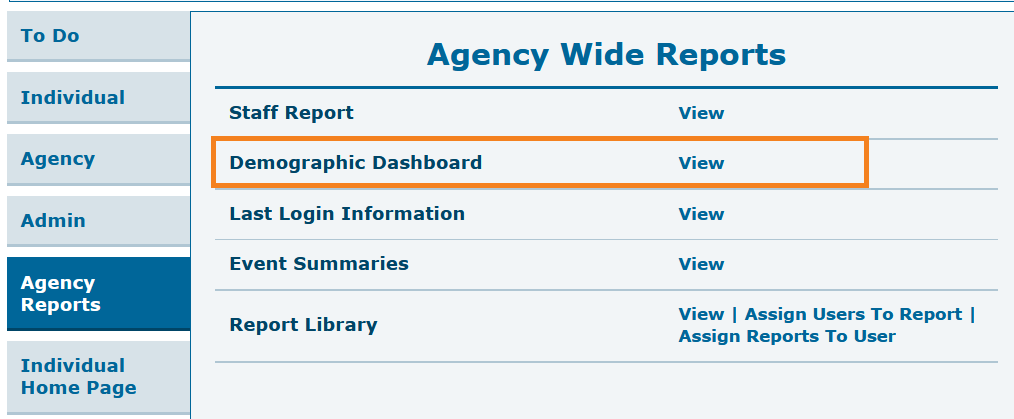
[Back to Top]- The Demographic Report option in the ‘Agency Wide Reports’ section of the Agency Reports tab has been renamed to Demographic Dashboard.
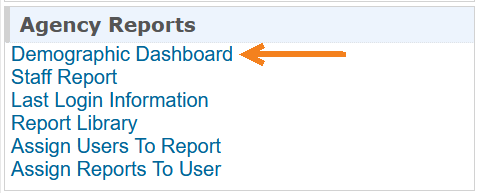
The Demographic Report link in the ‘Agency Reports’ section of the Oversight Dashboard has been renamed to Demographic Dashboard.
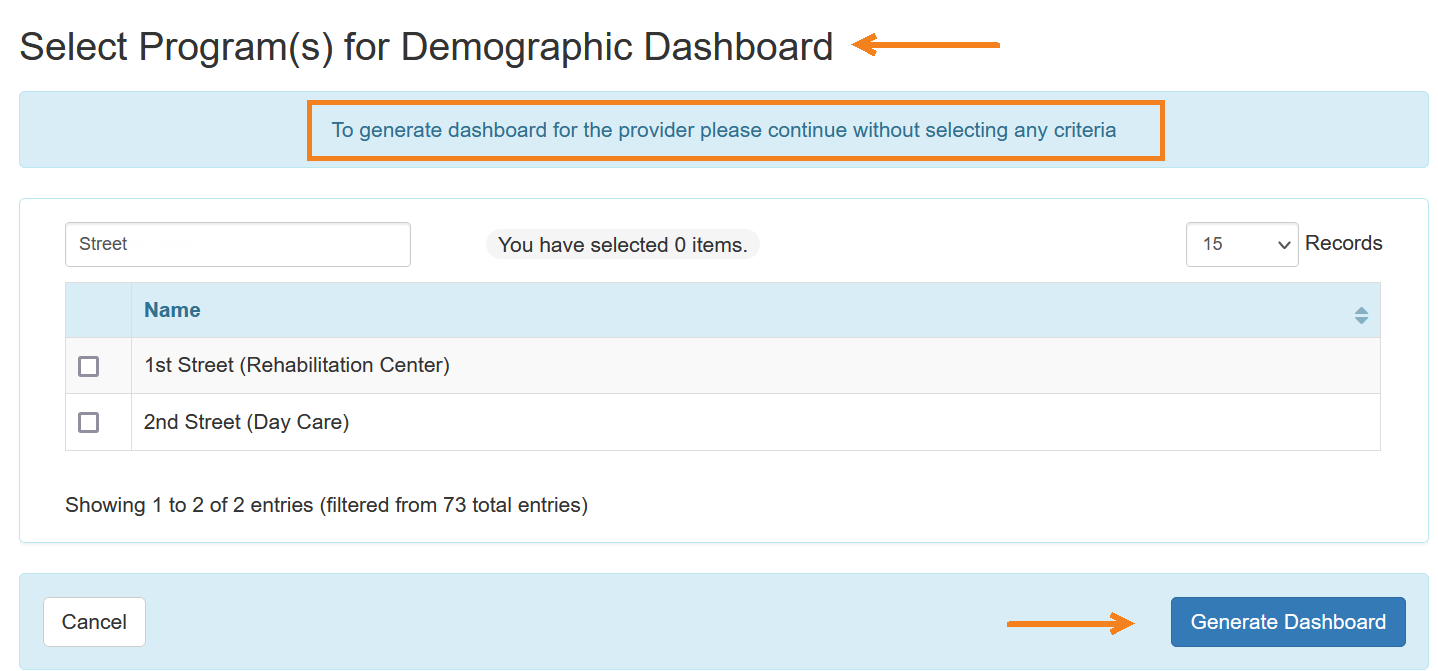
- The following updates are available on the ‘Select Program(s) for Demographic Report’ page:
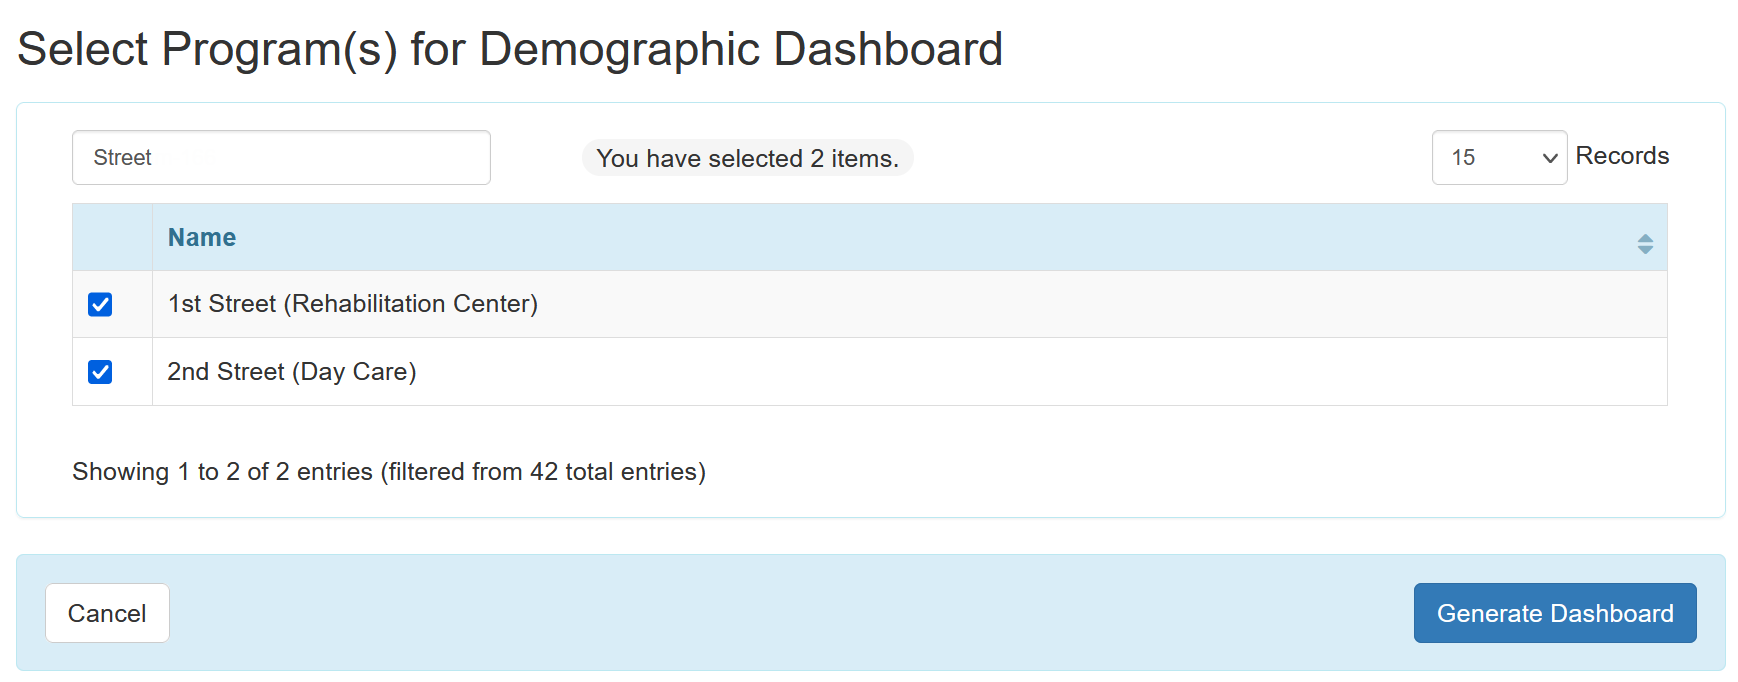
- The page title has been renamed to ‘Select Program(s) for Demographic Dashboard’.
- The message at the top of the page has been updated.
- The Generate Report button has been renamed to Generate Dashboard.
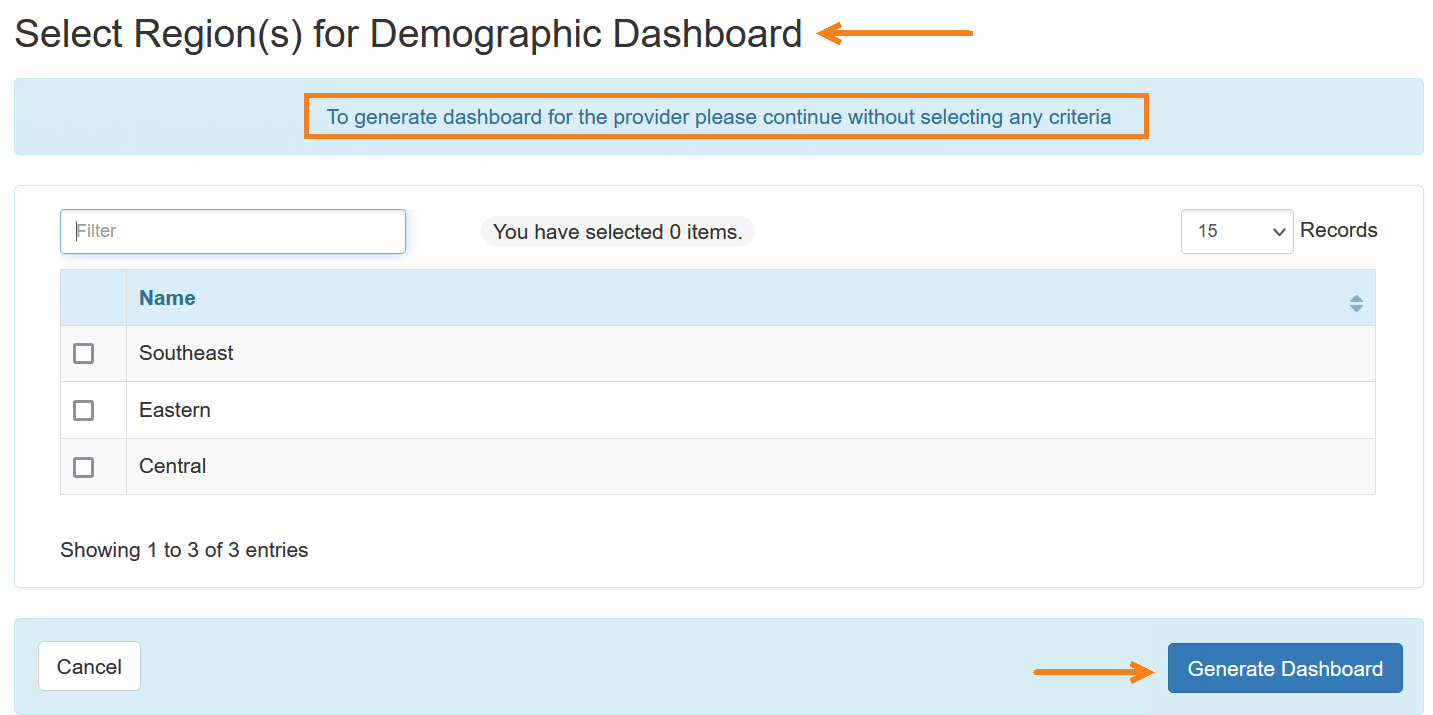
- The following updates are available on the ‘Select Region(s) for Demographic Report’ page:
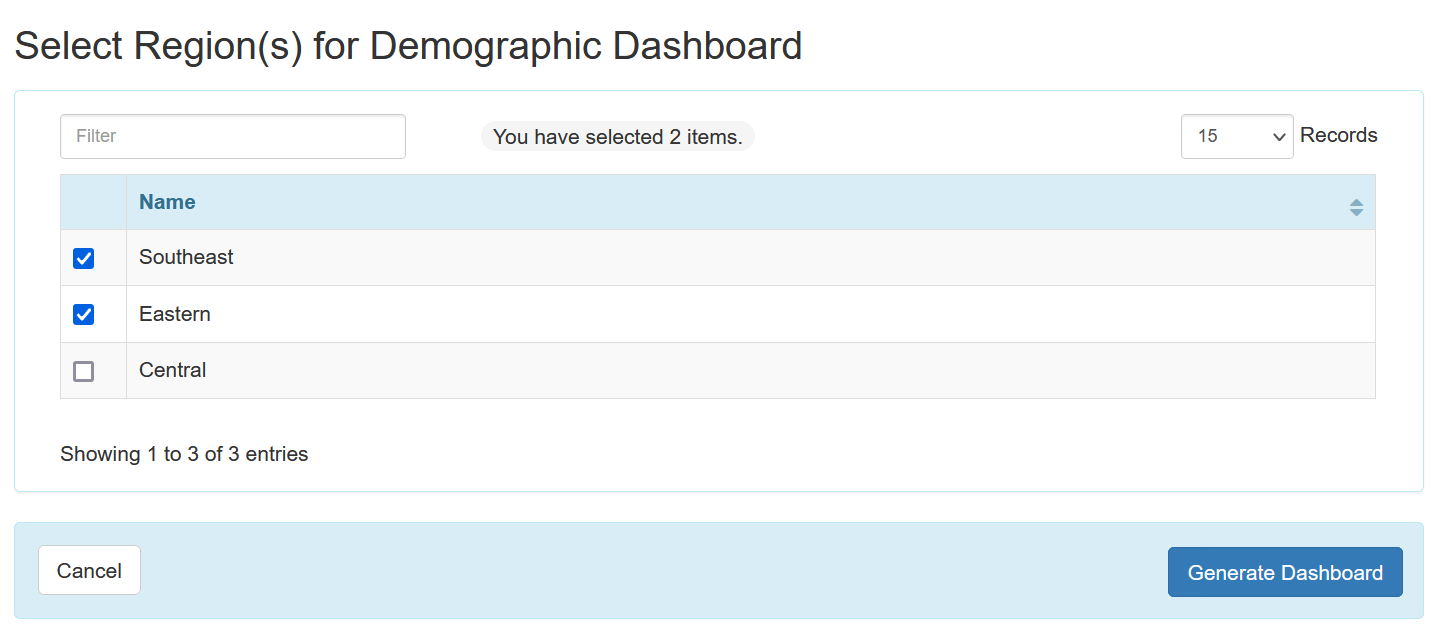
- The page title has been renamed to ‘Select Region(s) for Demographic Dashboard’.
- The message at the top of the page has been updated.
- The Generate Report button has been renamed to Generate Dashboard.
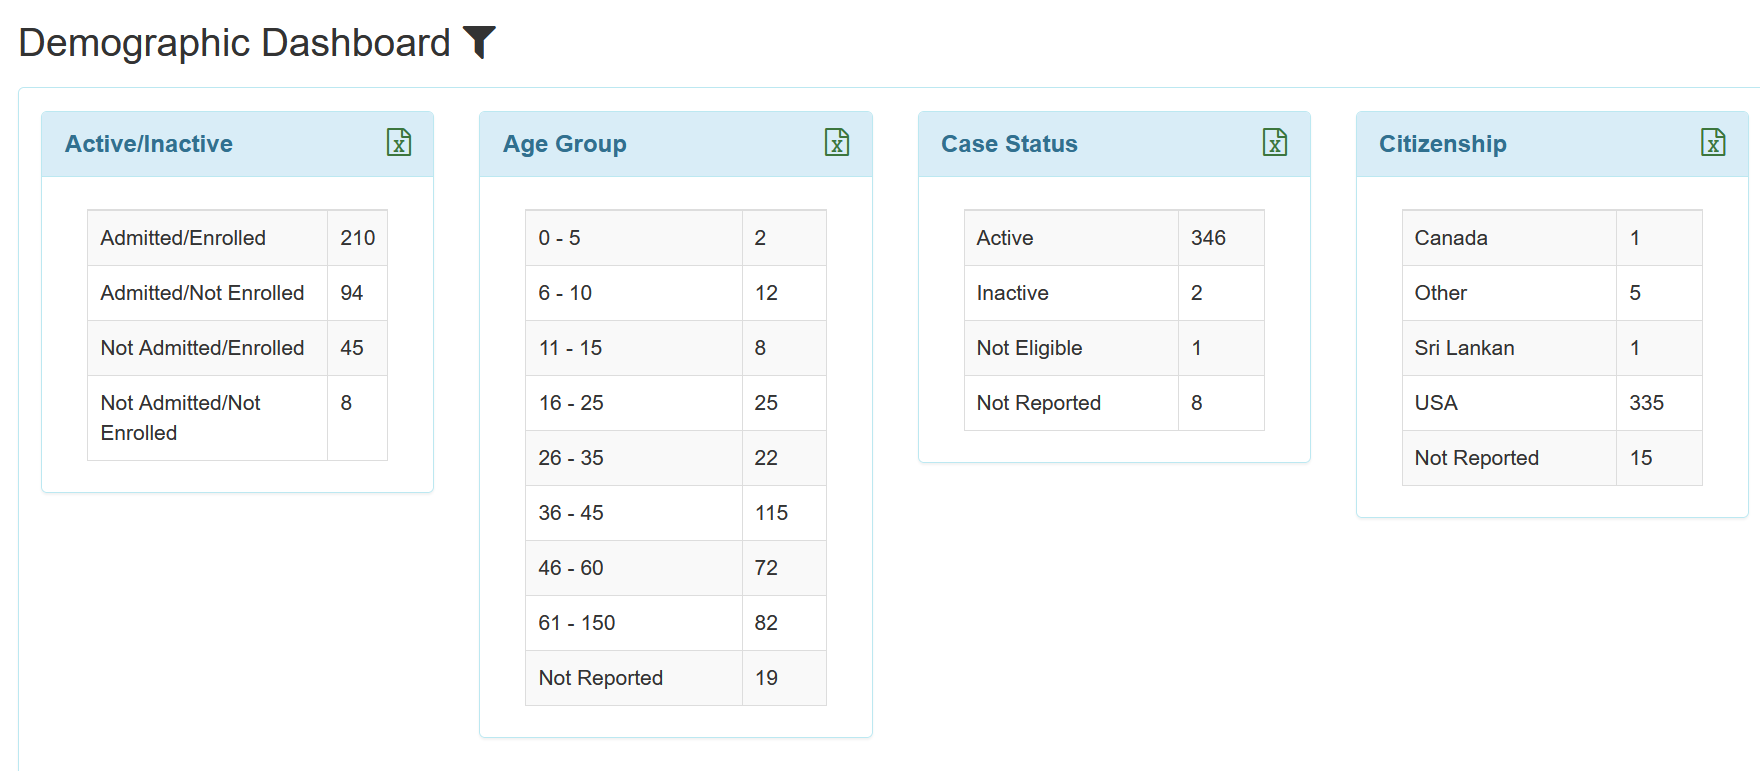
- On the report result page, the ‘Demographic Report’ page title has been renamed to ‘Demographic Dashboard’.
- On the ‘Activity Tracking Search’ results page, the Comment column will now reflect the word ‘Demographic Dashboard’ instead of ‘Demographic Report’ for comments related to Demographic Dashboard.

Immunization
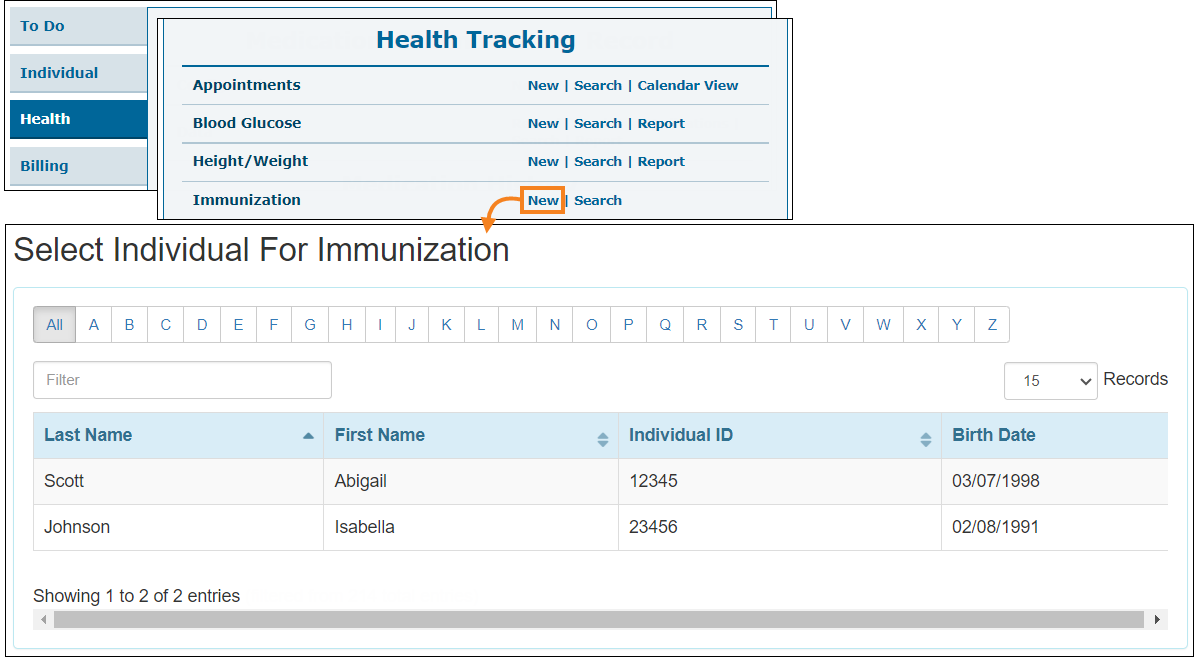
[Back to Top]- While creating a new Immunization, clicking on the New link will now directly open up the ‘Select Individual For Immunization’ page. Selecting a program while entering Immunization will no longer be necessary.
Individual Dashboard New!
[Back to Top]- A new Individual Dashboard caseload-based role has been added in the ‘Individual’ section of Super Roles and Shareable Super Roles.

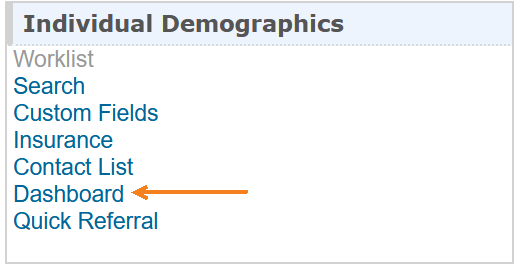
- Regular and Case Manager Users assigned with the Individual Dashboard caseload-based role will be able to access the new Dashboard link for the Individual Demographics option on the Individual tab.
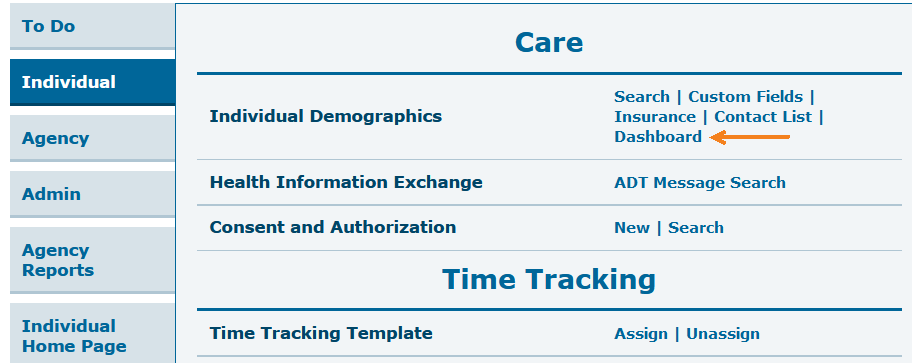
Oversight users will find the Dashboard link in the ‘Individual Demographics’ section on their Oversight Dashboard.
- For Regular and Case Management providers, clicking on the Dashboard link will open the ‘Select Program(s) for Demographic Dashboard’ page. This page will list Programs in which at least one individual on the user’s caseload is currently enrolled. This page will be automatically skipped if no Program is available where the individual from the user’s caseload is enrolled.
For Oversight providers, clicking on the Dashboard link will open the ‘Select Region(s) for Demographic Dashboard’ page. This page will list the Regions in which at least one individual on the user’s caseload is currently enrolled. This page will be automatically skipped if no Region is available where the individual from the user’s caseload is enrolled.
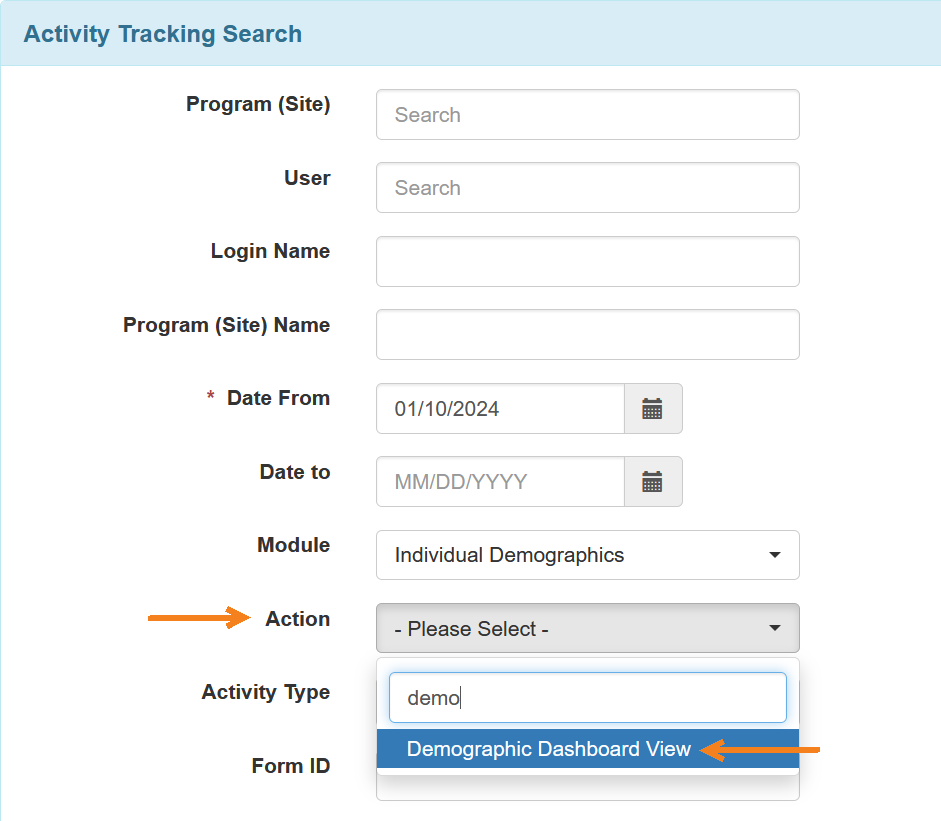
- In the ‘Activity Tracking Search’ page, the Demographic Report View dropdown option for the Action field has been renamed to Demographic Dashboard View.
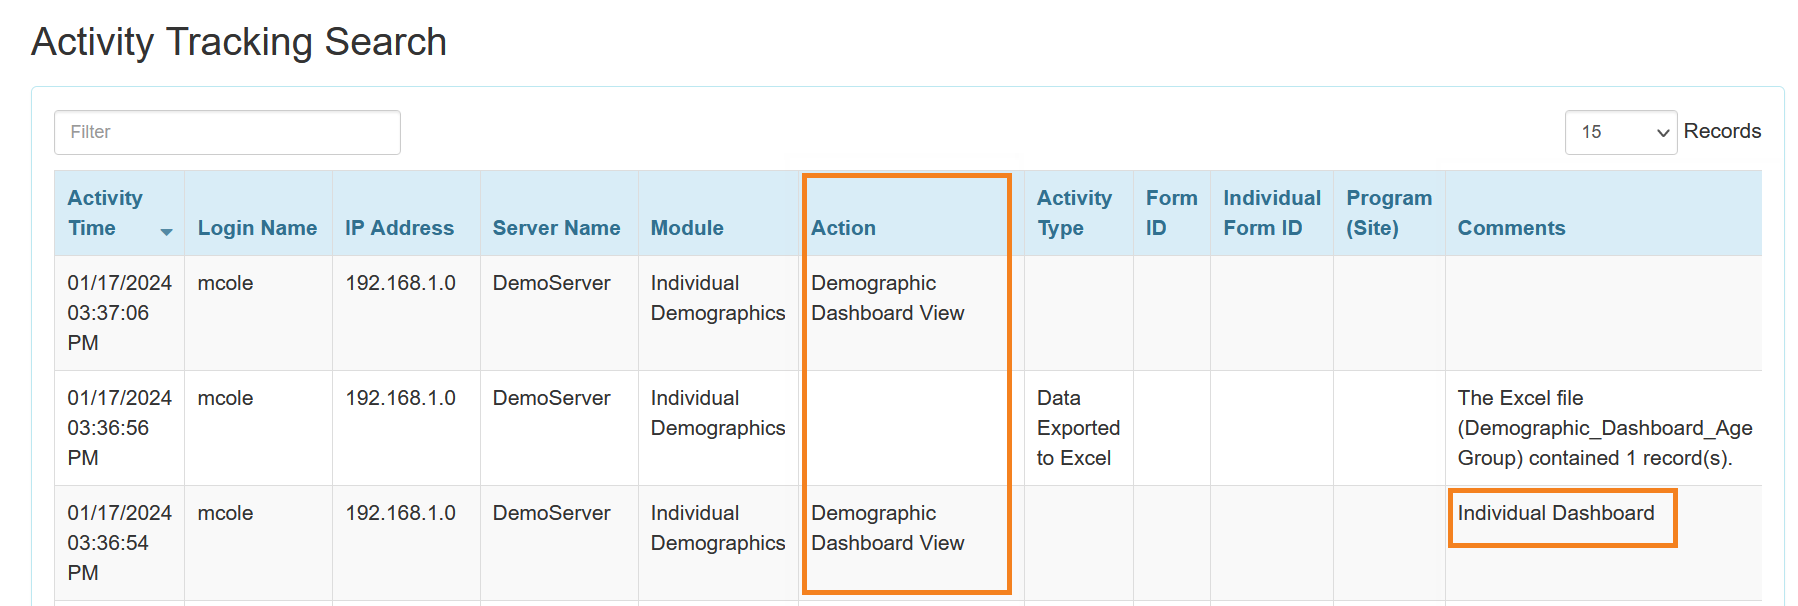
- The following updates have been made on the ‘Activity Tracking Search’ results page:
- Demographic Report View action has been renamed to Demographic Dashboard View in the Action column.
- If a user views the Demographic Dashboard using the Dashboard link for the Individual Demographics option, a 'Demogaphic Dashboard View' Action and an 'Individual Dashboard' Comment will be recorded.
Individual Demographic Form (IDF)
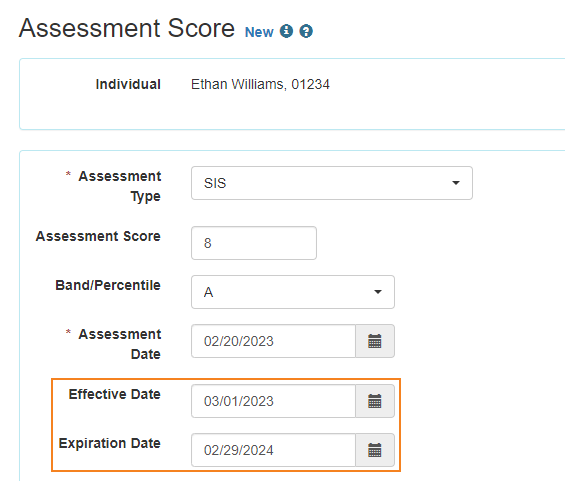
[Back to Top]- Two new fields Effective Date and Expiration Date have been added to the 'Assessment Score' form accessible from the Individual Demographic Form (IDF).
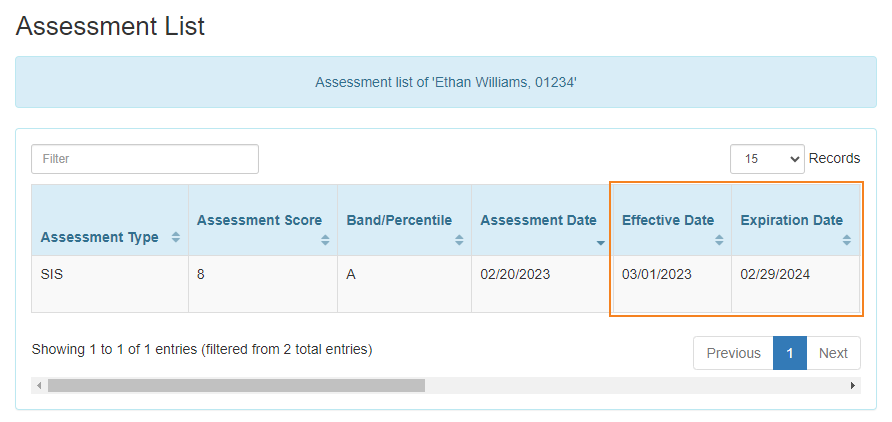
- The Effective Date and Expiration Date fields will also be available as columns on the IDF 'Assessment List' page, as well as the IDF Provider Configuration PDF exports where 'Assessment List' is selected as a PDF Item.

Individual Home Page
[Back to Top]- A new column titled Action Date has been added in the ‘Program Enrollments’ section on the Case Status tab of the Individual Home Page. This column will show the date and time of the last update action to the Enrollment Date or Discharge Date of a program.
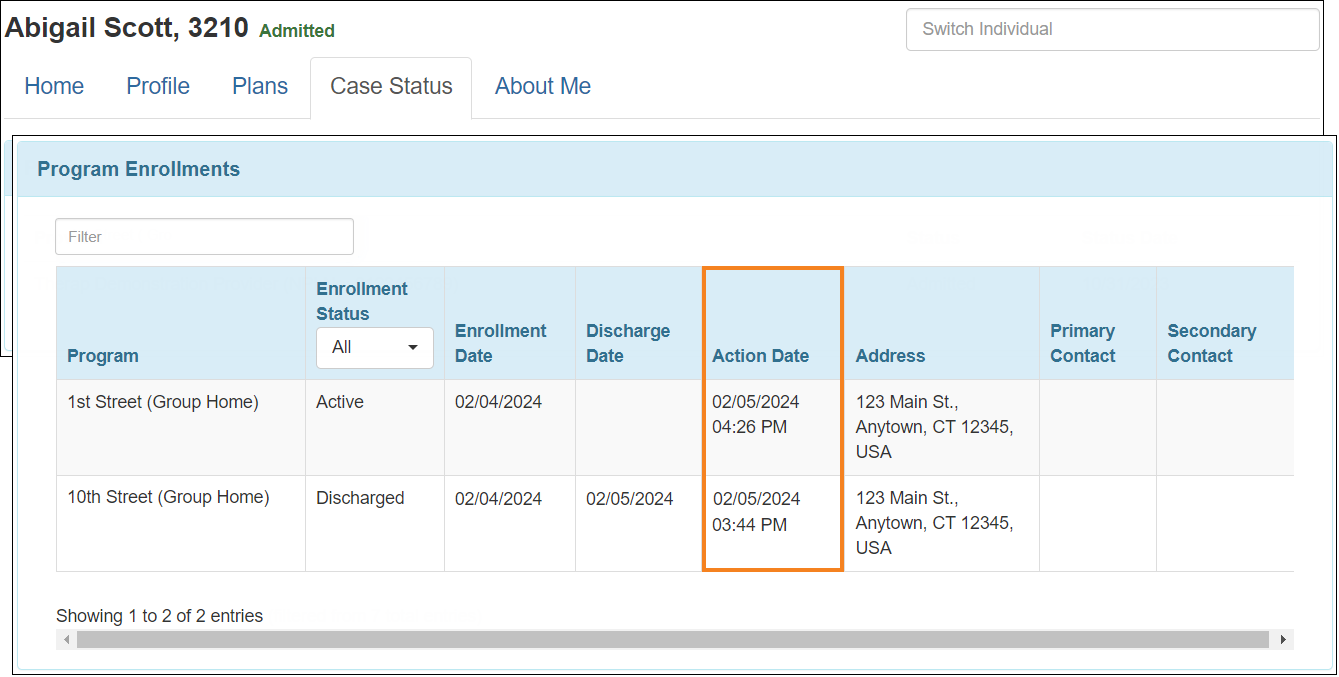
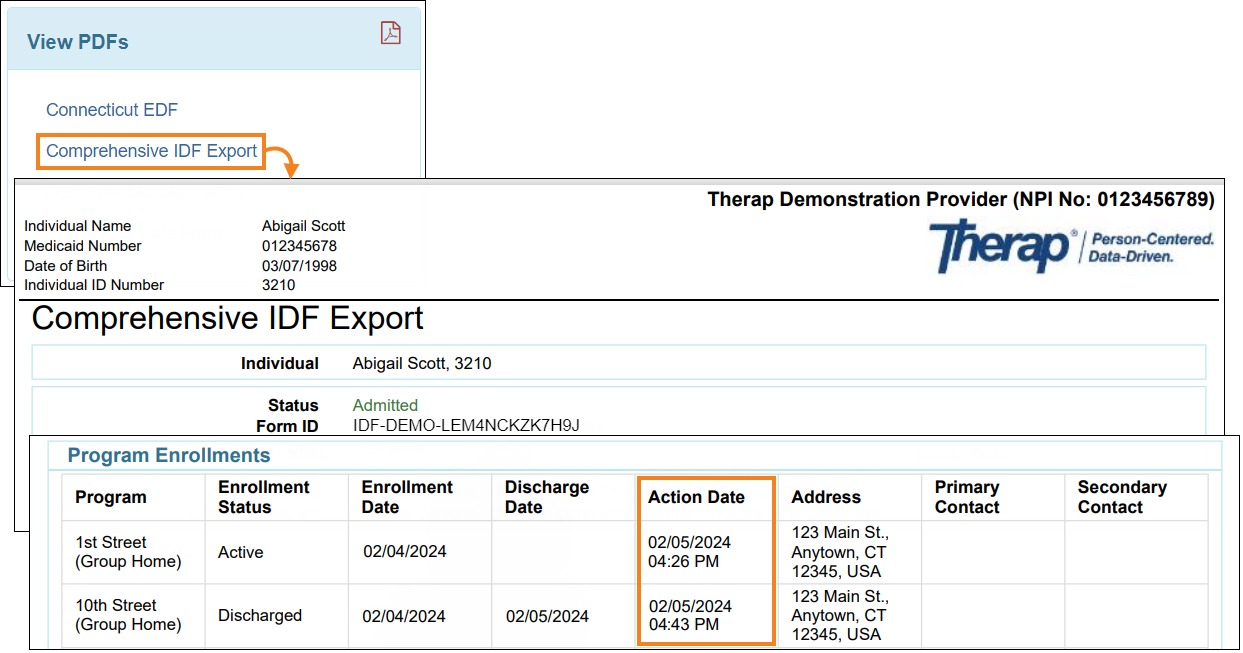
The Action Date column will also be available in the ‘Program Enrollments’ section of the PDFs generated from the individual's IDF or Individual Home Page.
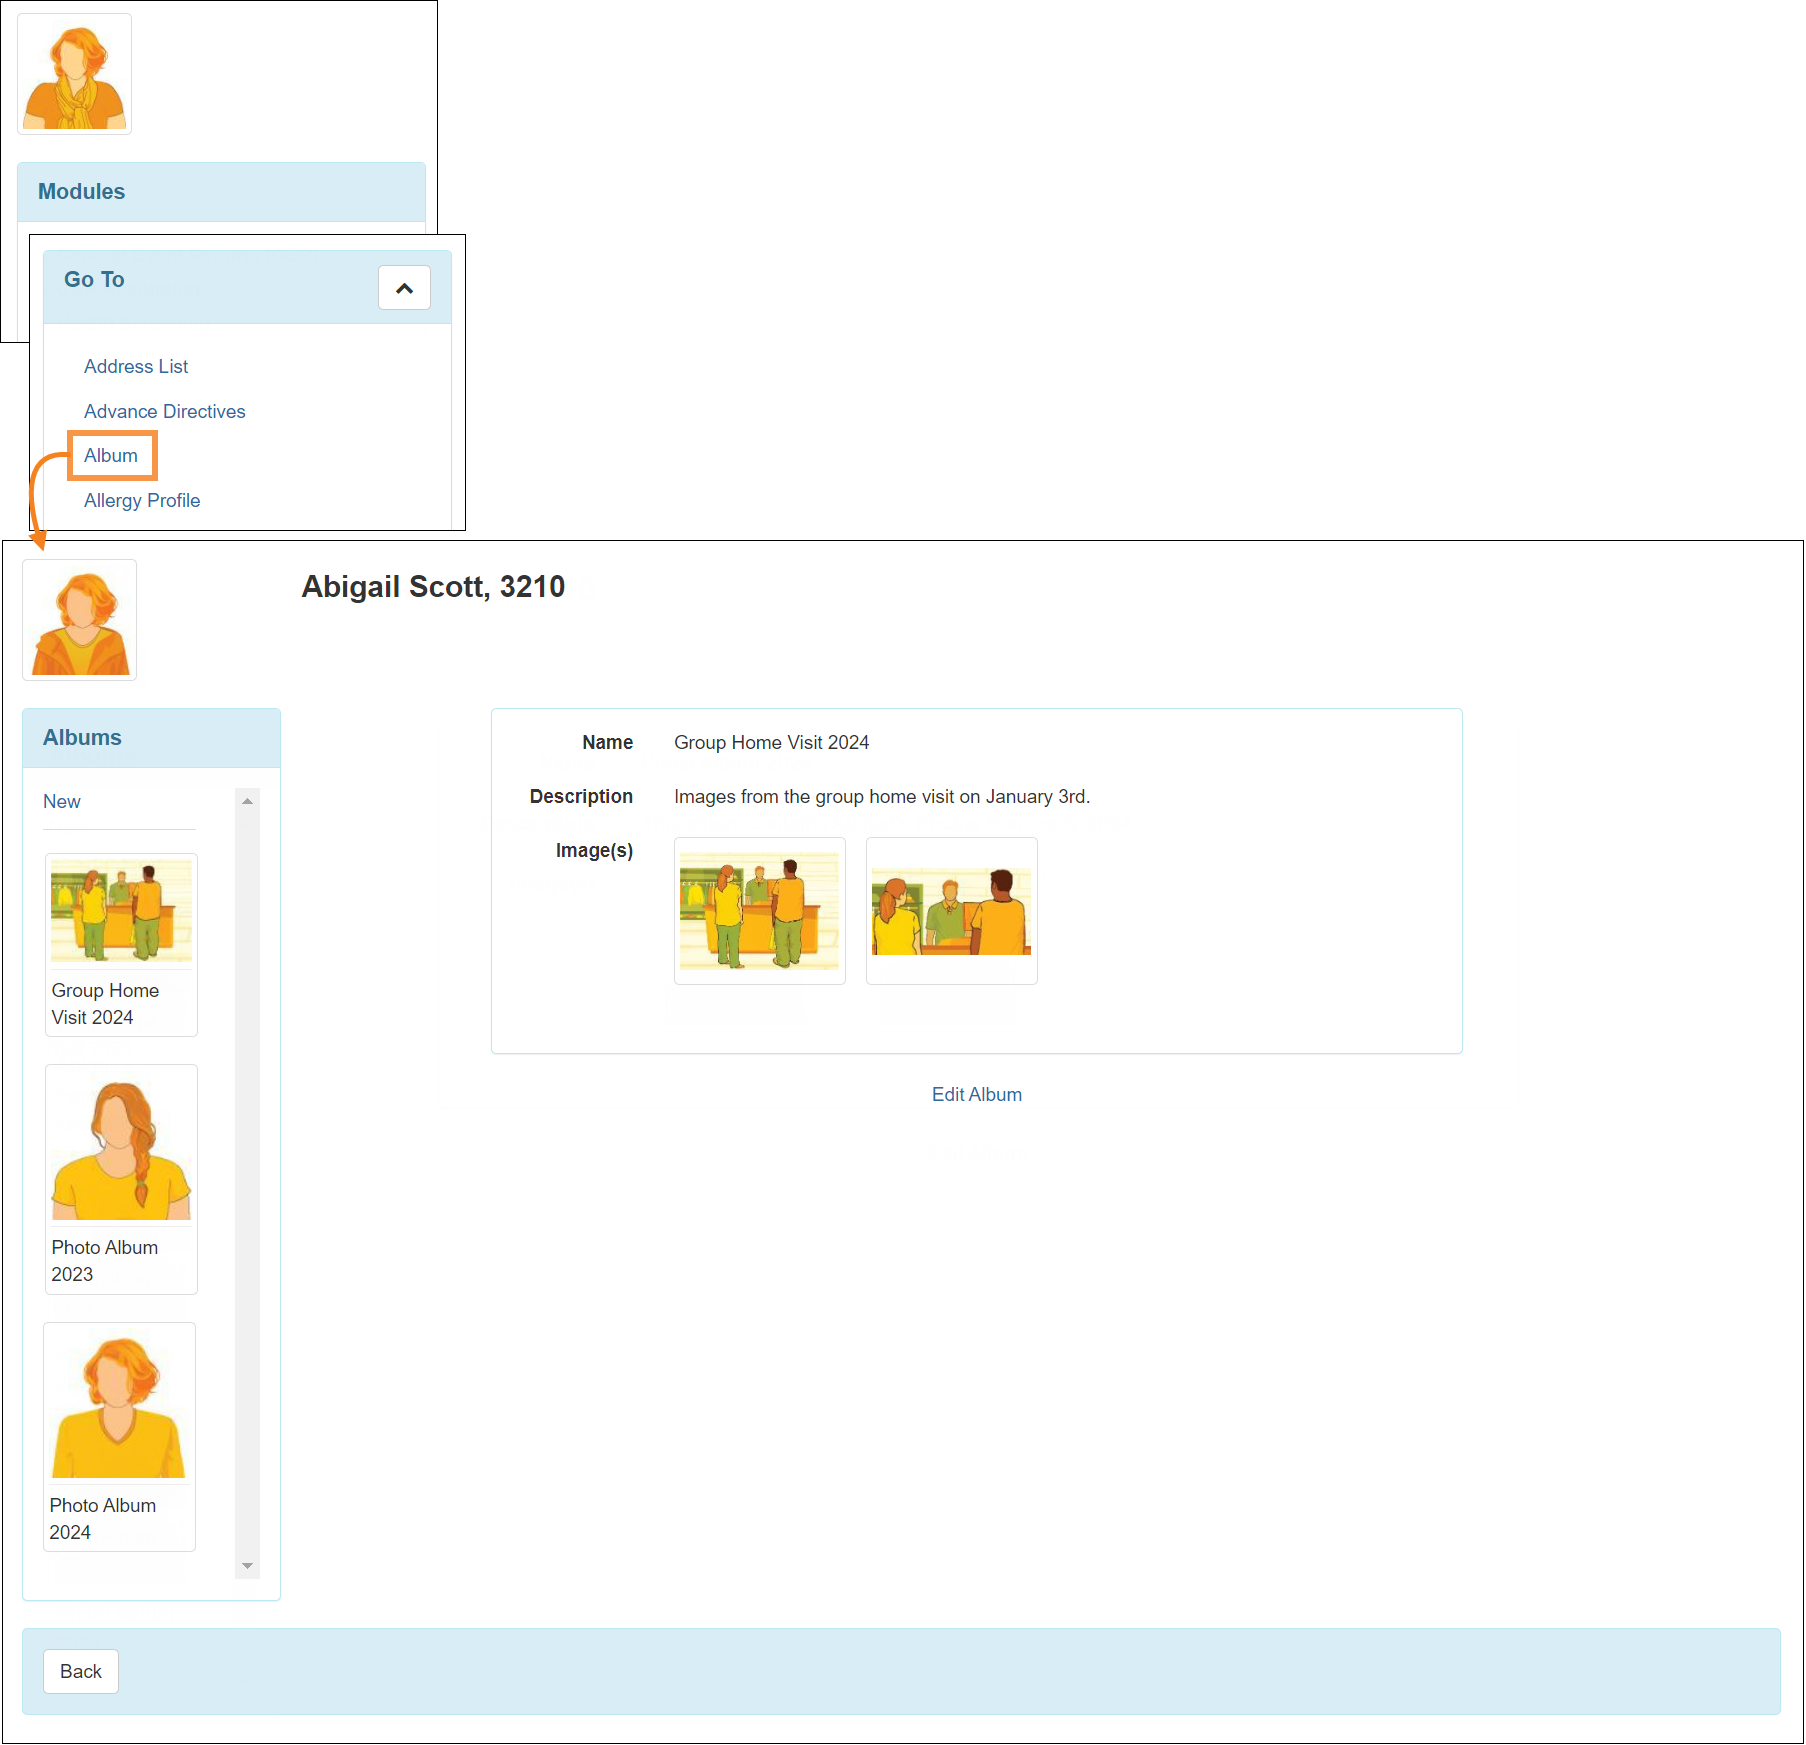
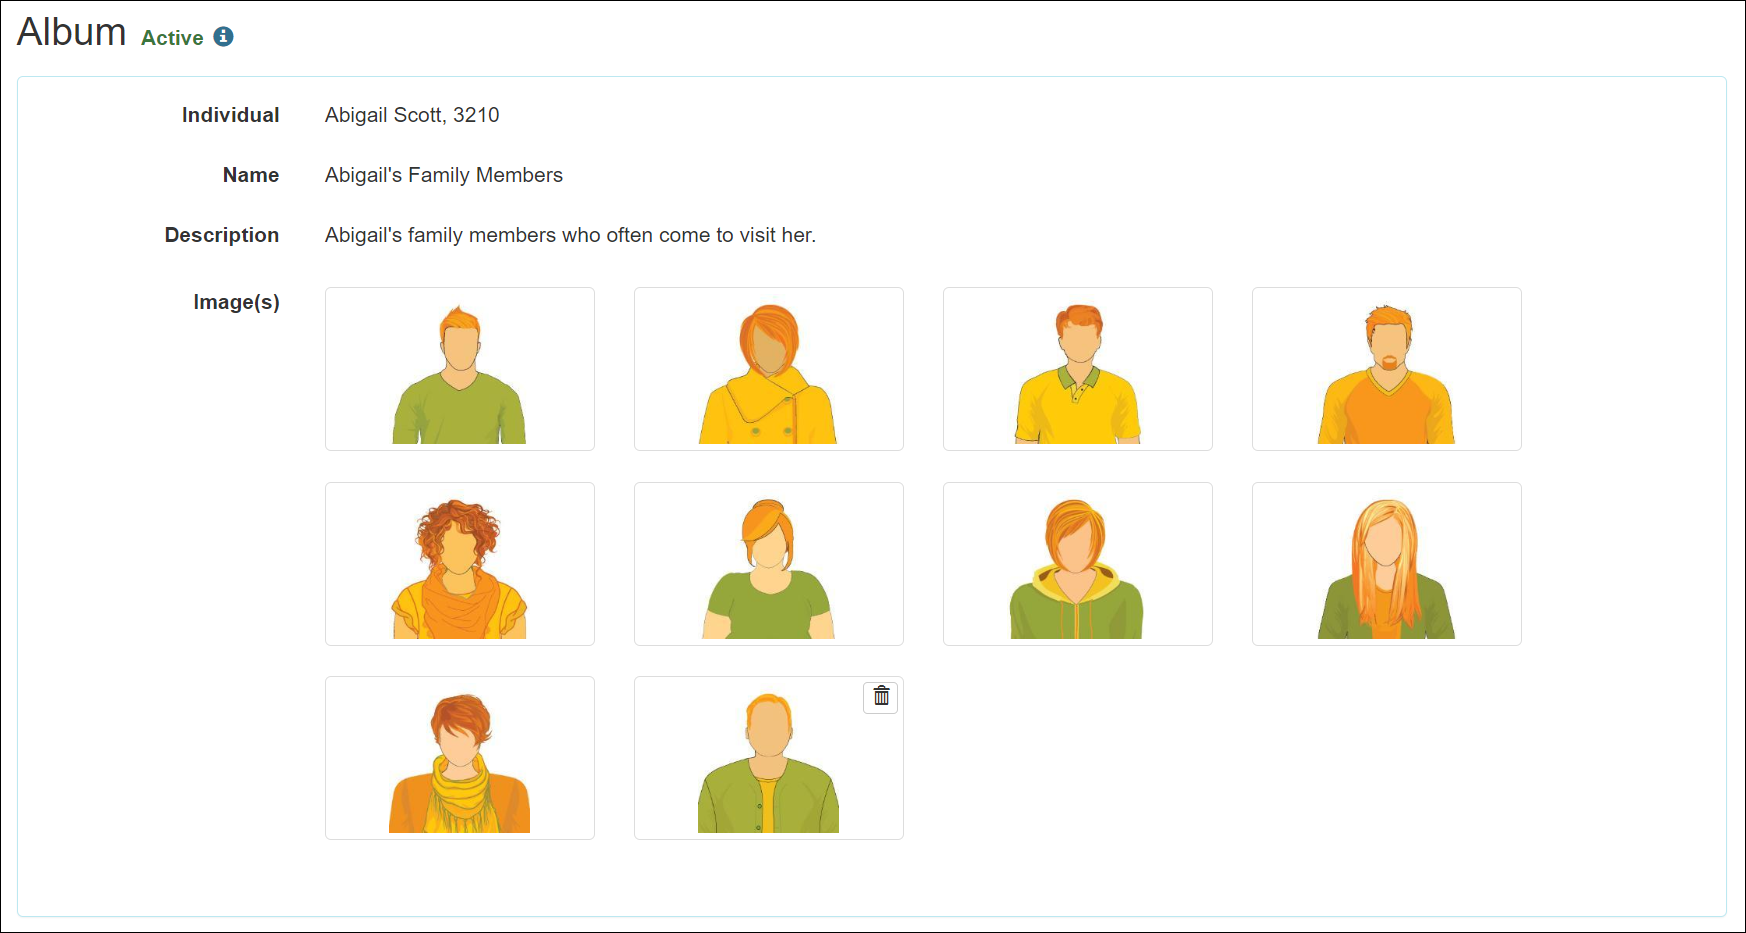
- An enhanced user interface has been introduced for the Individual Home Page Album option.
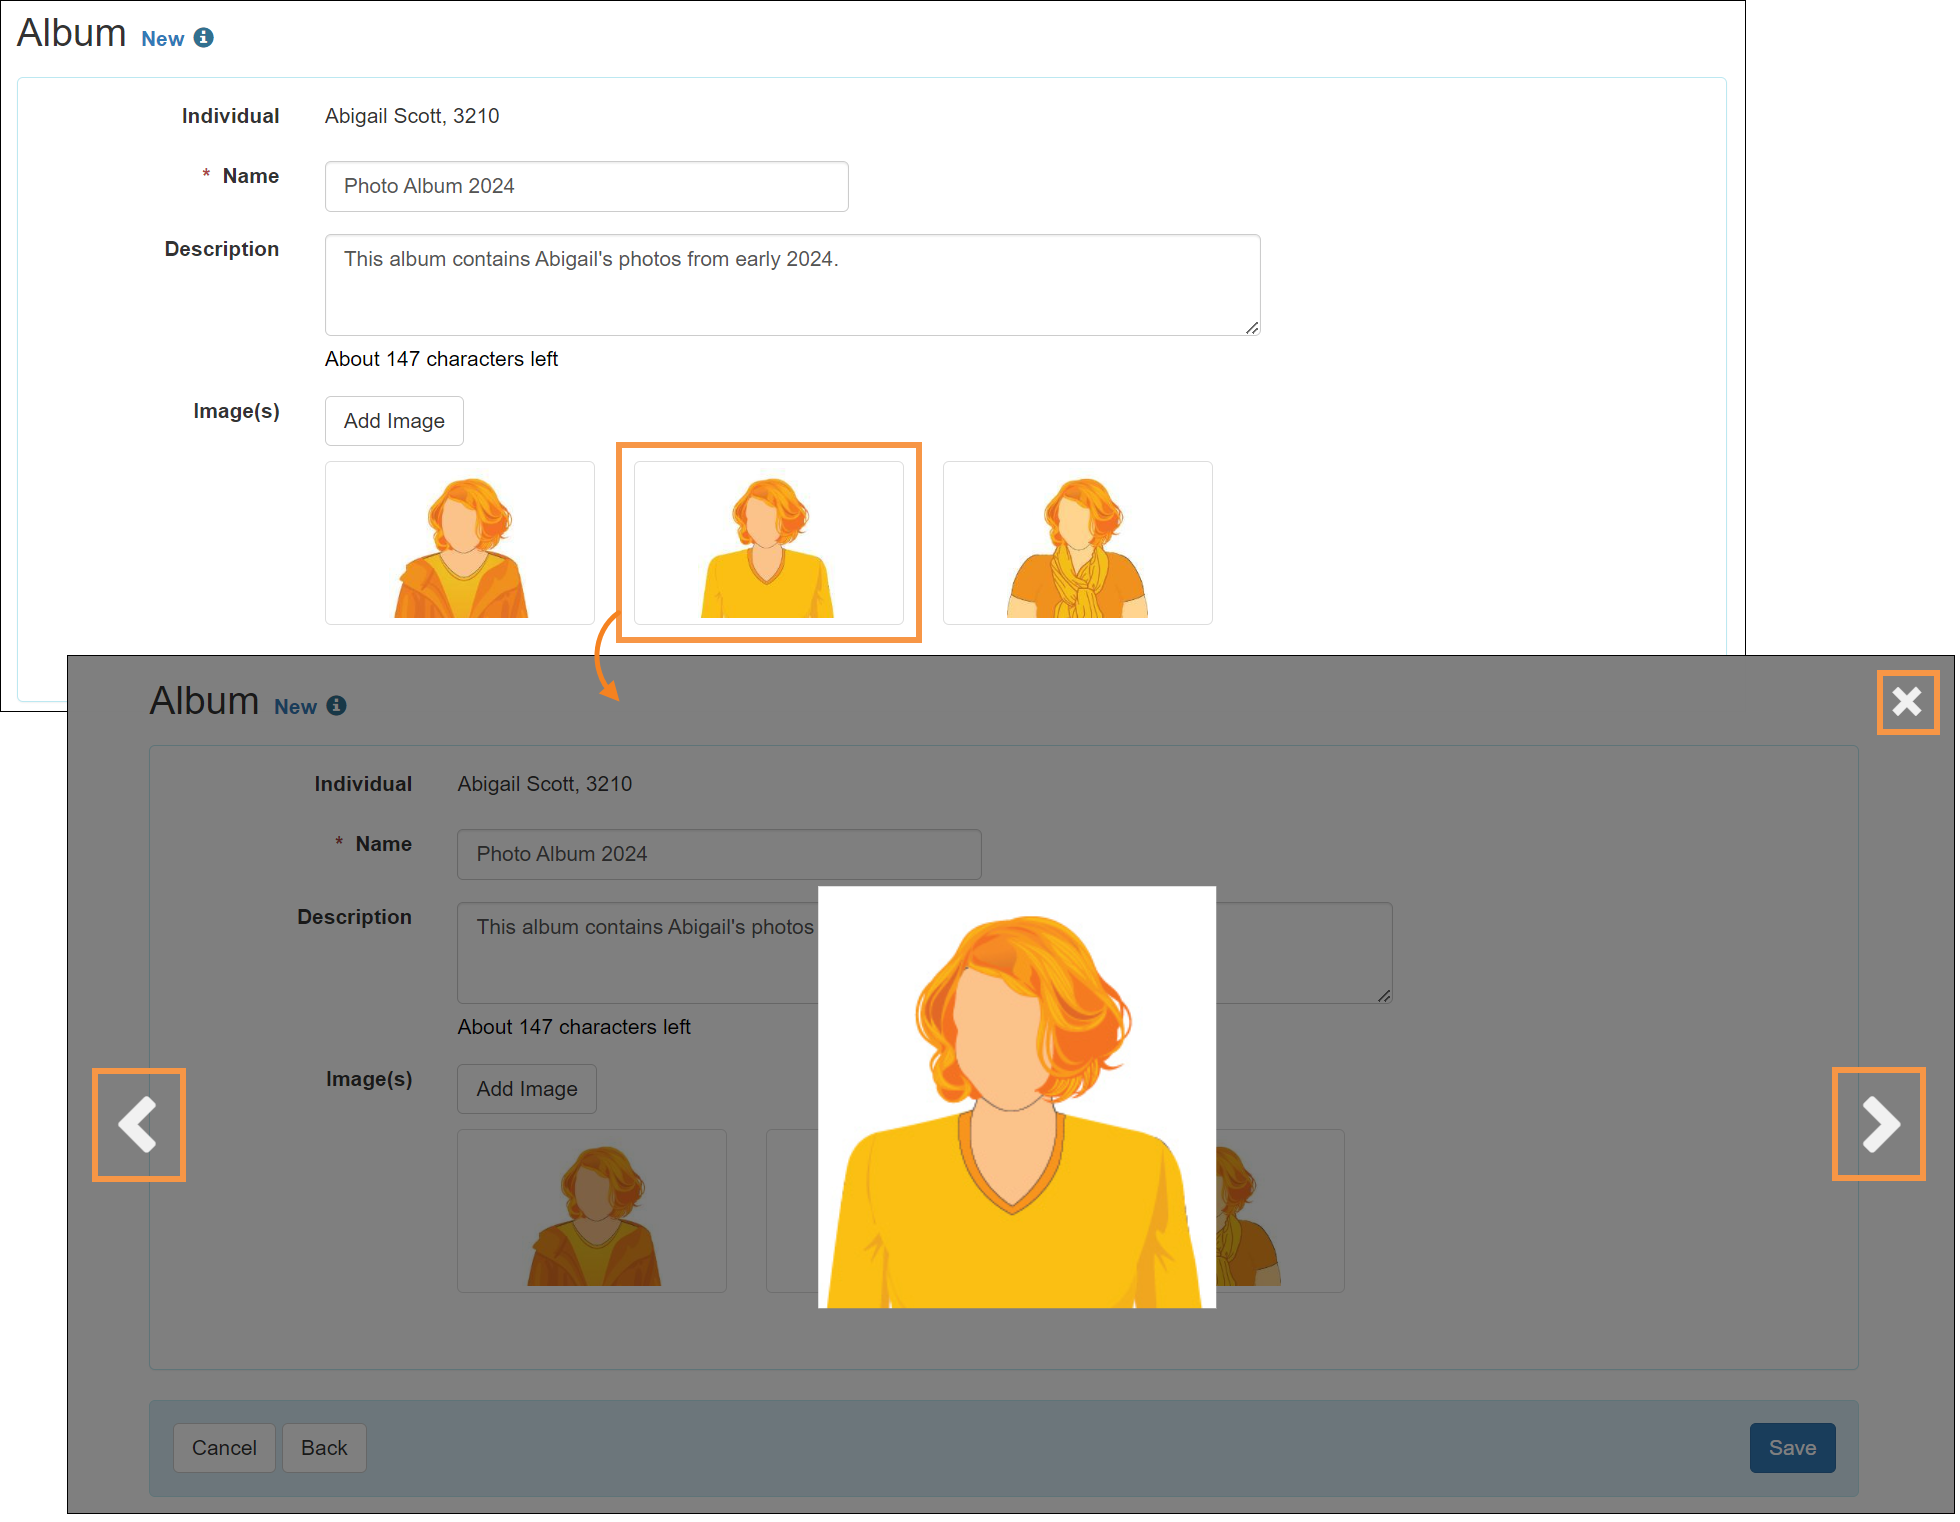
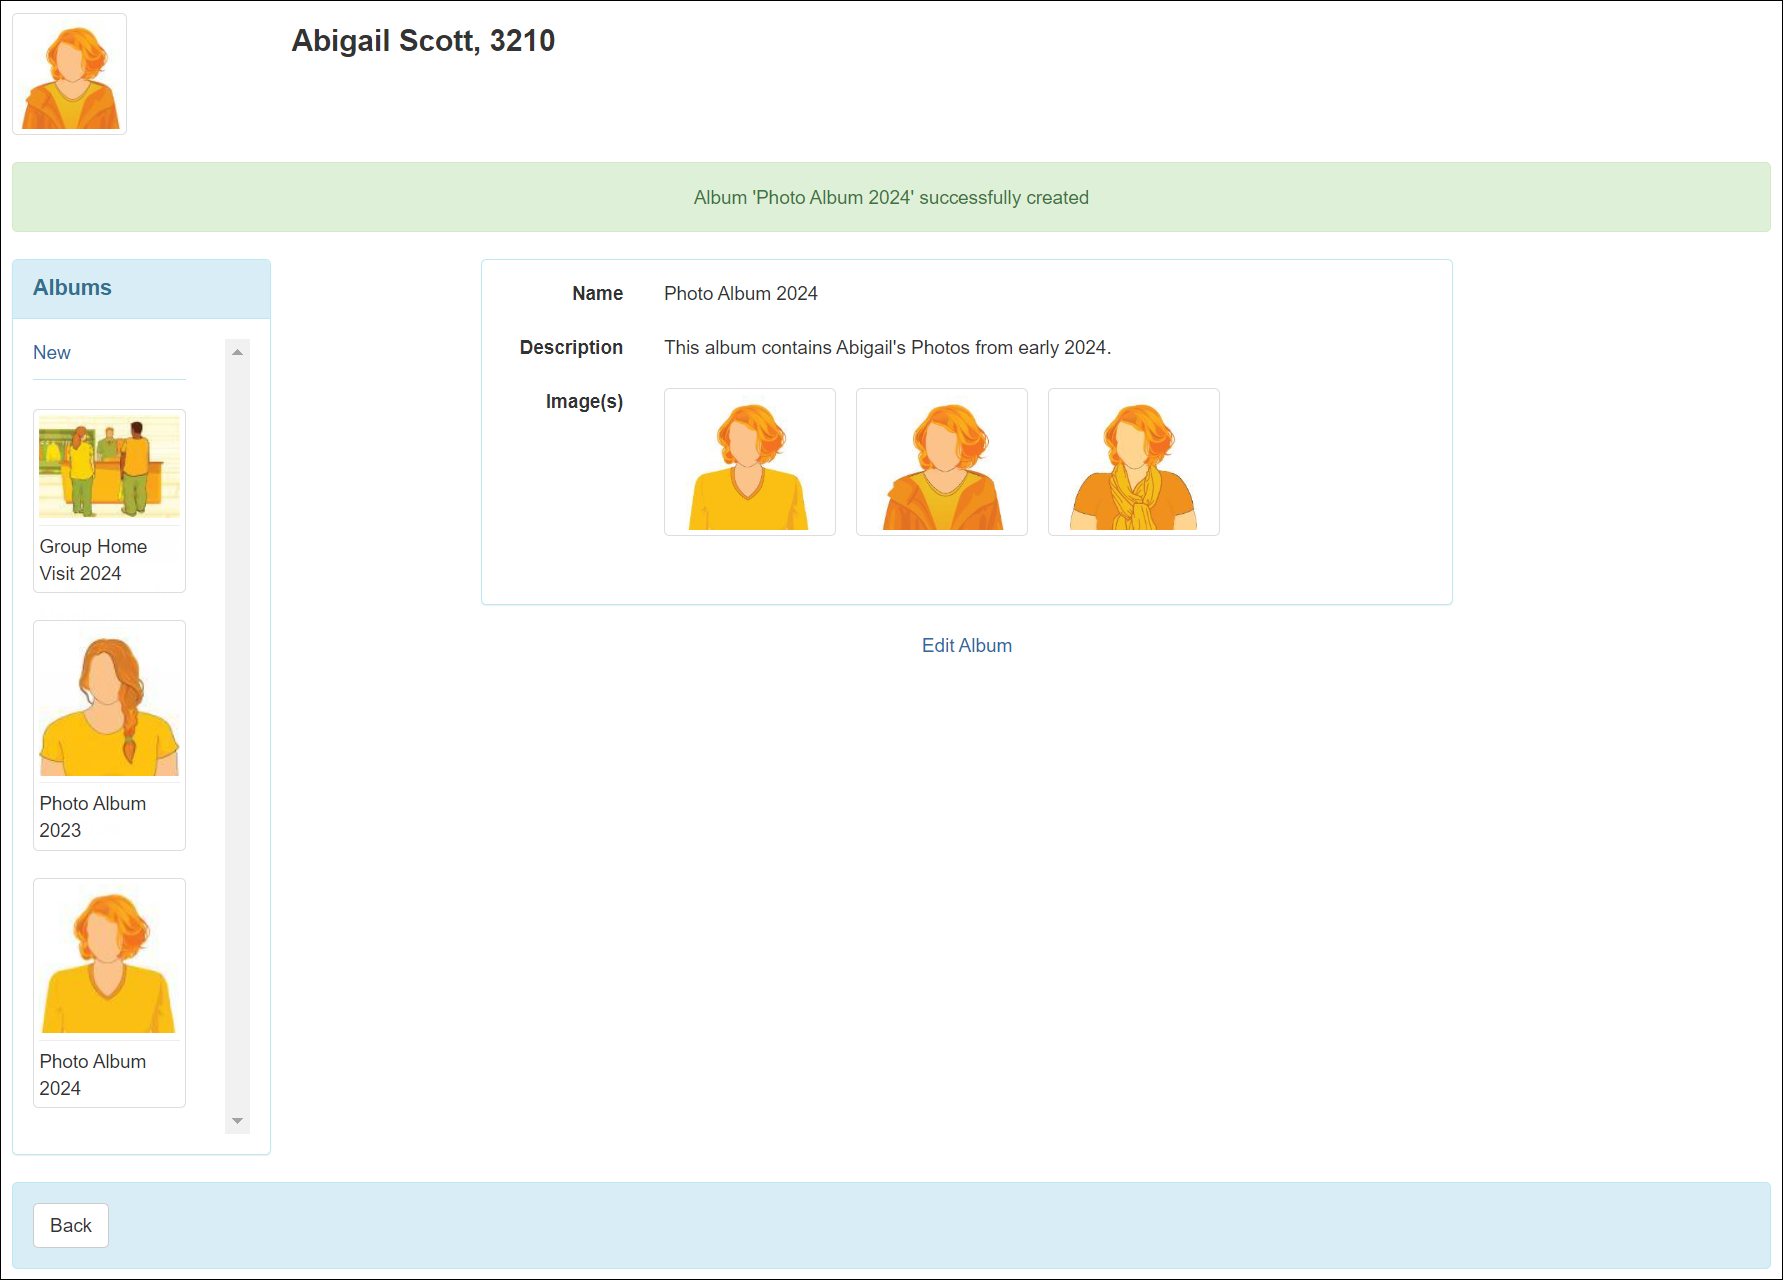
- Clicking on the New link in the ‘Albums’ section will now open a New ‘Album’ form where users will be able to create a new Album. Images can now be added directly from this form in the Image(s) field using the Add Image button.
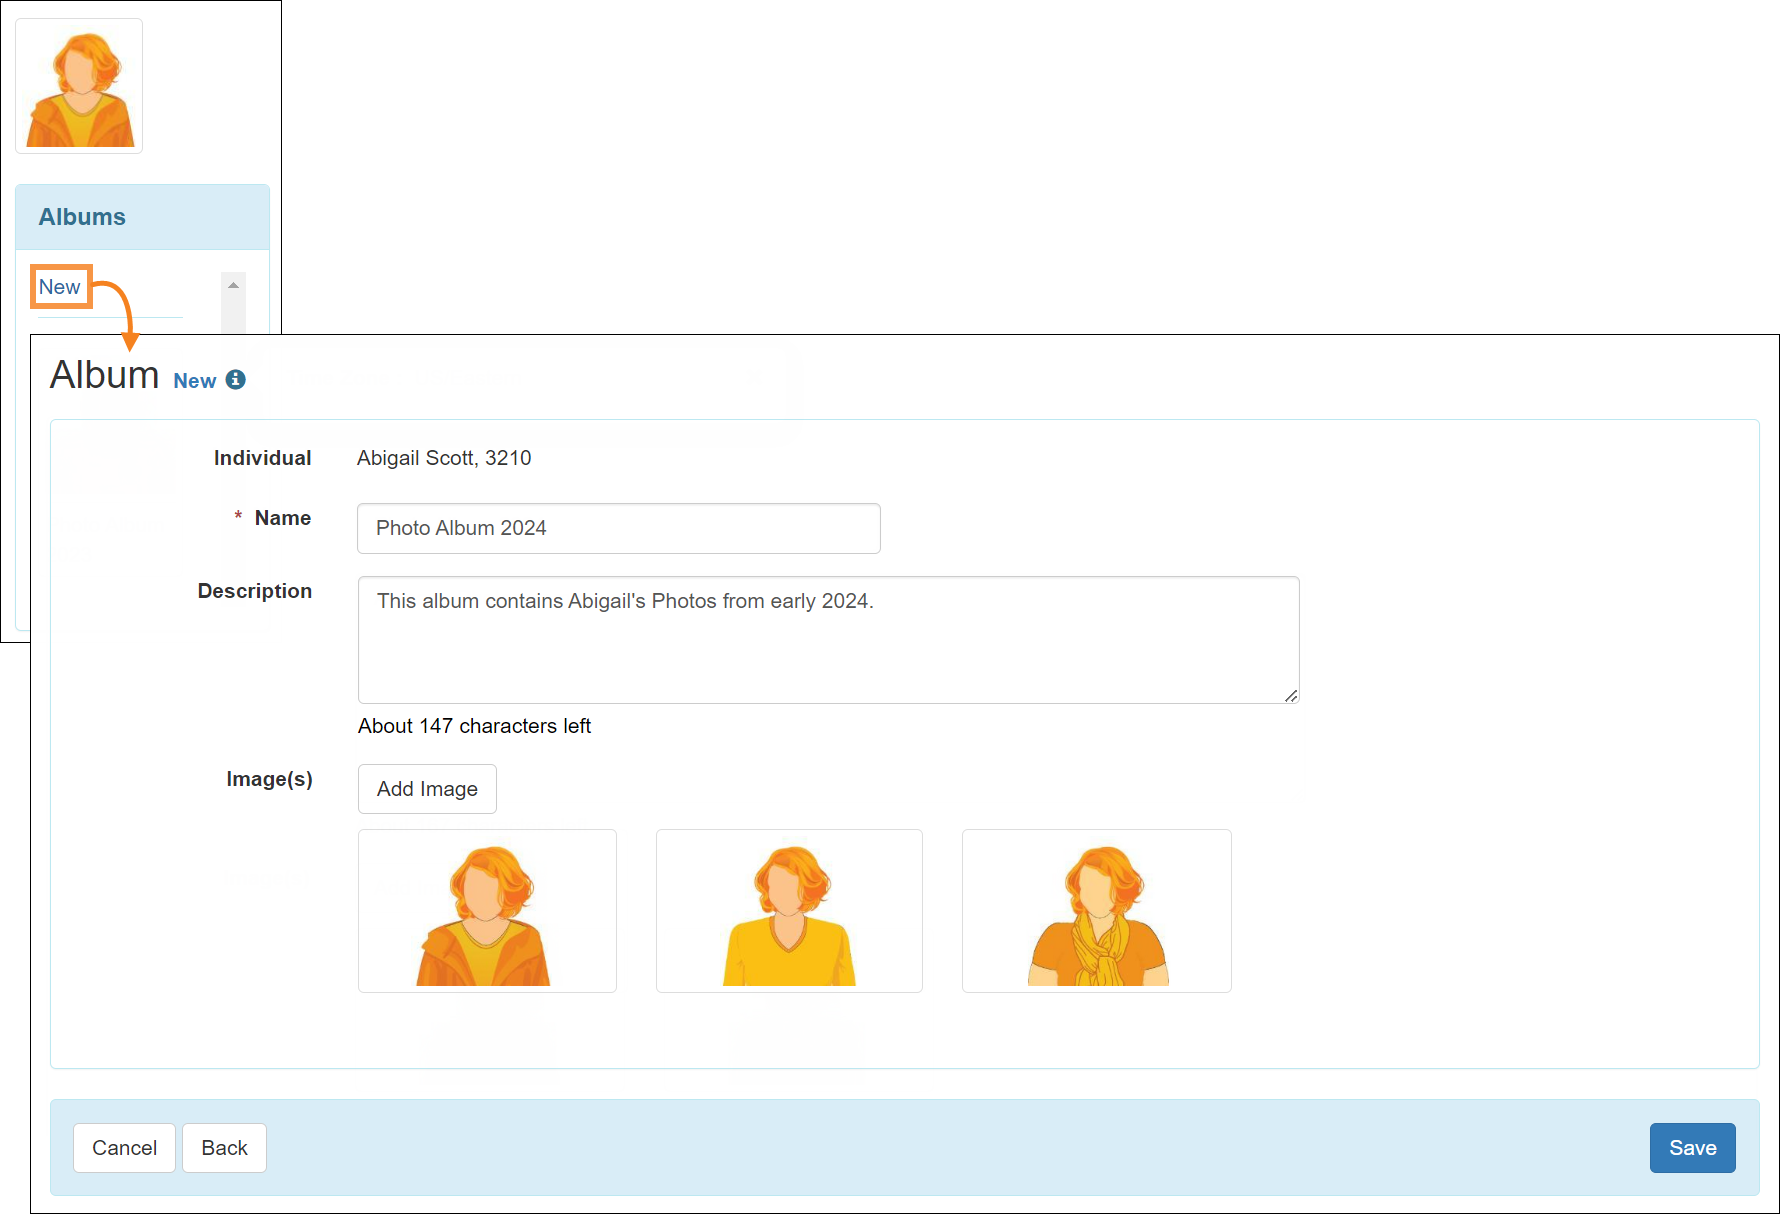
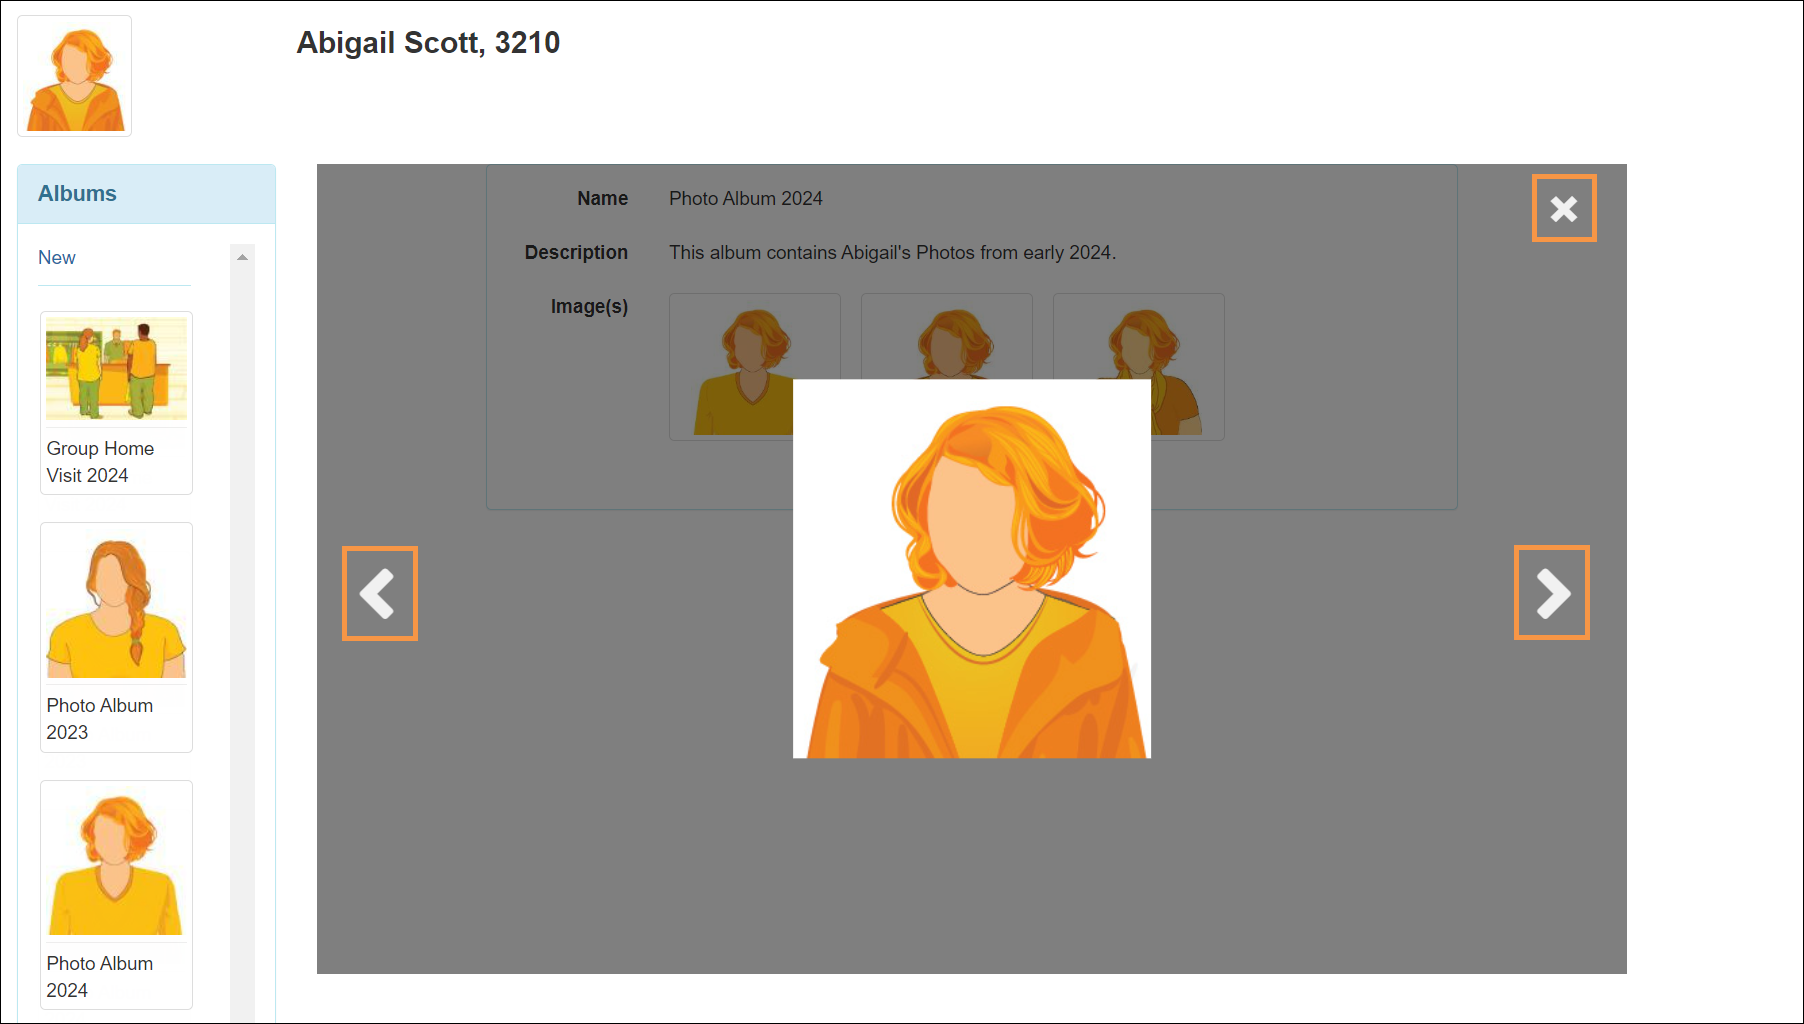
- Added images can be viewed from the Image(s) field. Viewed images can be closed using the cross button on the top left corner and next or previous images can be navigated by using the arrow buttons on both sides.
- Viewing images while creating a New Album:
- Viewing images from a saved Active Album:
- Viewing images while creating a New Album:
- Active Albums will be displayed in the 'Albums' list in ascending alphabetical order based on their Name.
- Saved Albums in Active status can be edited using the Edit Album link. The ‘i’ icon next to the status of the form will show the individual’s Time Zone, Entered By, and Last Updated By information. Once the updates are made, users need to click on the new Update button to save the changes. A success message will be displayed once an Album is updated.
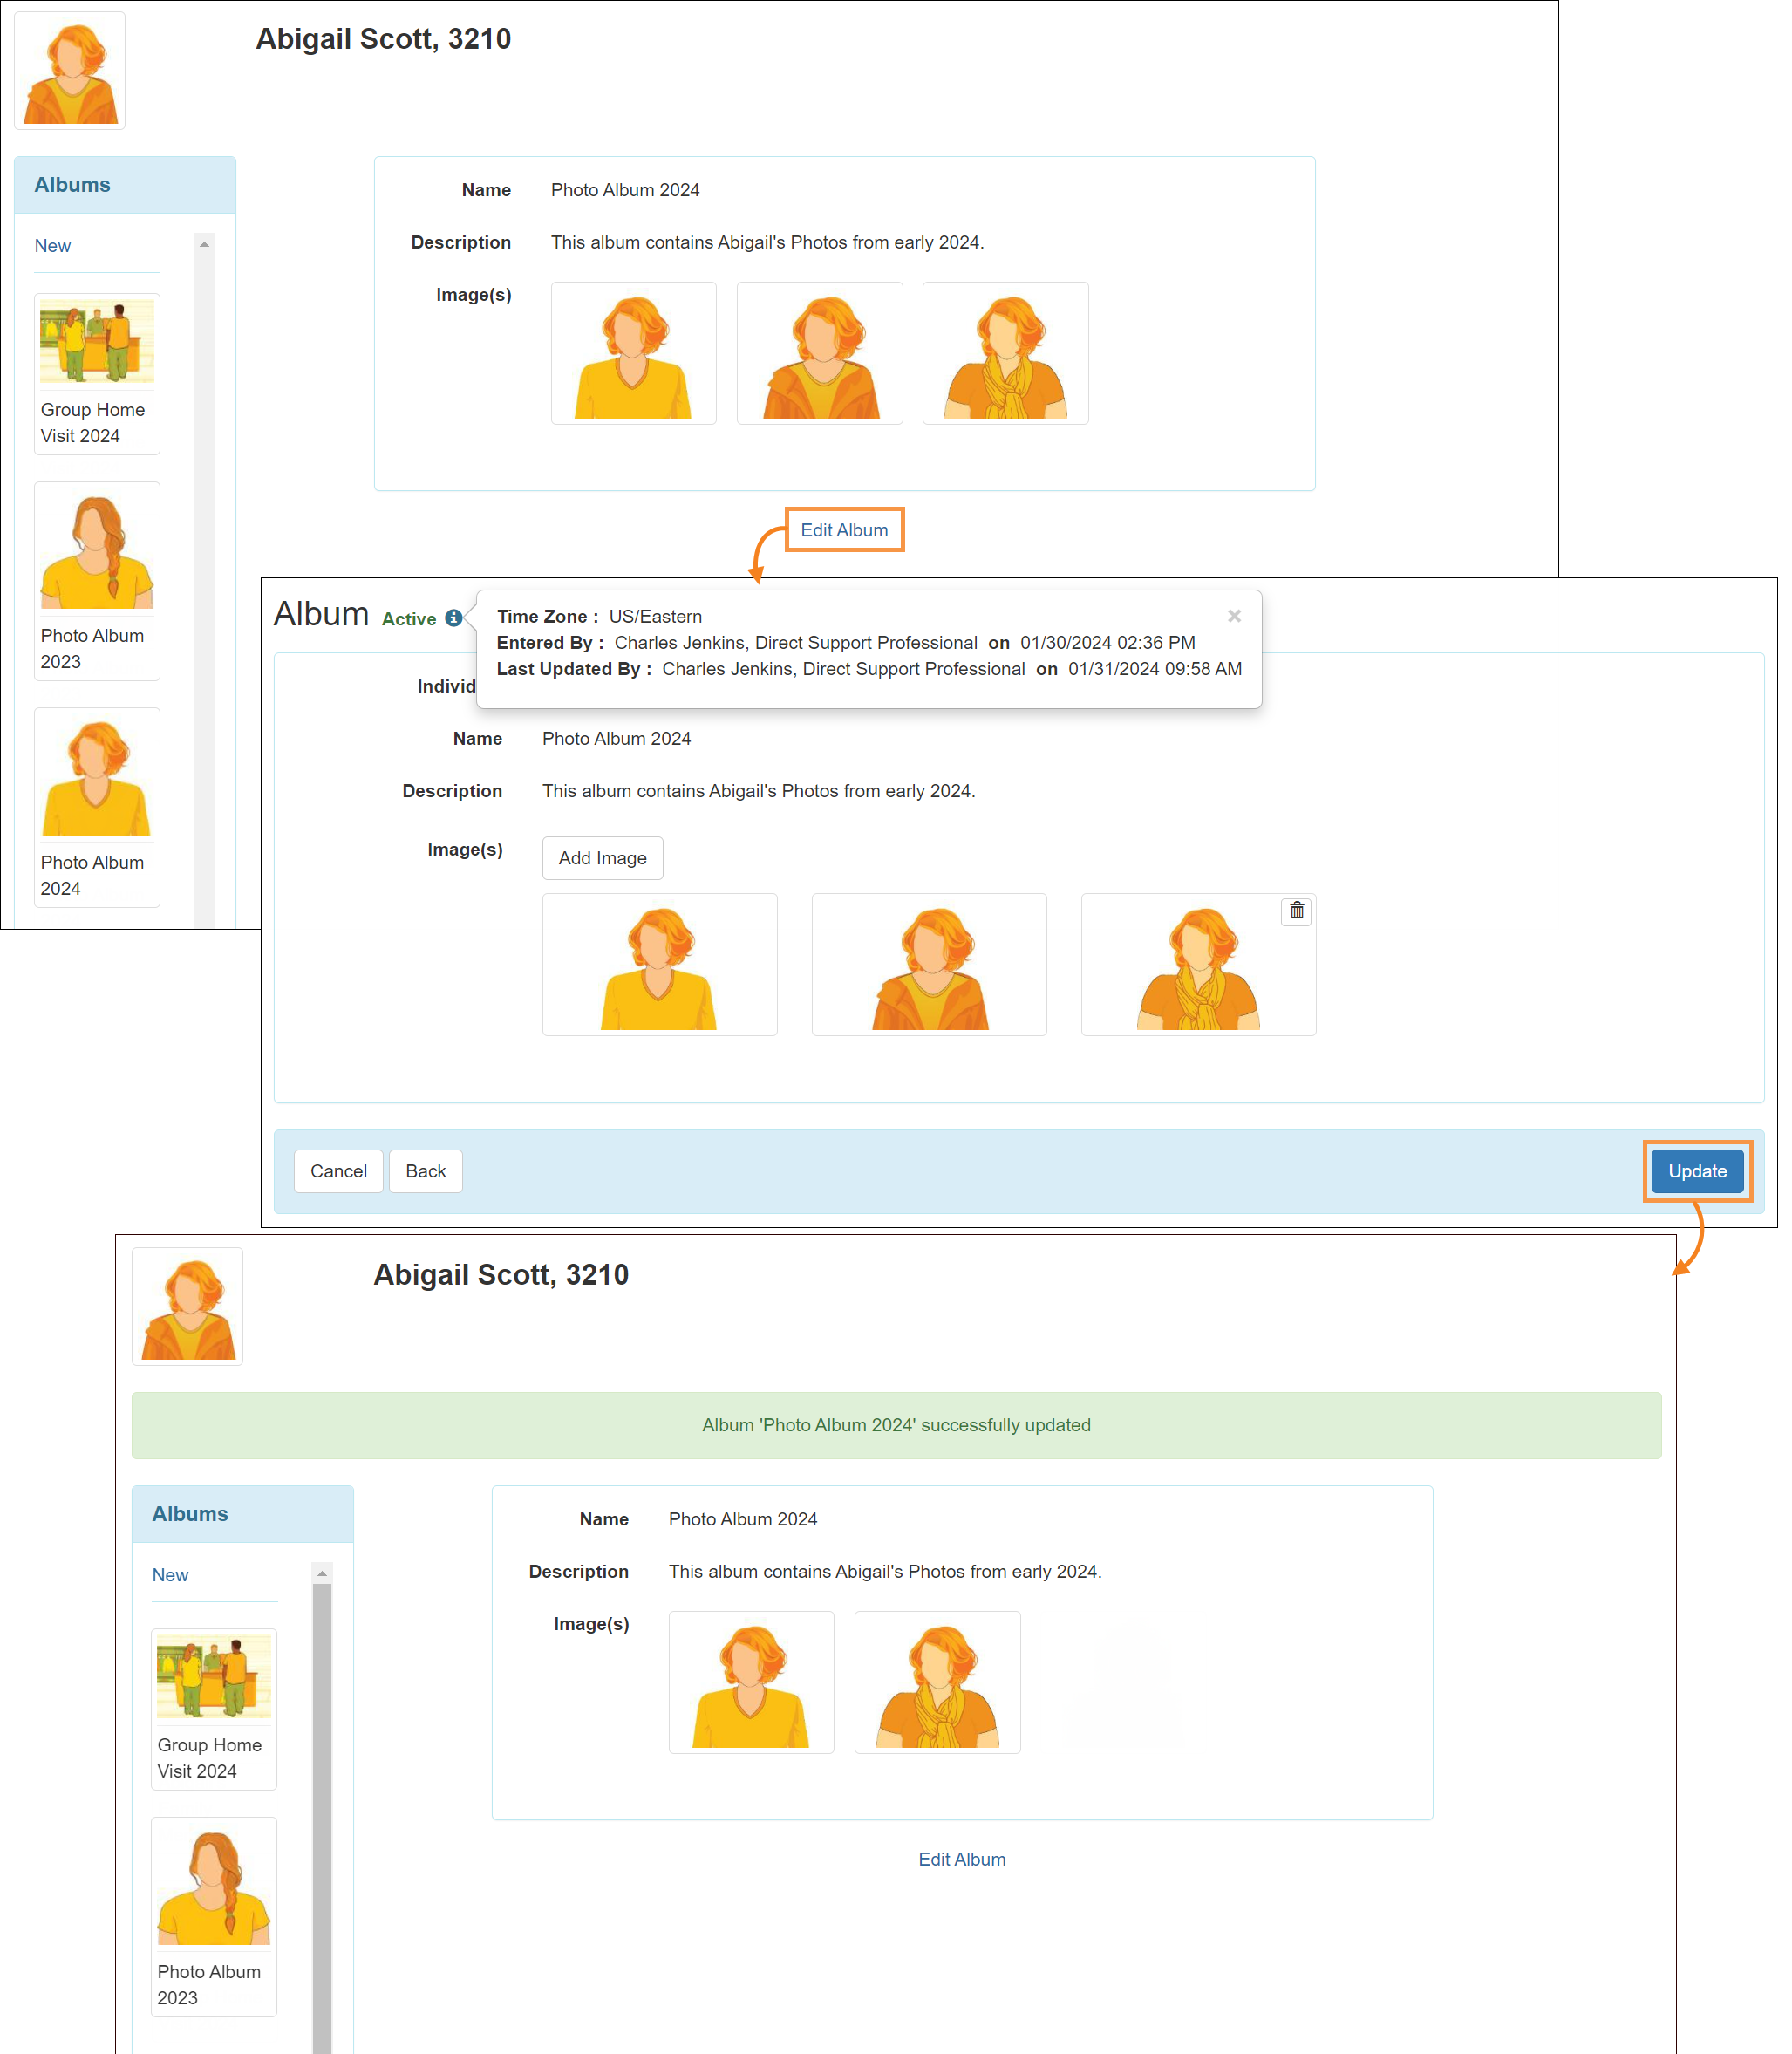
- When creating or editing an Album, added images can be deleted by using the Trash icon that appears upon hovering over an image. If users attempt to delete an image within an Album, they will receive a popup warning message stating, ‘Are you sure, you want to delete this image?’

- Once users add 10 images to a New or Active Album, the Add Image button will no longer be available. To add a new image, users must first delete at least one of the existing images.
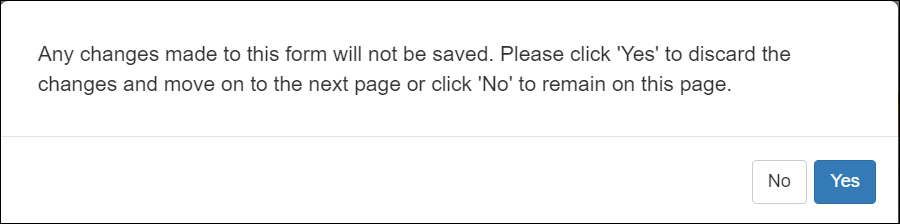
- After entering information in a New or Active ‘Album’ form, if users attempt to navigate Back or Cancel the form, they will now receive a popup warning message stating, ‘Any changes made to this form will not be saved. Please click 'Yes' to discard the changes and move on to the next page or click 'No' to remain on this page.’
- In the ‘Activity Tracking Search’ results page, the following changes have been made for the Album module:
- For each uploaded image, the Activity Type column will display Image Upload activity.
- Deleting an image will no longer show comments in the Comments column.
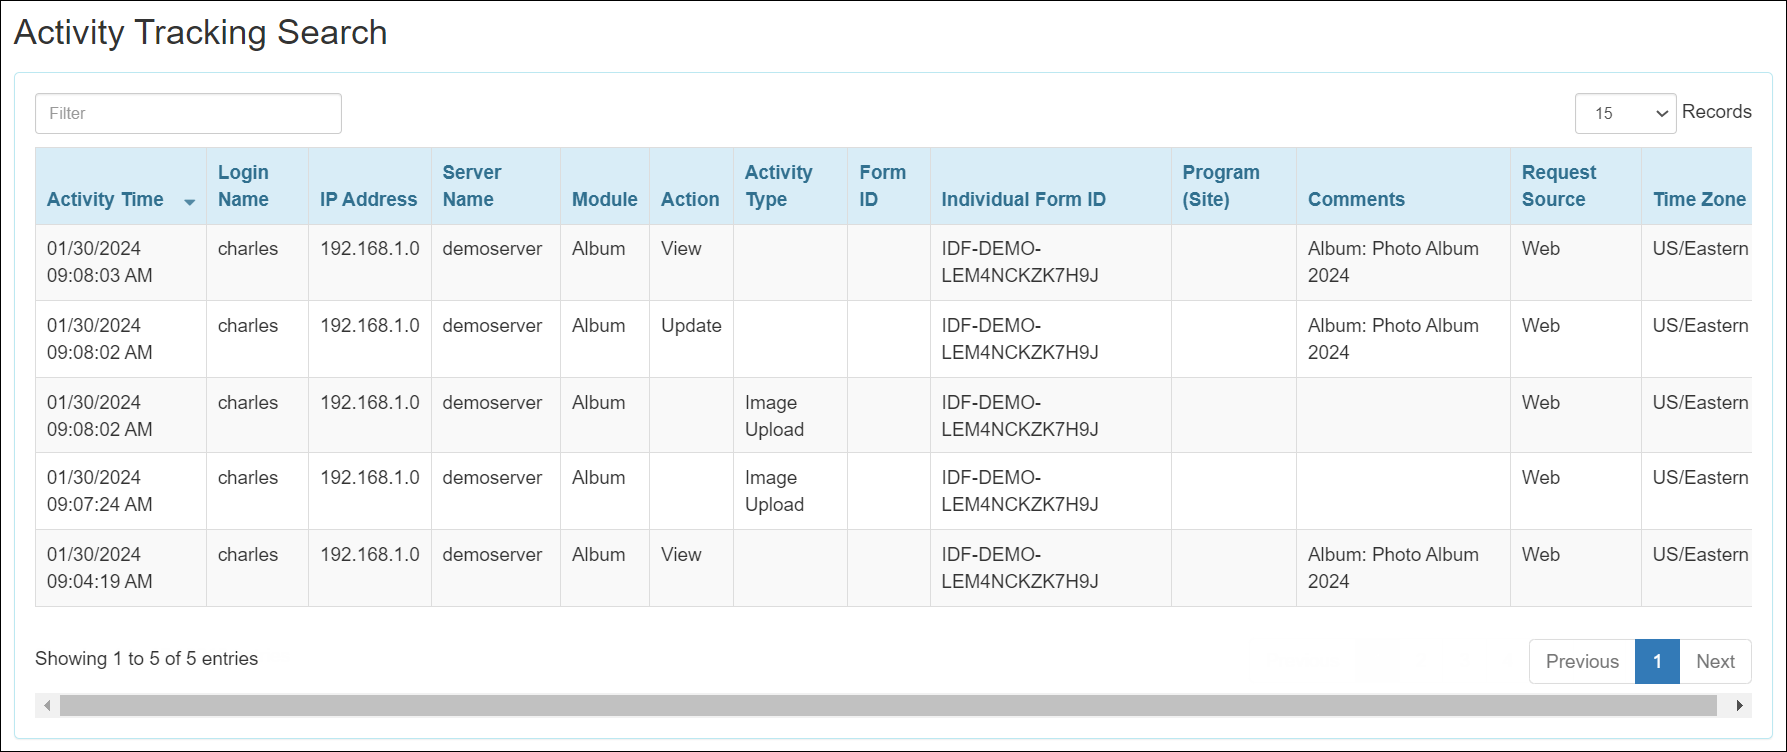
- In the 'Activity Tracking Search' results page, deleting an image from the Album module will no longer show comments in the Comments column.
Individual Plan
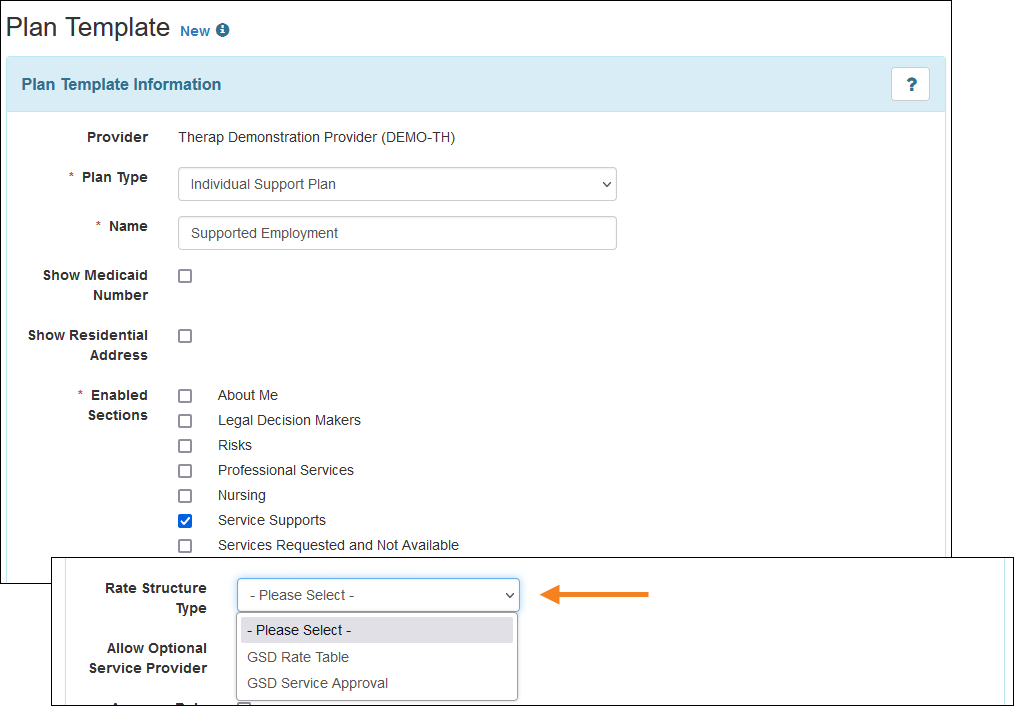
[Back to Top]- A new dropdown field titled Rate Structure Type will be available on the Plan Templates after selecting the Service Supports option from the Enabled Sections list. Two options will be available in the dropdown list: GSD Rate Table and GSD Service Approval.
The Rate Structure Type field will be blank in the Plan Templates created before this release.
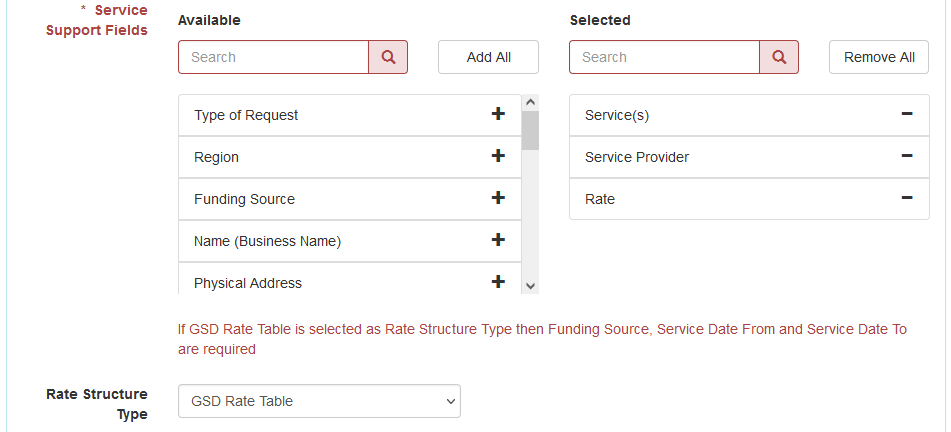
- If an option is selected for the Rate Structure Type field, then the 'Rate' option will need to be selected from the Service Support Fields field, otherwise an error message will be displayed when saving or approving the Plan Template.
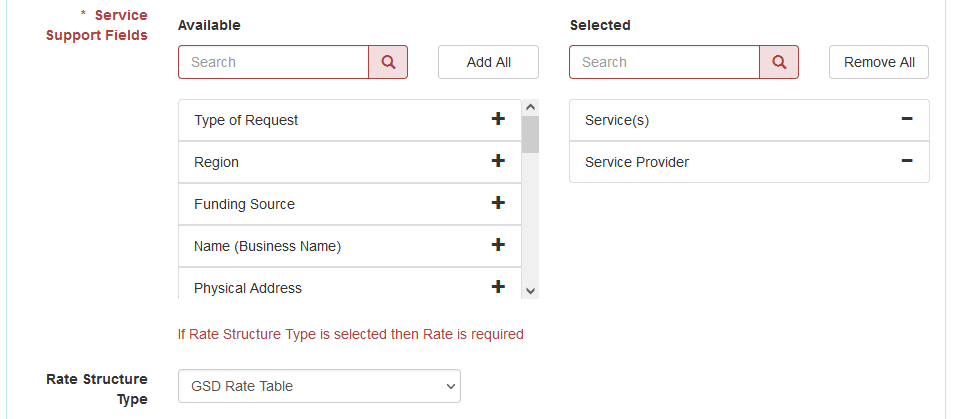
If the GSD Rate Table option is selected for the Rate Structure Type field, then 'Funding Source', 'Service Date From', and 'Service Date To' options will need to be selected from the Service Support Fields field, otherwise an error message will be displayed when saving or approving the Plan Template.
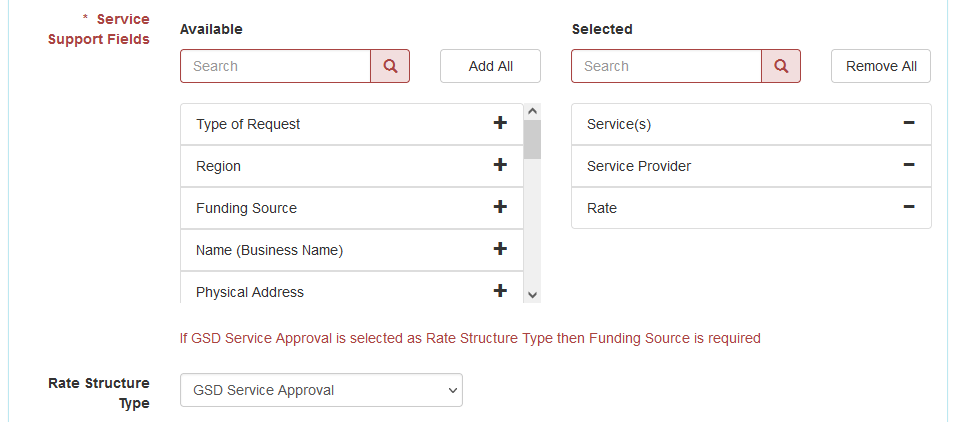
If the GSD Service Approval option is selected for the Rate Structure Type field, then the 'Funding Source' option will need to be selected from the Service Support Fields field, otherwise an error message will be displayed when saving or approving the Plan Template.
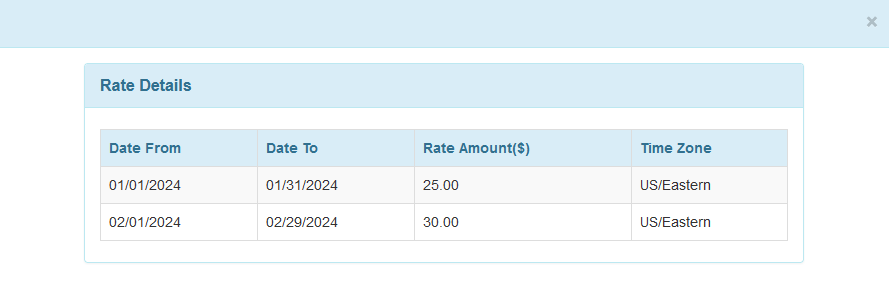
- If an option is selected in the Rate Structure Type dropdown field on the Plan Template, then a new Add Rate button will be available beside the Rate field on the 'Service Support' form of the Individual Plan. Clicking on the Add Rate button will open the 'Rate Details' pop-up window with associated rates.
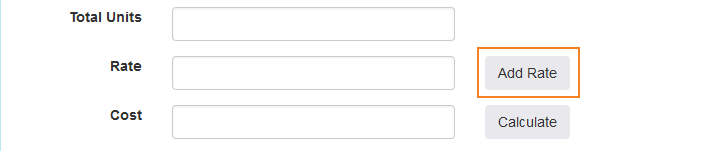
Selecting GSD Rate Table option will pull the rates from the Rate forms of the Service Directory module based on the Effective Date range.
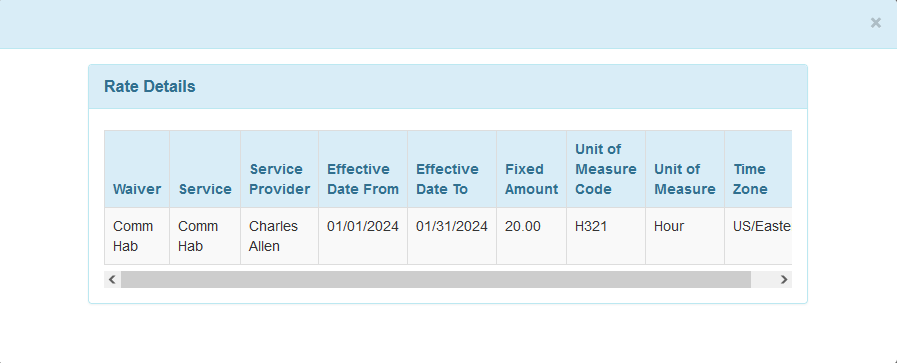
Selecting GSD Service Approval option will pull the rates from the Service Rate field of the 'Authorized Waiver Service(s)' section of the 'Provider Service Approval' forms of the Service Directory module.
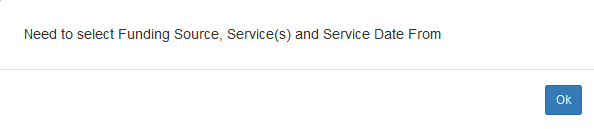
- If the GSD Rate Table option is selected in the Plan Template, then on the 'Service Support' form, users will need to select Funding Source, Service(s), and Service Date From before clicking on the Add Rate button. Otherwise, an error message will be displayed.
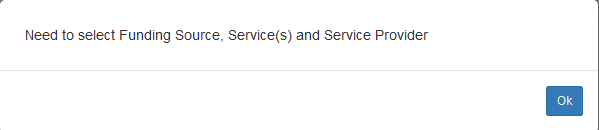
If the GSD Service Approval option is selected in the Plan Template, then on the 'Service Support' form, users will need to select Funding Source, Service(s), and Service Provider before clicking on the Add Rate button. Otherwise, an error message will be displayed.
- If no option is selected in the Rate Structure Type field on the Plan Template, then the Add Rate button will not be available beside the Rate field on the 'Service Support' form of the Individual Plan.

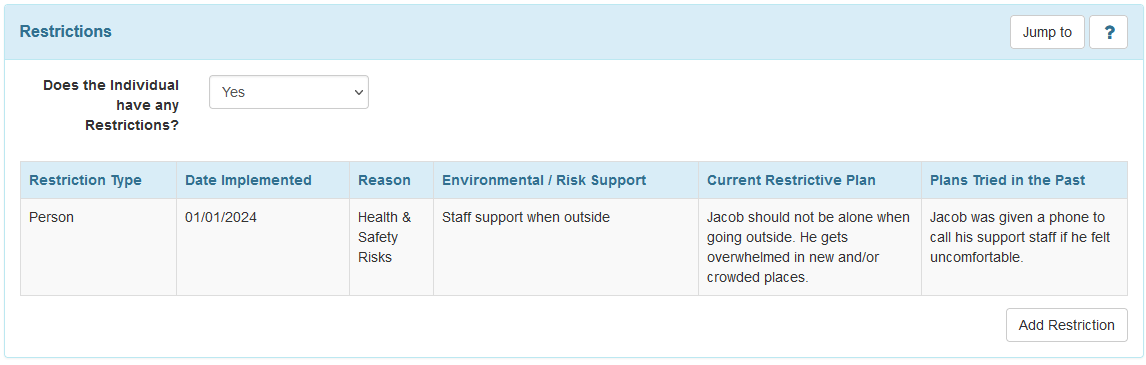
- Users will now be able to add a maximum of 25 restrictions in the 'Restrictions' section of an Individual Plan. Previously, only one restriction could be added.
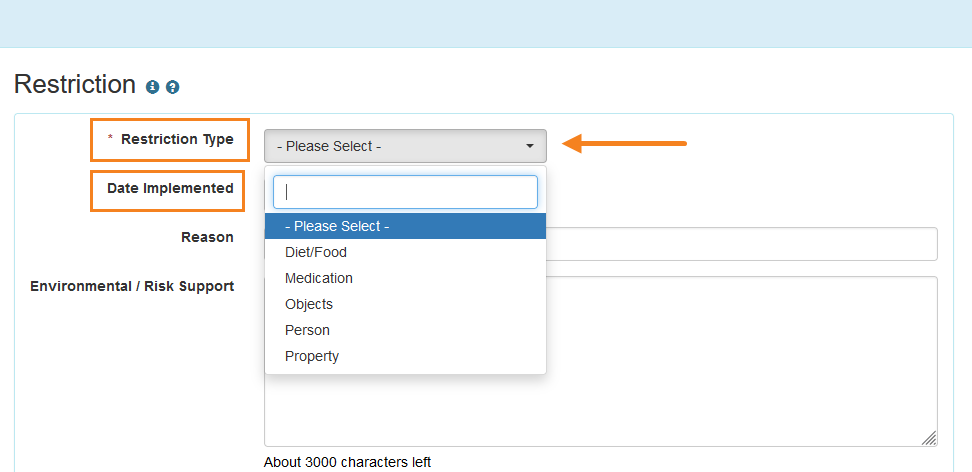
- The 'Restrictions' section will now show a new field titled Does the Individual have any Restrictions? If the - Please Select - option or the No option is selected for this field, then no change will be visible in this section. If the Yes option is selected, then a new Add Restriction button will appear.


- Clicking on the Add Restriction button will open the 'Restriction' popup window. The following changes have been made:
- A new required field titled Restriction Type has been added with the following options:
- Diet/Food
- Medication
- Objects
- Person
- Property
When saving, submitting, returning to submitter, approving, or updating Individual Plans created before this release, users will need to select an option in this field for the Restrictions, otherwise they will receive an error message. - The Date field has been renamed to Date Implemented.
- The Reviewed - No Restrictions Required field and the corresponding Yes and No radio buttons have been removed. In the Individual Plans created before this release where Yes option was selected for the Reviewed - No Restrictions Required field, the No option will be automatically selected for the Does the Individual have any Restrictions? field after the release. Similarly, where No option was selected for the Reviewed - No Restrictions Required field, the Yes option will be automatically selected for the Does the Individual have any Restrictions? field after the release.
- A new required field titled Restriction Type has been added with the following options:
- The information added in the 'Restriction' popup window will be displayed in a table format in the 'Restrictions' section of the Individual Plan. Users can add more restrictions by clicking on the Add Restriction button.
- If users select the No option or the - Please Select - option for the Does the Individual have any Restrictions? field in an Individual Plan with Restrictions, then an error message stating "Yes must be selected" will be displayed when saving, submitting, returning to submitter, approving, or updating Individual Plans with Restrictions.

- The Individual Plan Form ID field on the Individual Plan Change Forms will now show the Form ID as a clickable link. Clicking on the link will open the Individual Plan in a new tab. Previously, the Form IDs used to be read-only.

Login
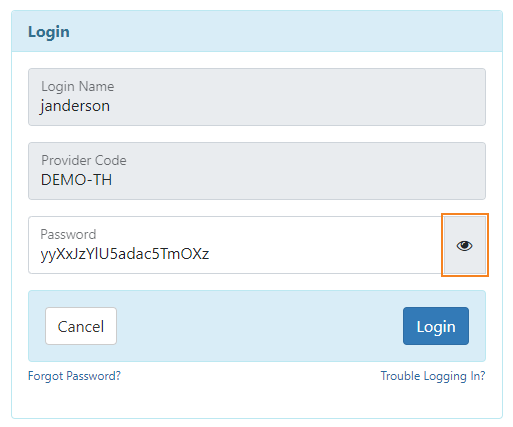
[Back to Top]- A new password visibility toggle option (shown as an 'eye' icon) has been added to the Password login field. Clicking on this toggle will mask and unmask the entered Password.
Medication History
[Back to Top]- A new section titled 'Medication History' has been added in the Health tab. The Medication History and Medication Review modules that were previously displayed in the 'Health Tracking' section will now be displayed in the ‘Medication History’ section. This section will be available for the users who have the Medication History module enabled for their agency and have appropriate Medication History caseload-based roles.
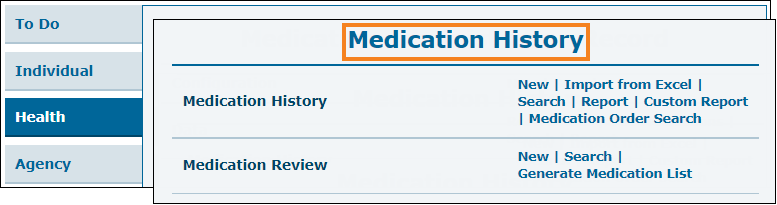
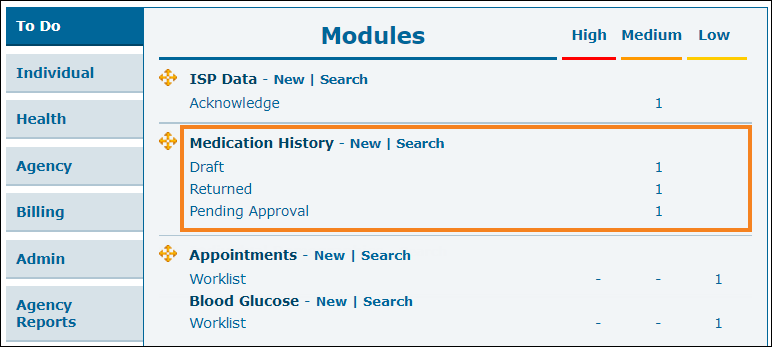
- The counts for ‘Draft’, ‘Returned’, and ‘Pending Approval’ Medication History forms will now show in a separate 'Medication History' section on the To Do tab.
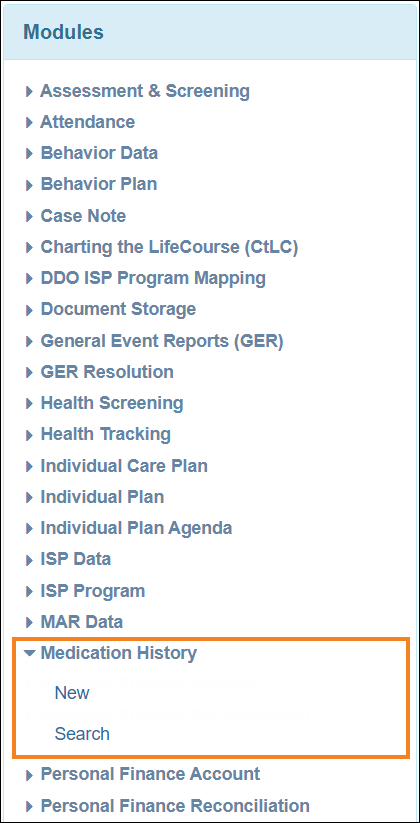
- On the ‘Modules’ section of the Individual Home Page, Medication History will appear as a separate option and will no longer be displayed under the Health Tracking option.
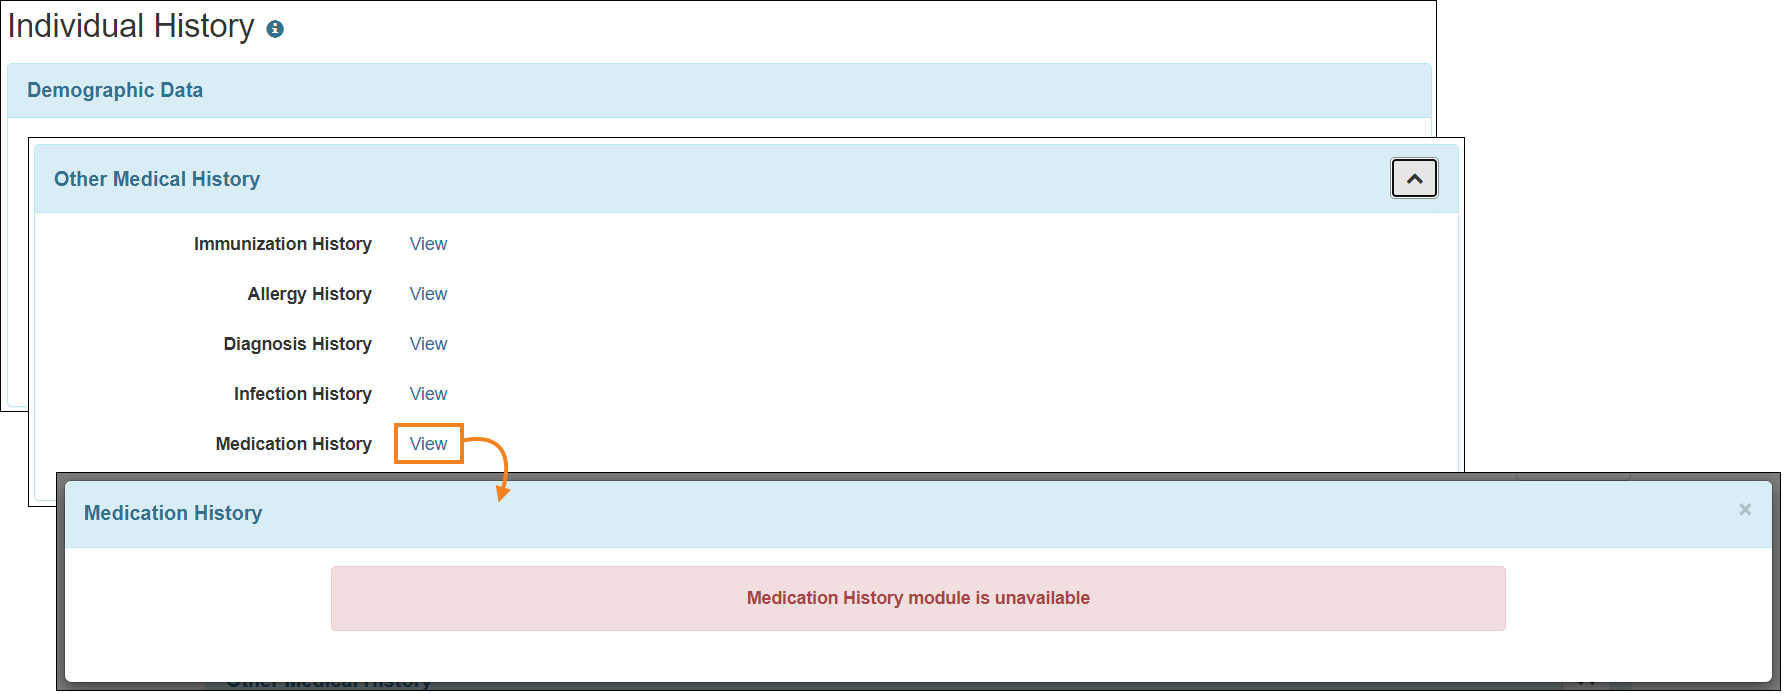
- If the Medication History module is not enabled for an agency, then users will receive an error message stating 'Medication History module is unavailable' while they attempt to access Medication History from the following modules:
- Allergy Profile
- Blood Glucose
- Infection Tracking
- Individual History
- General Even Reports (GER)
- If the Medication History module is not enabled for an agency, then the Disclosure PDF of the Individual History module will not display the 'Medication History' section.
Multi-Individual Event (MIE)
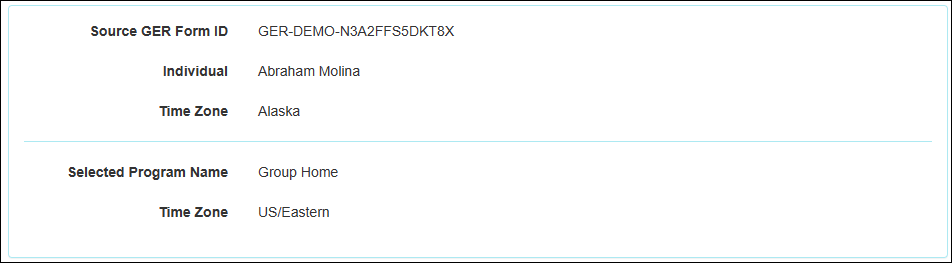
[Back to Top]- Users can no longer copy GERs for individuals over different time zones. The form will display an error message if users attempt to copy GERs for individuals in different time zones stating:
‘You cannot copy the GER for a site of different timezone.’
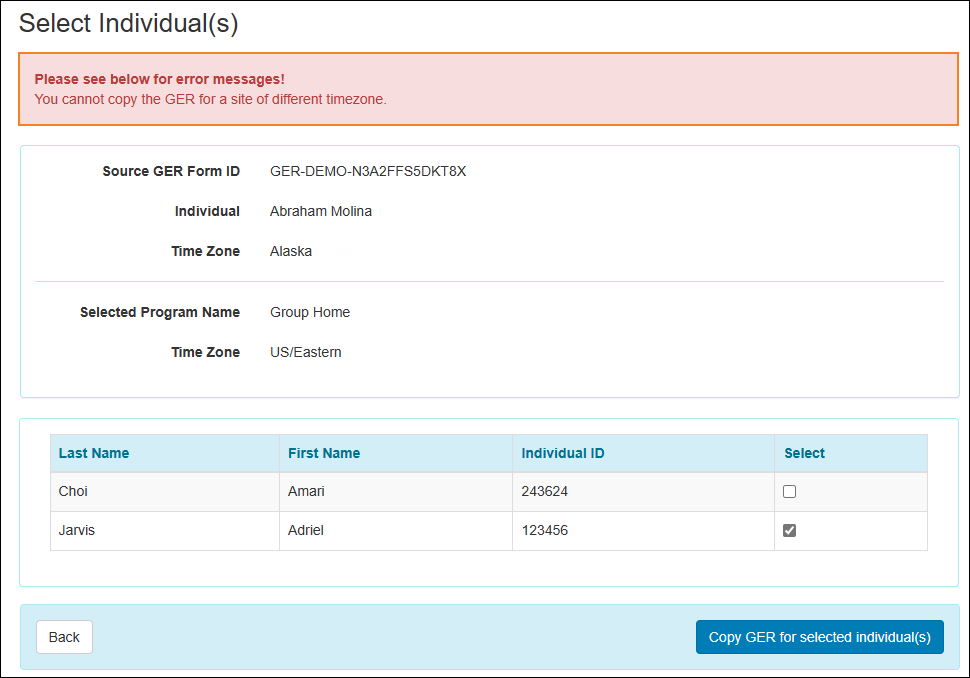
- Users will now see the following fields in the ‘Select Individual(s)’ page in ‘Read-Only’ mode when attempting to copy GERs for other individuals:
- Source GER Form ID
- Individual
- Time Zone
- Selected Program Name
Personal Finance
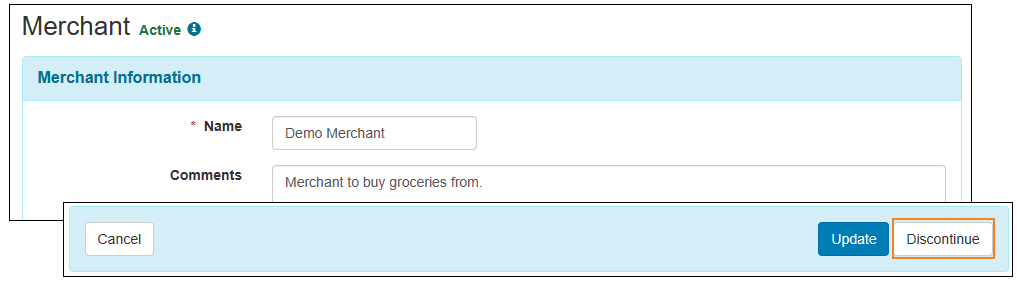
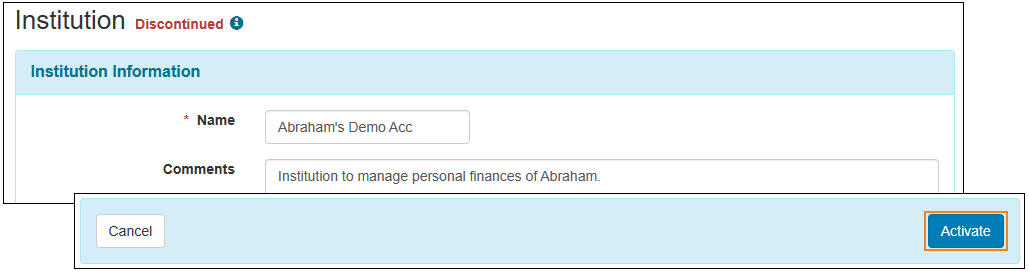
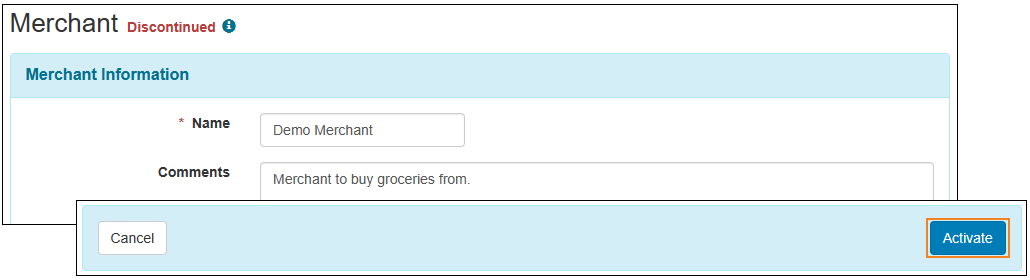
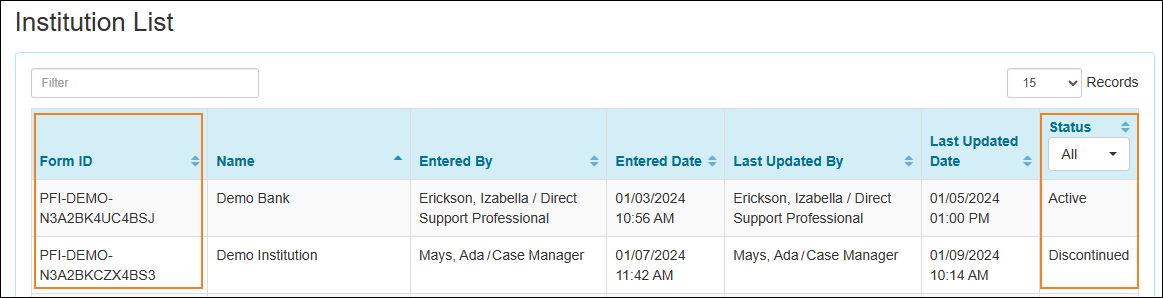
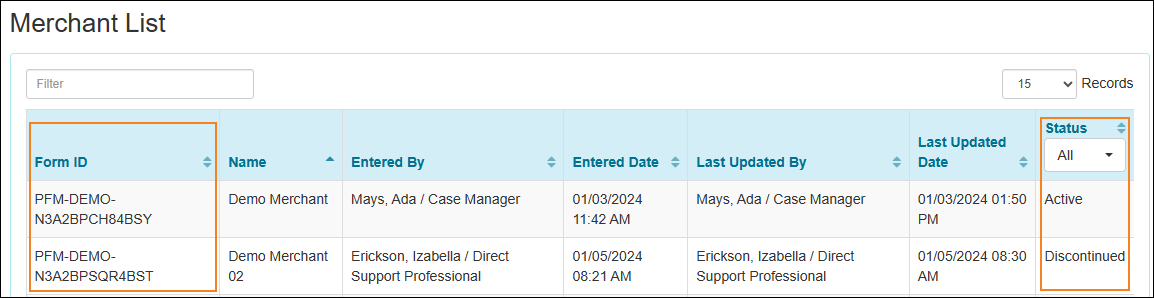
[Back to Top]- The 'Institution' and 'Merchant' forms will now display their respective Status at the top and the Form ID field will be displayed after clicking on the 'i' icon.


- Users will now be able to discontinue Institutions and Merchants using the new Discontinue button located at the bottom of the forms.

- Users will now be able to activate discontinued Institutions and Merchants using the new Activate button located at the bottom of the forms.
- The Form ID and the Status columns have been added to the ‘Institution List’ and the ‘Merchant List’ pages.
- The discontinued Institutions and Merchants will no longer appear in the Institution Name and the Merchant fields of the ‘Personal Finance Account’ and ‘Transaction’ forms.
Referral for Oversight Providers
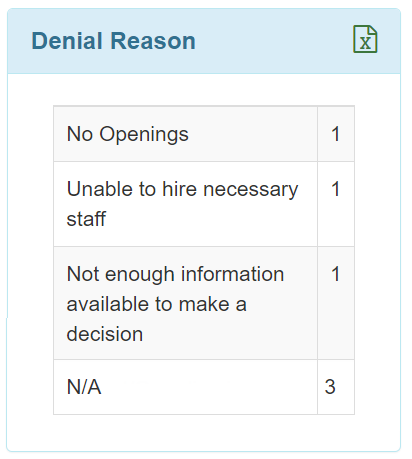
[Back to Top]- A new criteria section titled 'Denial Reason' has been added to the 'Referral Dashboard'. This section will list the reasons why Referrals have been denied by Linked Providers and the number of corresponding denied Referrals as counts. Since users in an Oversight agency cannot select a 'Denial Reason' while denying a Referral, therefore the number of Referrals in 'Denied By Oversight' status will be incorporated into the counts for the 'N/A' row. Denied Referrals will be incorporated into the counts if the date on which they have been sent to Linked Providers falls within the date range used to generate the Referral Dashboard. For example, if the Referral Dashboard was generated for a date range between 01/01/2024 and 01/05/2024, then the number of denied Referrals that were sent to the Linked Providers between 01/01/2024 and 01/05/2024 will be displayed as counts for the corresponding 'Denial Reason'.
Secure Communications (SComm)
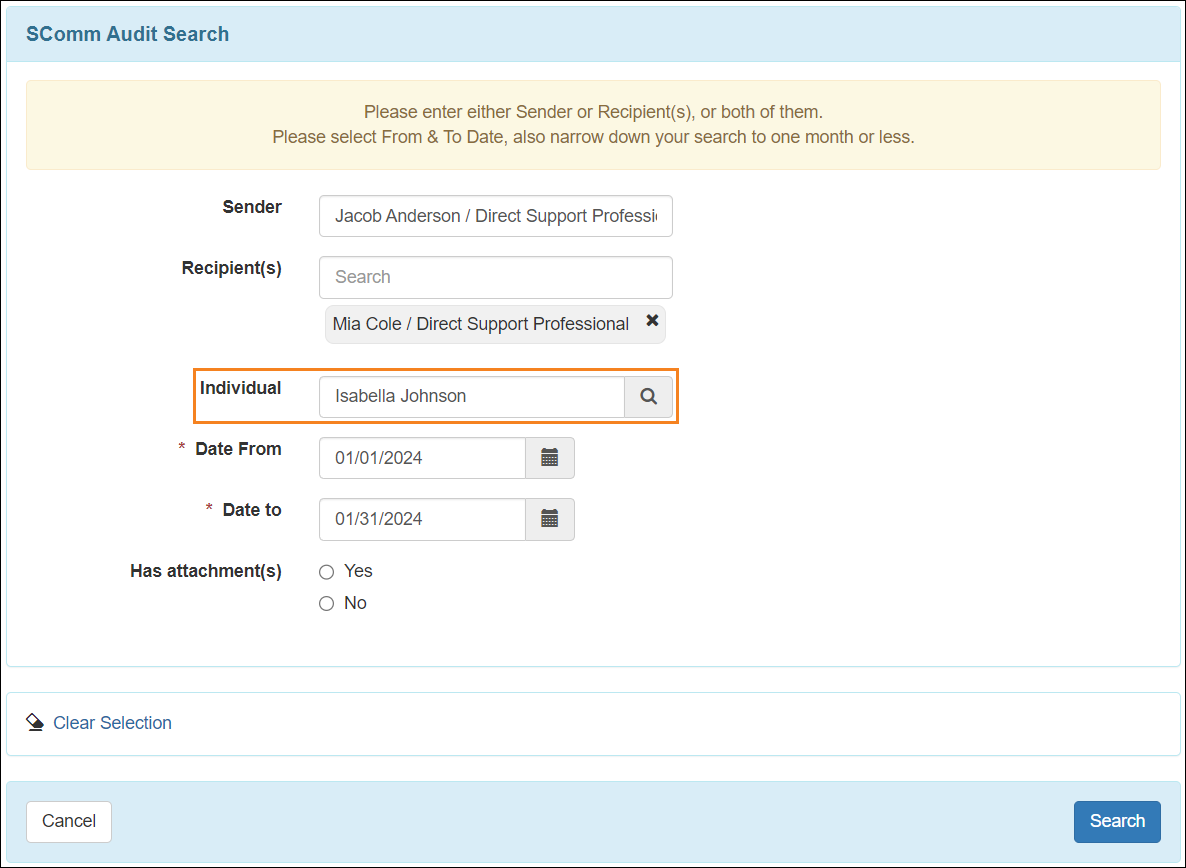
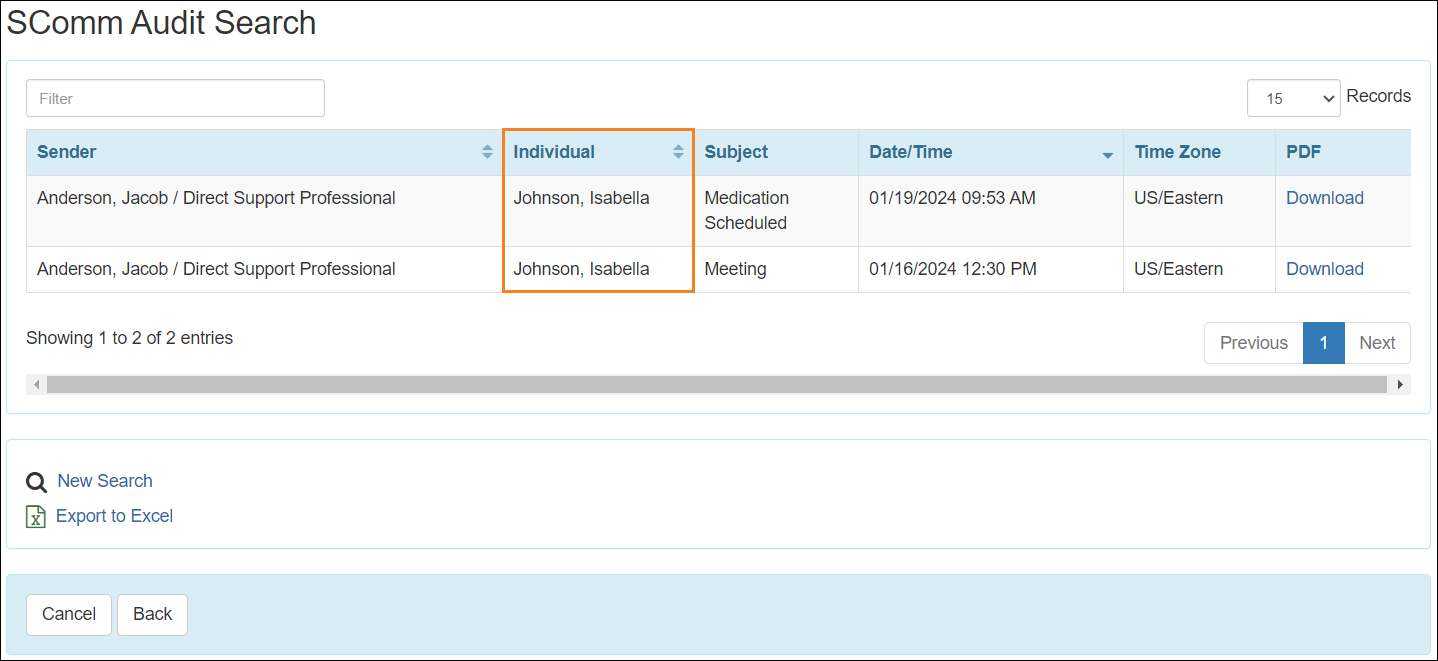
[Back to Top]- A new field titled Individual has been added to the ‘SComm Audit Search’ page.
- A new column titled Individual has been added to the ‘SComm Audit Search’ result page.
Service Directory
For Users in Oversight Providers
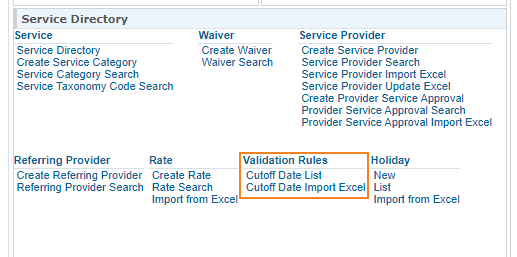
[Back to Top]- A new subsection titled ‘Validation Rules’ has been added in the ‘Service Directory’ section of the oversight dashboard. Two new links titled Cutoff Date List and Cutoff Date Import Excel have been added in the ‘Validation Rules’ subsection.
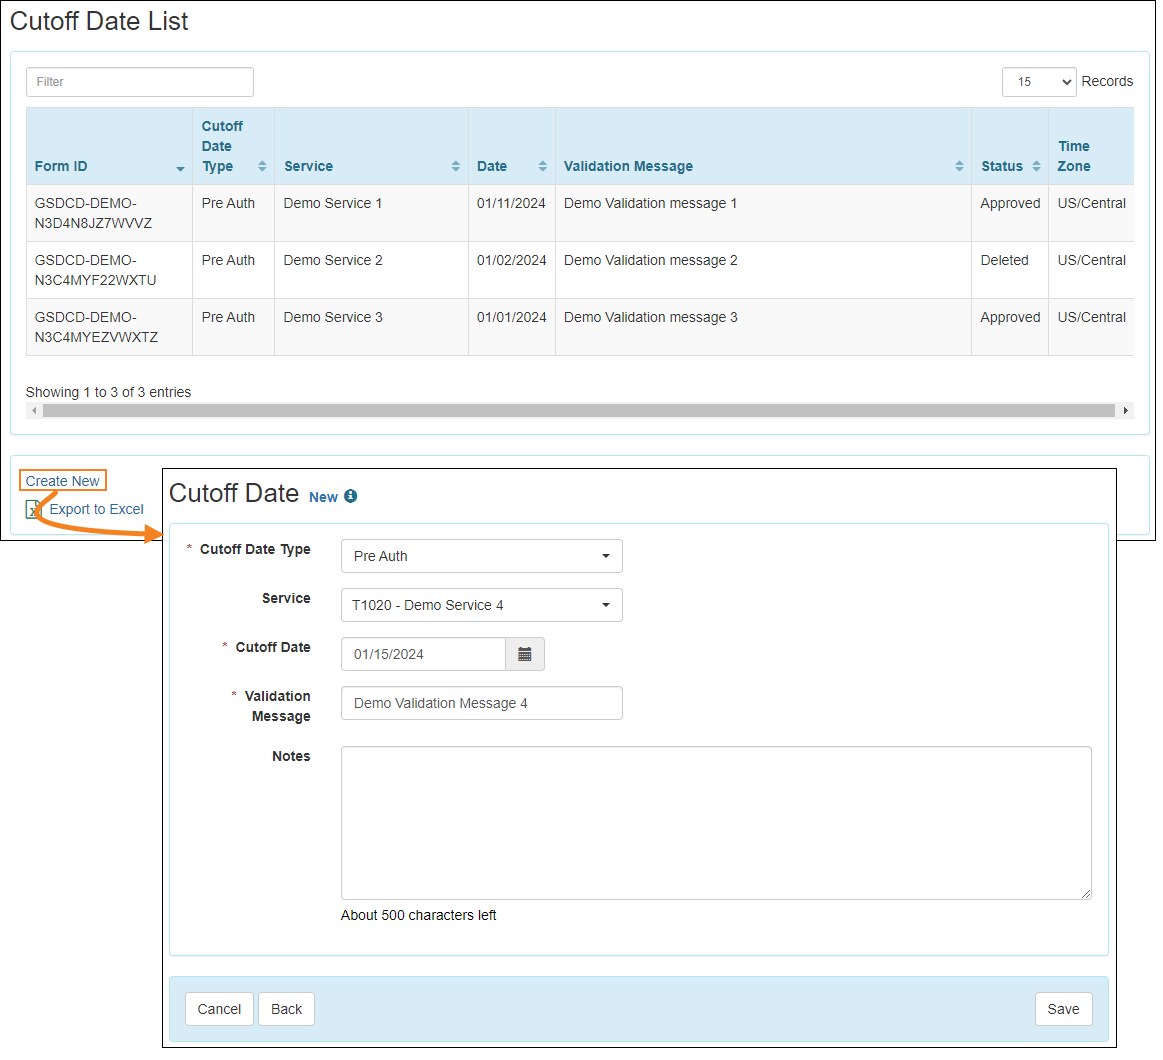
- Users will now be able to see the list of Cutoff Dates and create new ones from the 'Cutoff Date List' page.
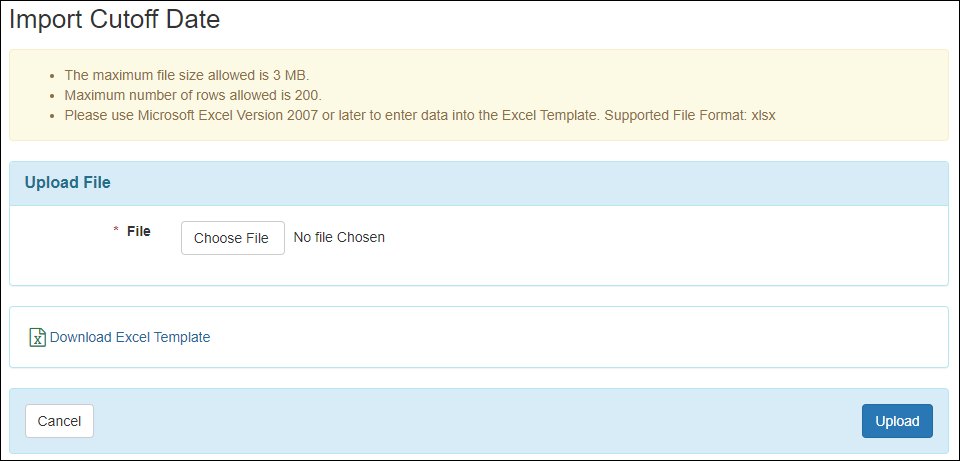
- Users will now be able to import Cutoff Dates into the system by uploading an Excel file.
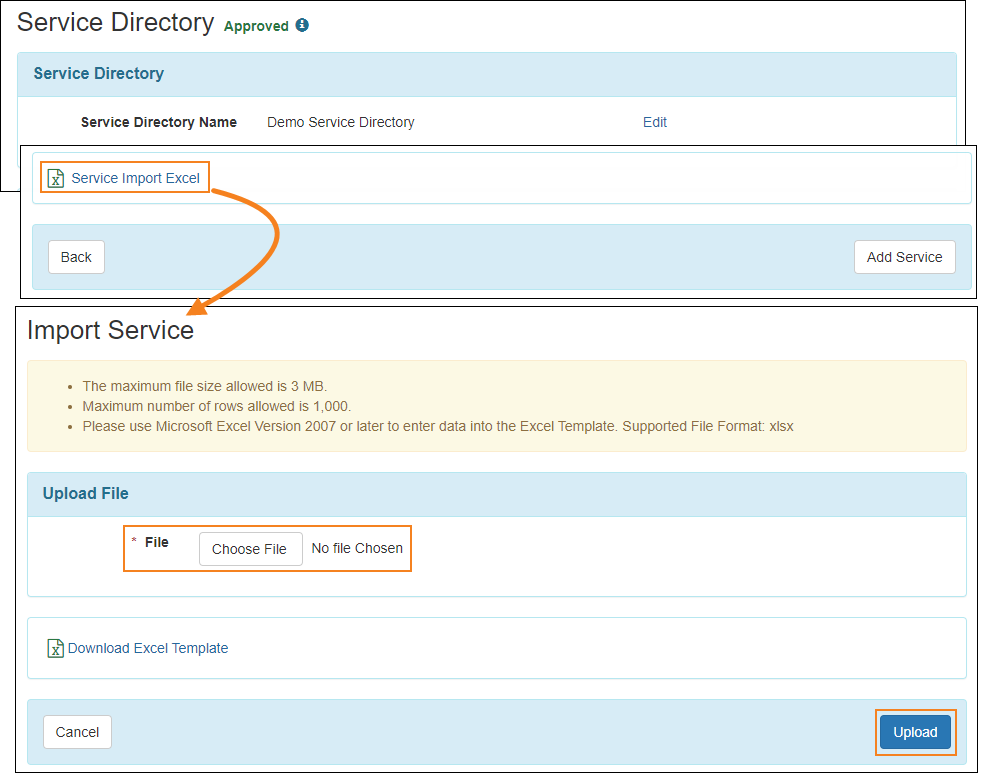
- A new Service Import Excel link has been added on the bottom of the ‘Service Directory’ page. Users will now be able to import Services by uploading an Excel file.
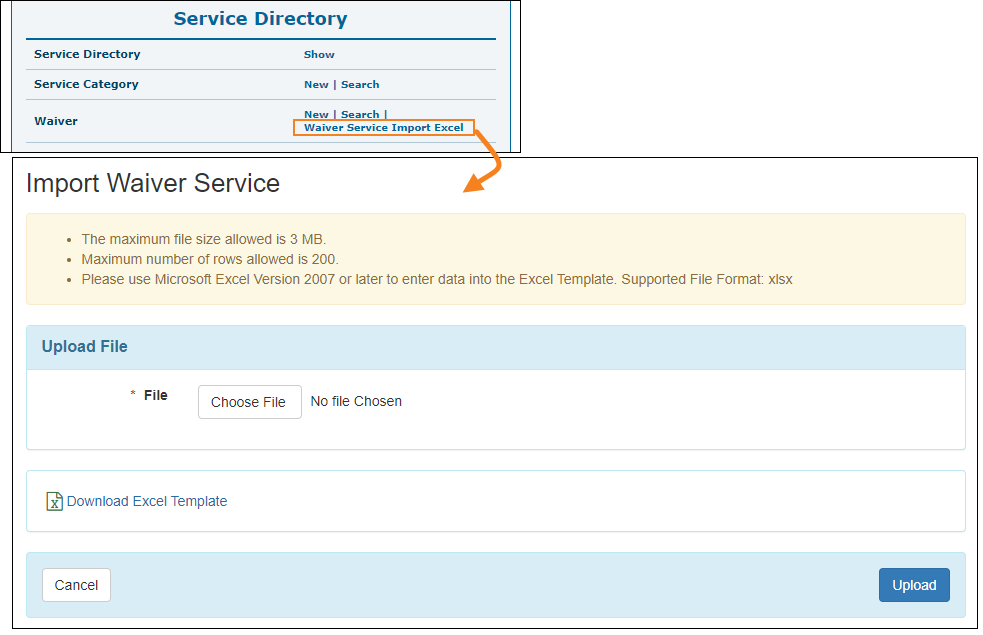
- A new Waiver Service Import Excel link has been added in the ‘Waiver’ subsection of the ‘Service Directory’ section on the Oversight Dashboard. Users will now be able to import Waiver Services by uploading an Excel file.

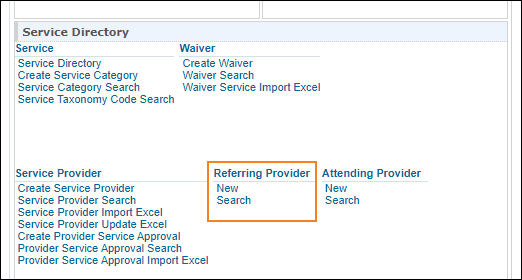
- The Create Referring Provider and the Referring Provider Search links in the ‘Referring Provider’ subsection of the ‘Service Directory’ section have been renamed to New and the Search, respectively.
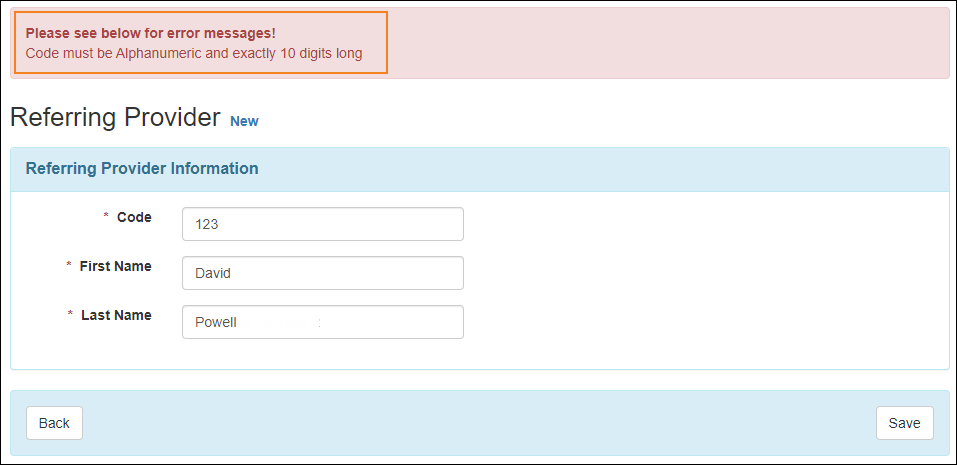
- The validation message shown while creating a new Referring Provider has been updated.
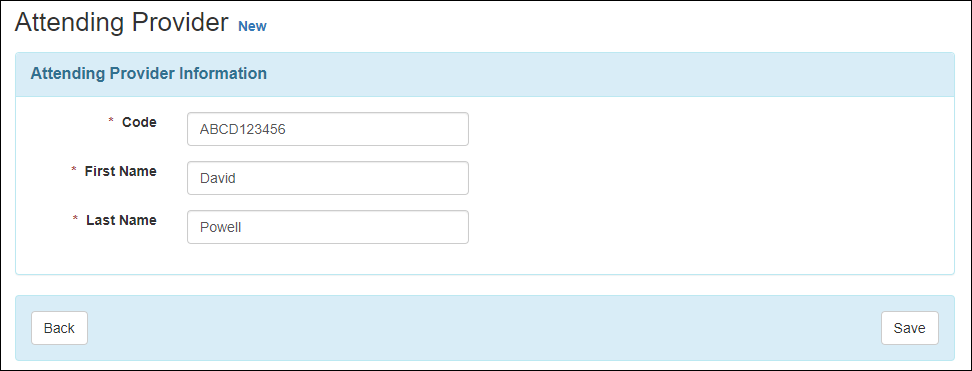
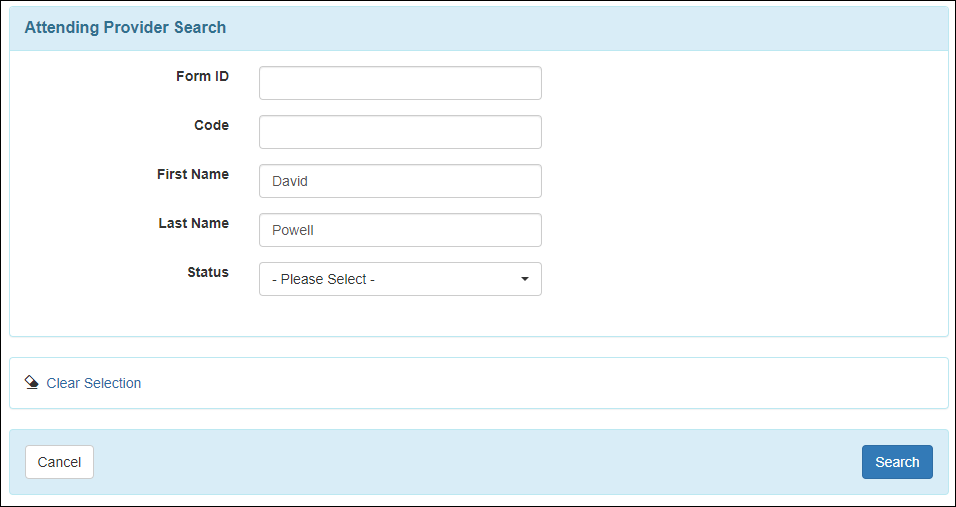
- A new subsection titled ‘Attending Provider’ has been added in the ‘Service Directory’ section of the Oversight dashboard, containing two new links, New and Search.
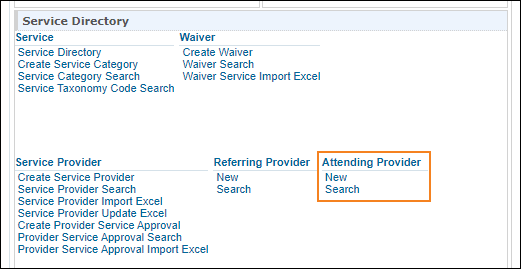
Users will be able to add new Attending Providers by clicking on the New link in the ‘Attending Provider’ subsection.
Users will now be able to search for Attending Providers by clicking on the Search link in the ‘Attending Provider’ subsection.
For Users in Linked Providers
[Back to Top]- A new Service Import Excel link has been added on the bottom of the ‘Service Directory’ page. Users will now be able to import Services by uploading an Excel file.
- A new Waiver Service Import Excel link has been added next to the Waiver option in the ‘Service Directory’ section. Users will now be able to import Waiver Services by uploading an Excel file.