Therap for Canada 2024.6.0 Released!
Release Date: 8/7/2024 To learn more about the new features and enhancements included in this release, please view Release User Guides for Canada 2024.6.0
- Appointments & Calendar
- Behavior Plan
- Behavior Plan & General Event Reports (GER)
- First Databank (FDB) New!
- General
- General Event Reports (GER)
- Immunization
- Individual Plan
- Medication History
- Personal Finance
- Secure Communication (SComm)
- Service Authorization
- Service Directory
- T-Log
Appointments & Calendar
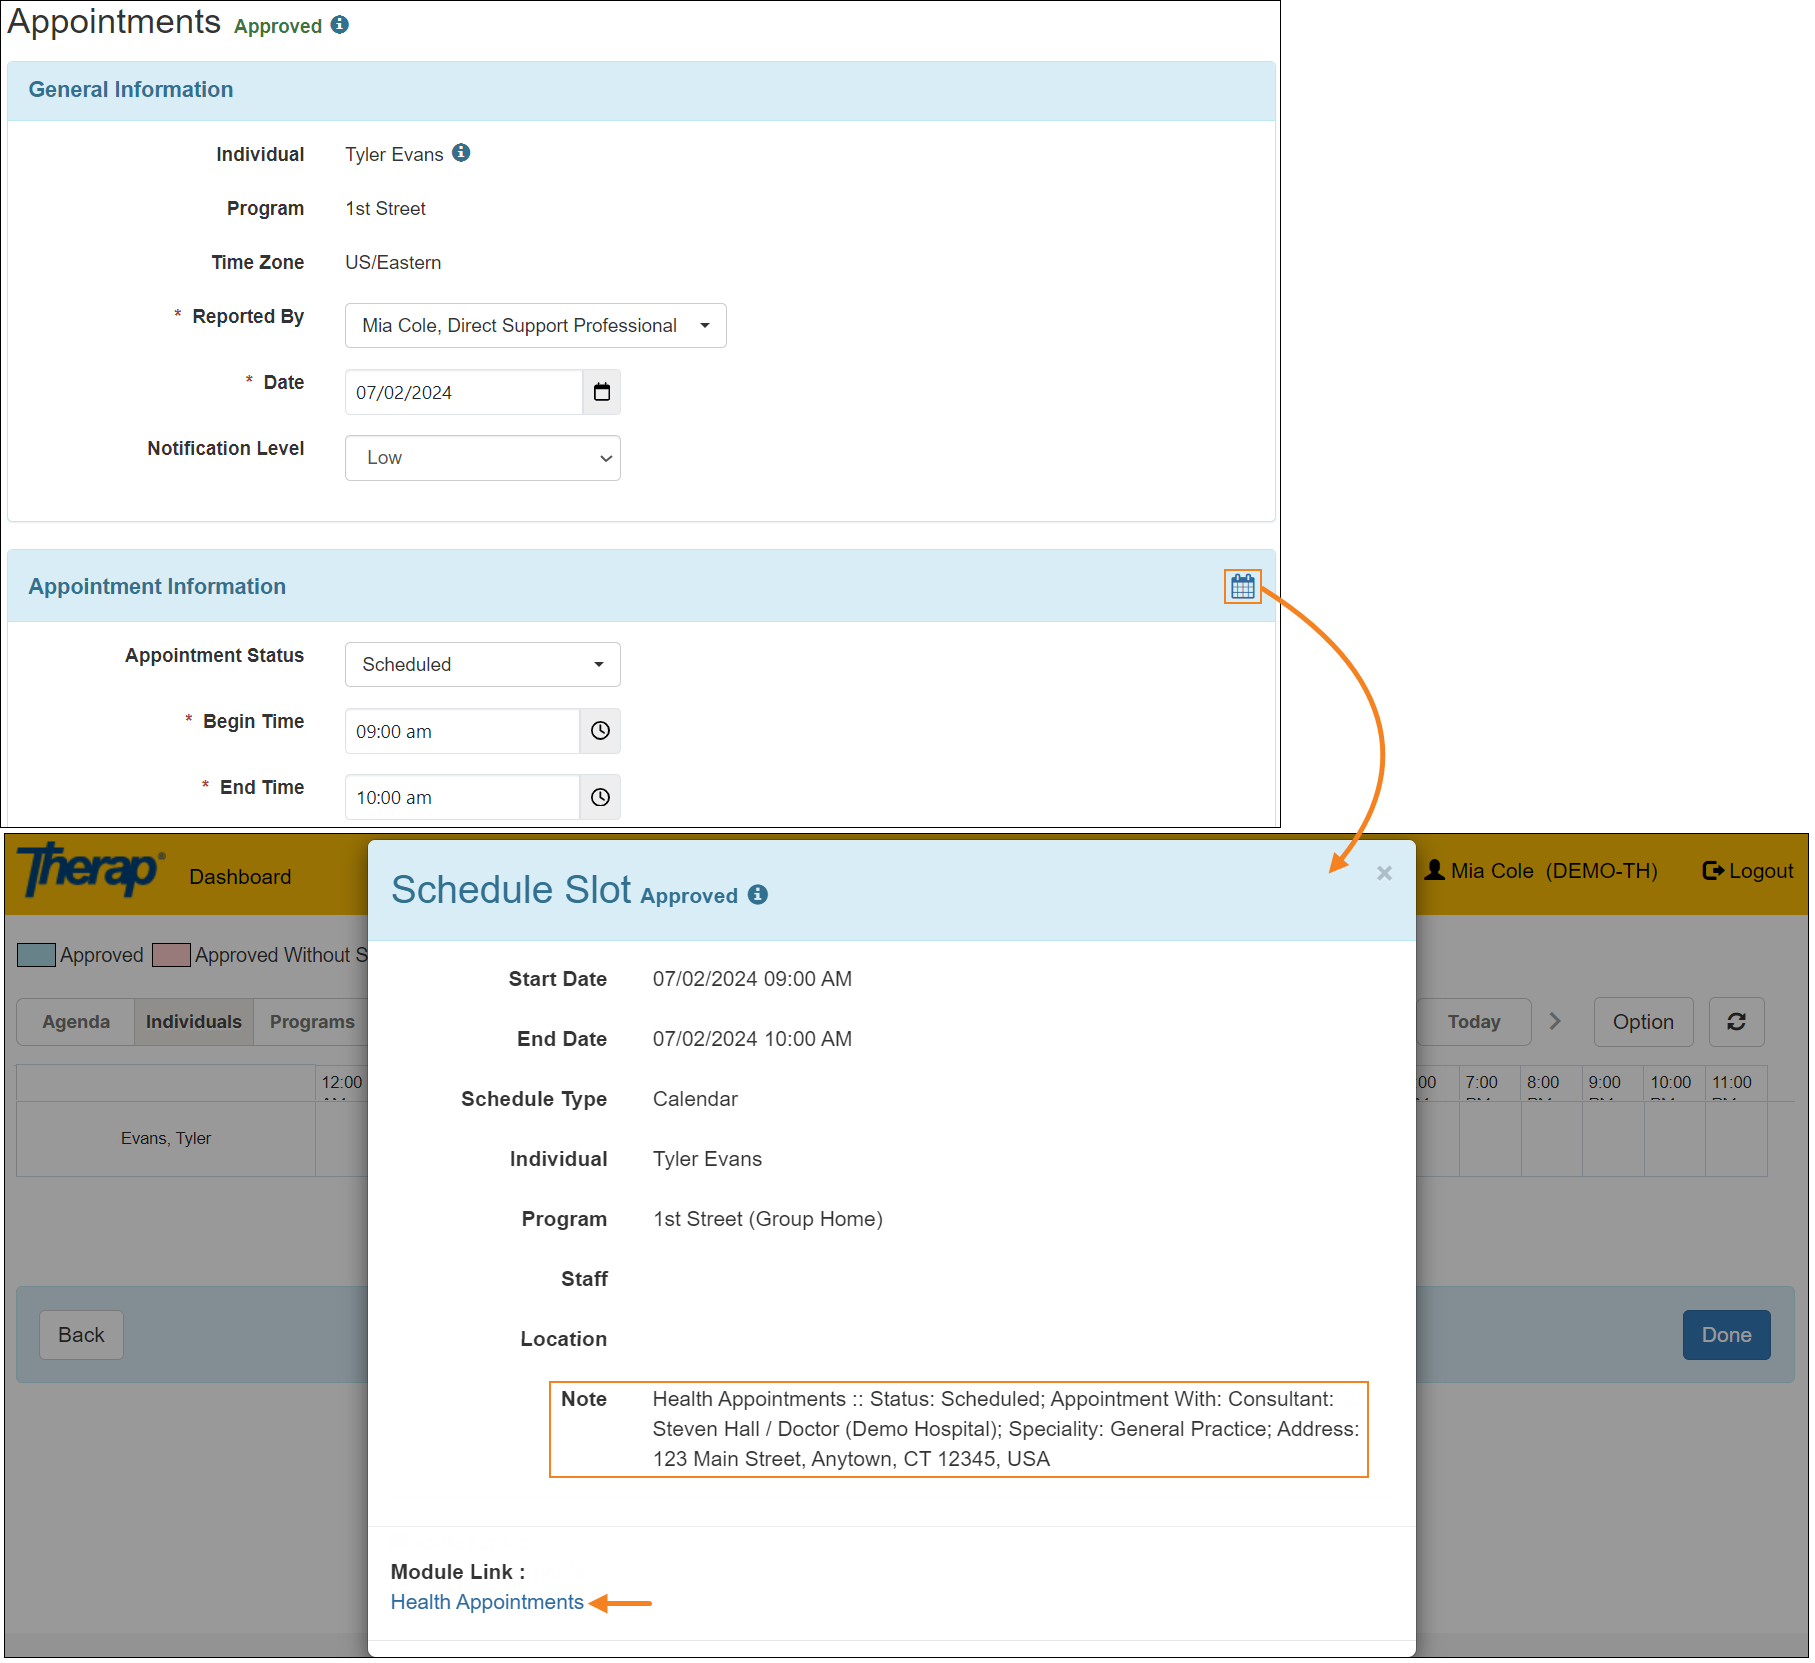
[Back to Top]- For each ‘Appointments’ form that gets saved or submitted for an individual within the Health Tracking module, a Calendar Slot will be generated within the Calendar module if it is enabled for the agency. The calendar icon that appears on the top right corner of the ‘Appointment Information’ section of ‘Appointments’ forms in ‘In Prep’ and ‘Approved’ statuses will now be visible only to the users who have the Schedule View or Schedule Edit caseload-based roles. Clicking on this Calendar icon will lead users to the scheduling grid and open the corresponding Calendar Slot that was generated for the appointment. Users with the Schedule Admin administrative role will be able to locate and view these Calendar Slots by generating the scheduling grid from the Agency tab.
The Note field on such Calendar Slots will populate information from the Appointment Status, Consultant, Hospital, Specialty, Address, Driver, Pick Up At, Depart Time, and Reason for Appointment fields on the associated appointments. A maximum of 196 characters will be displayed in this field. Three dots will be displayed at the end of the information displayed in this field when the information populated from the associated ‘Appointments’ form exceeds the limit of 196 characters.
The Calendar Slots created from Health Tracking appointments will contain a link titled Health Appointments under a field titled Module Link. Clicking on the Health Appointments link will redirect the users to the corresponding ‘Appointments’ form.
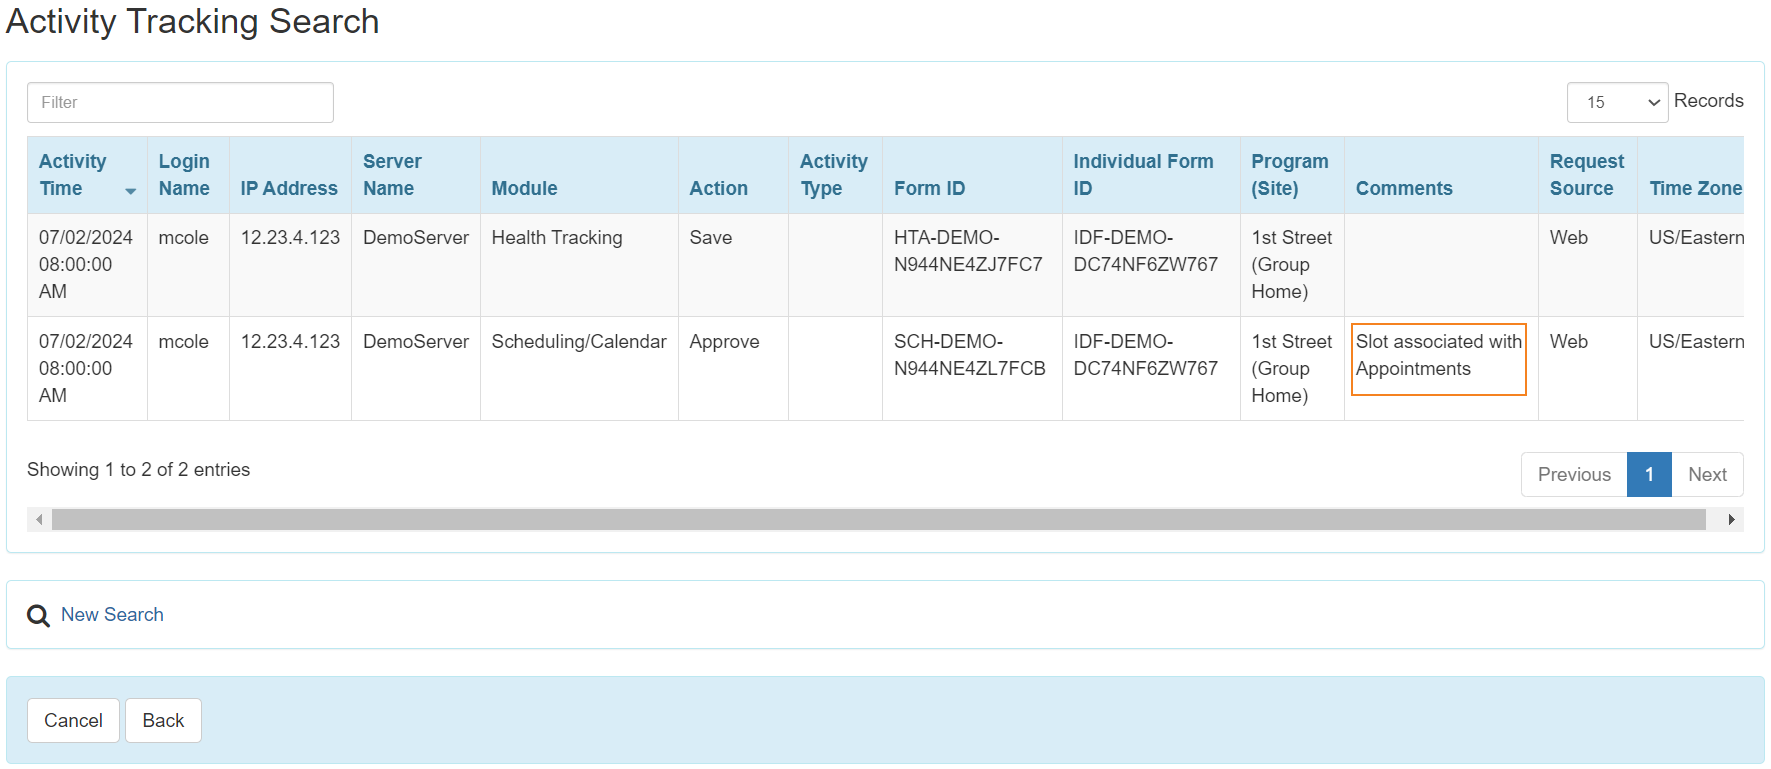
- On the ‘Activity Tracking Search’ results page, a new comment stating Slot associated with Appointments will be displayed for the Calendar Slot created automatically in the system for a Health Tracking appointment.
Behavior Plan
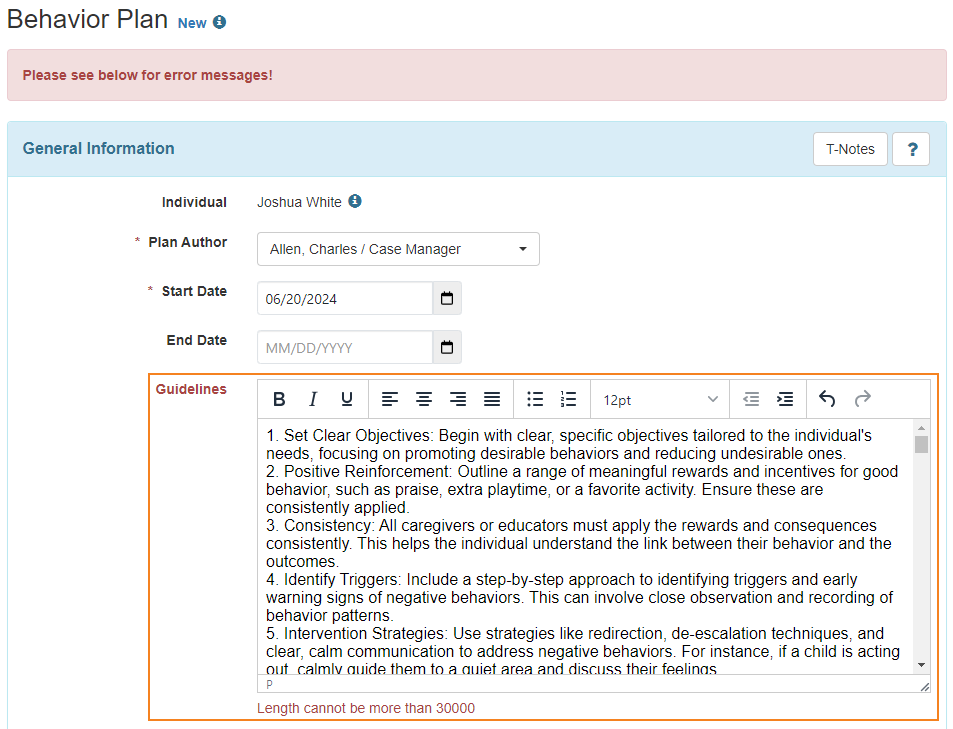
[Back to Top]- The character limit for the Guidelines text-box on the Behavior Plan form has been increased from 10,000 to 30,000 characters.
Behavior Plan & General Event Reports (GER)
[Back to Top]- The restraint titled Supine Stability Hold has been removed from the Restraint Category titled ‘Safety Care’.
First Databank (FDB) New!
[Back to Top]- First Databank (FDB) for users in Canada has been introduced in this release. Users from FDB enabled providers will now be able to lookup for drugs and allergies from the FDB database. Super Admins from agencies will need to send requests to Therap via the 'Issue Tracking' section to have this feature enabled.
- The following changes for the FDB enabled providers will appear on the Medication History form:
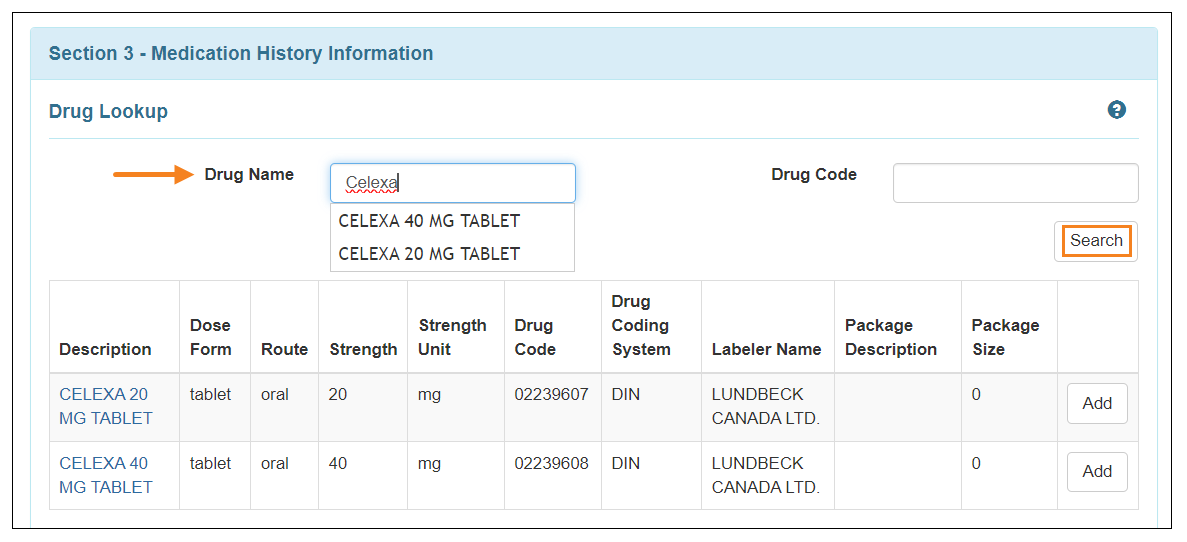
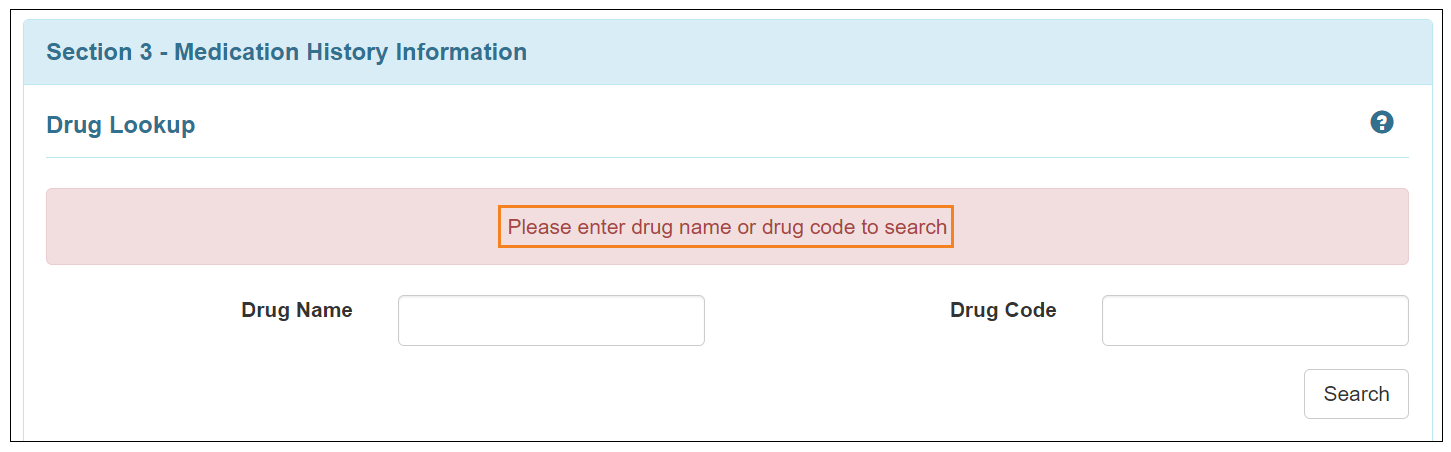
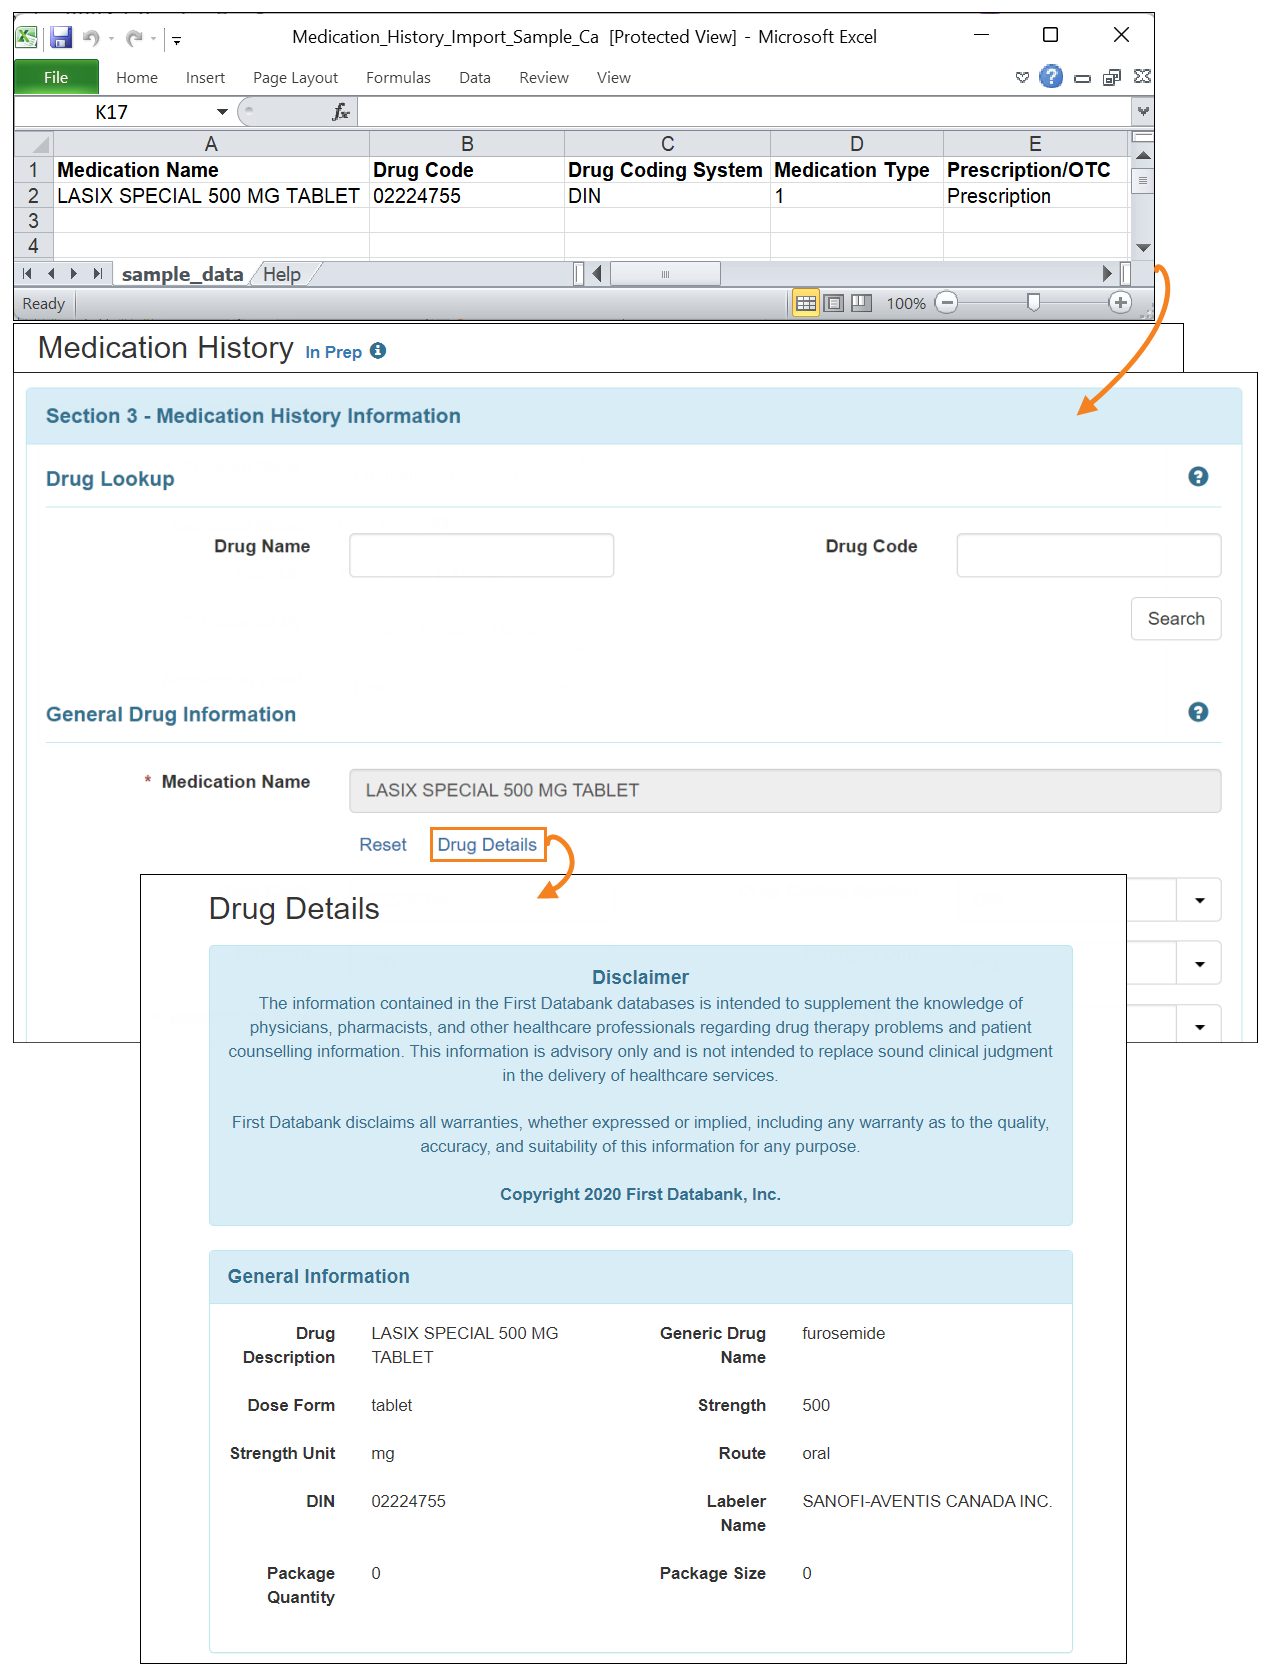
- A new ‘Drug Lookup’ sub-section will appear in the ‘Section 3 - Medication History Information’ section of the Medication History form where users will be able to Search drugs by a Drug Name or Drug Code. Users can add the searched drug to the Medication History form using the Add button and also view the details of the searched drug by clicking on the drug name in the Description column. If users search for the drug using the Drug Name, an autocomplete drop down list will appear with the matching keywords. Users can click on a Drug Name from the list to have it appear on the Drug Name field, and perform search using the Search button.
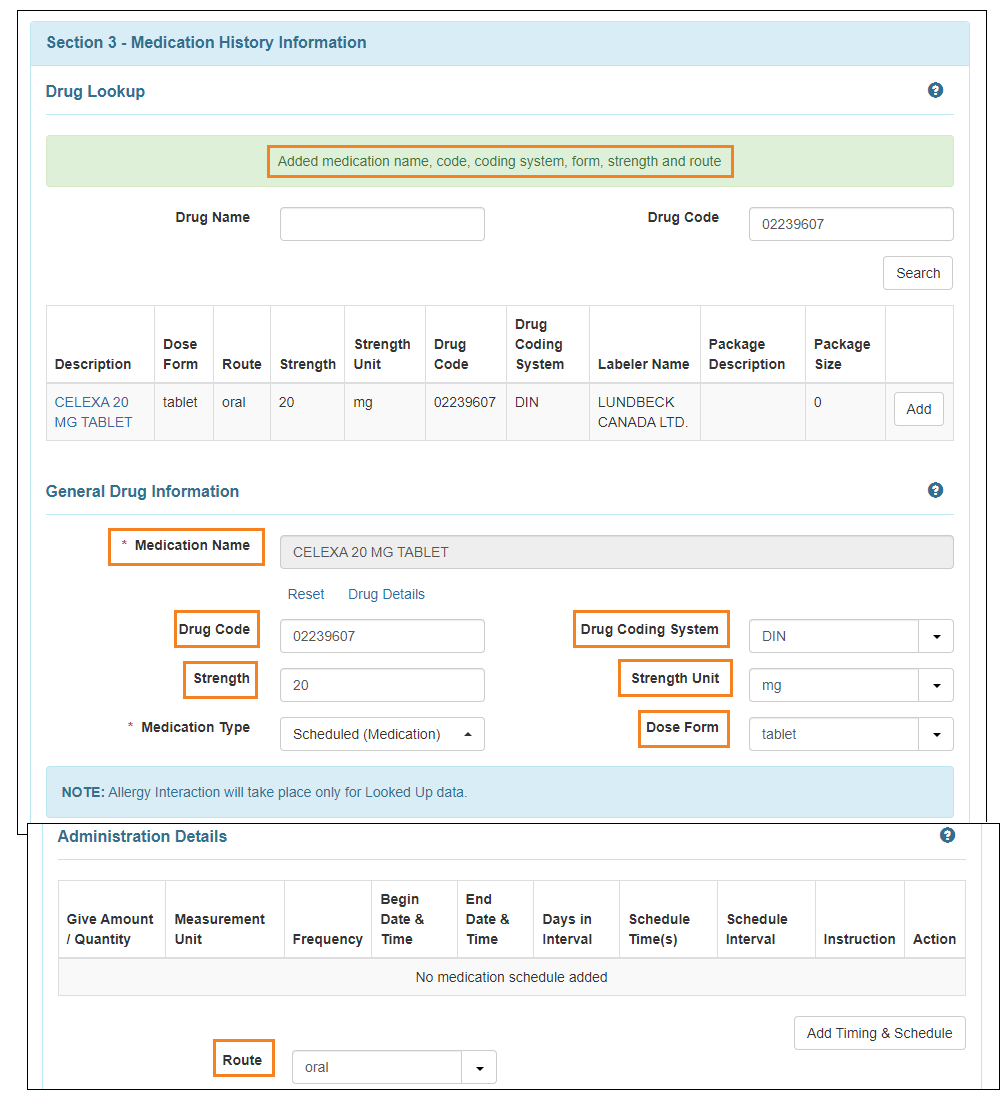
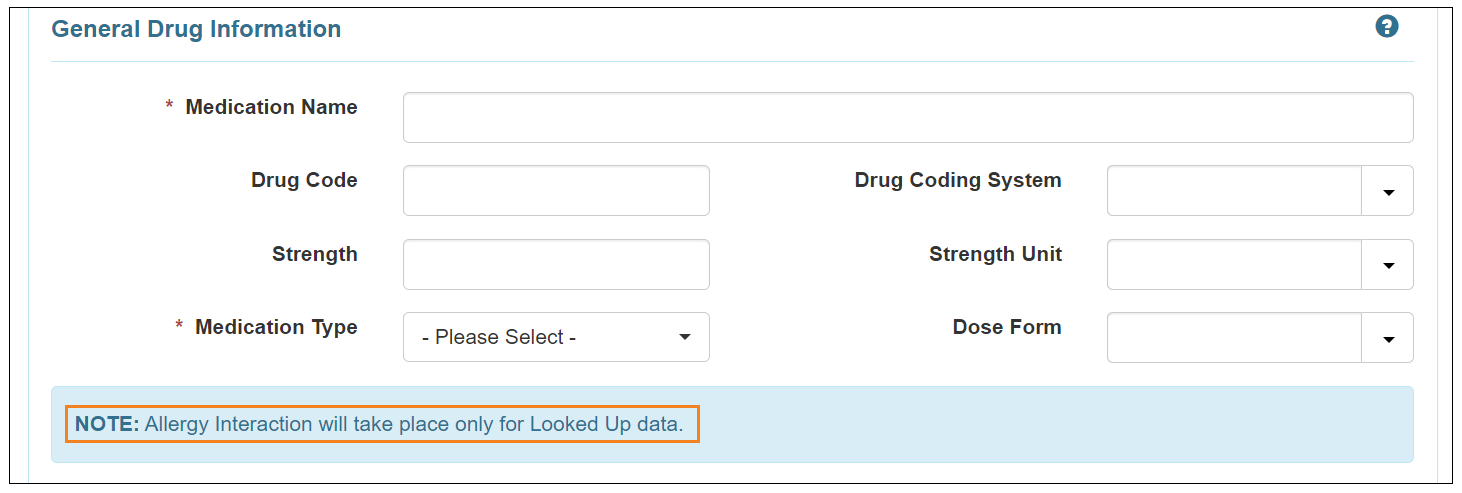
- Adding a medication using Drug Lookup will display a success message in the ‘Drug Lookup’ section, and auto-populate the medication-specific information from First Databank (FDB) in the ‘General Drug Information’ section. The Medication Name will appear as read-only for the looked up medications. However, the system will allow users to manually update the Drug Code, Drug Coding System, Strength, Strength Unit, Dose Form, and Route information.
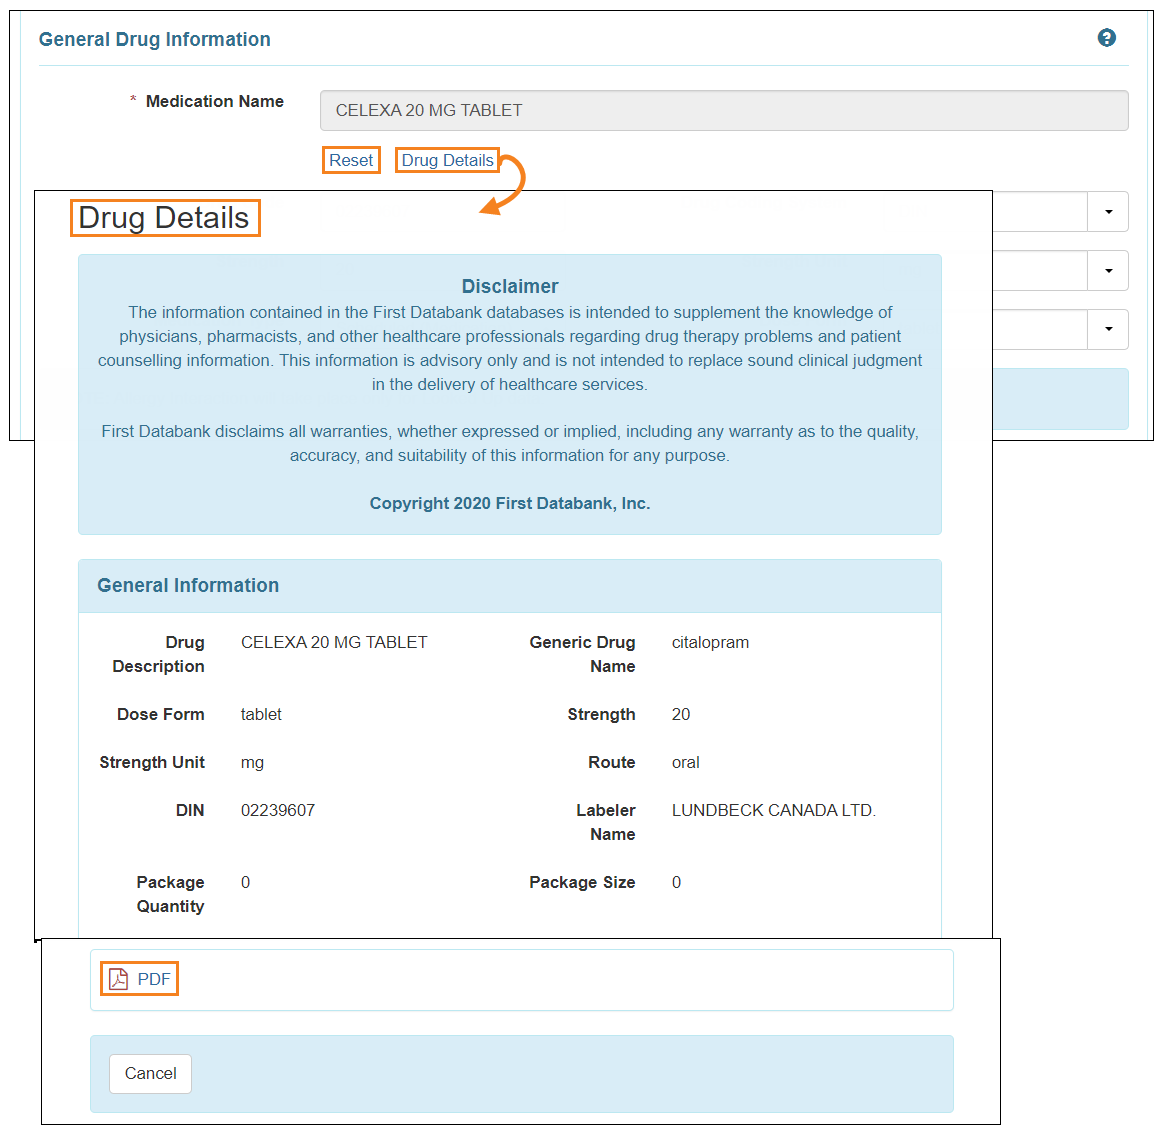
- A Drug Details link for the looked up medications will be available in the Medication Name field which will allow users to view and print PDF of the medication details from the First Databank (FDB). Users can also edit the Medication History form and remove the medication looked up information using the Reset link on the Medication History form.
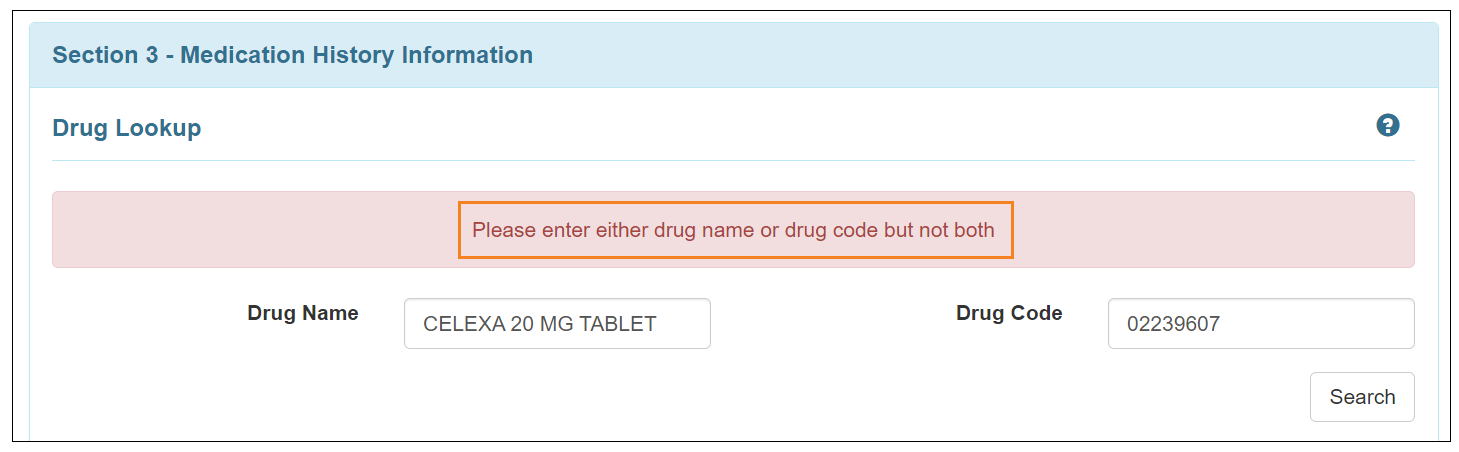
- If users enter both the Drug Name and Drug Code or do not enter either of them while performing a search, they will receive an error message in the ‘Drug Lookup’ section.
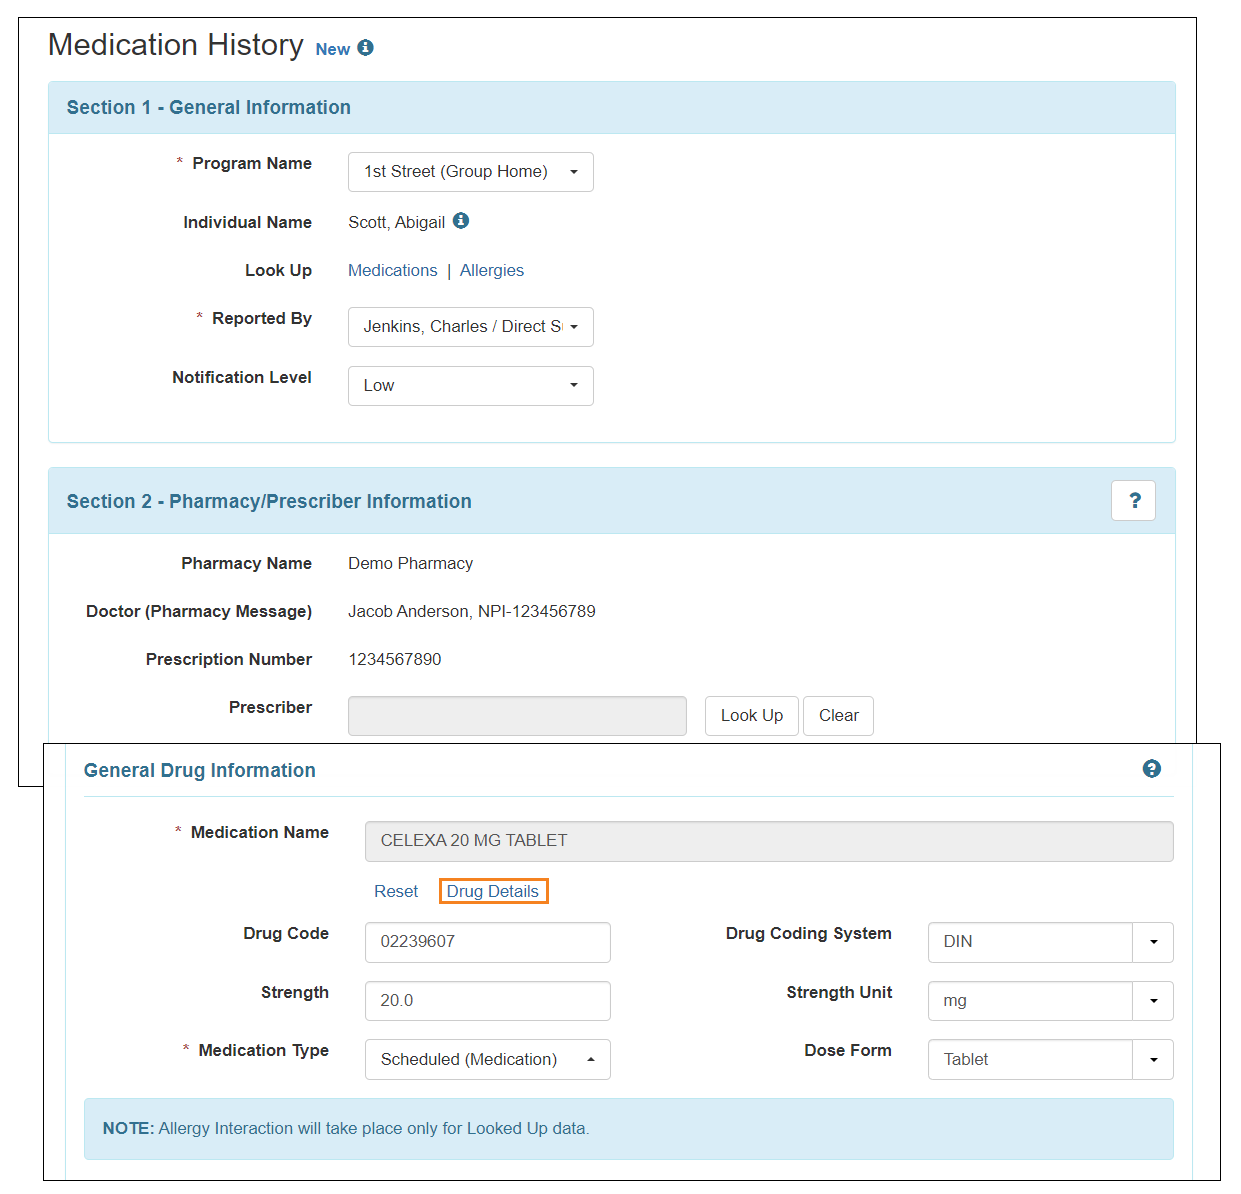
- A note on Allergy Interaction with medications will appear in the ‘General Drug Information’ section of the New Medication History forms.
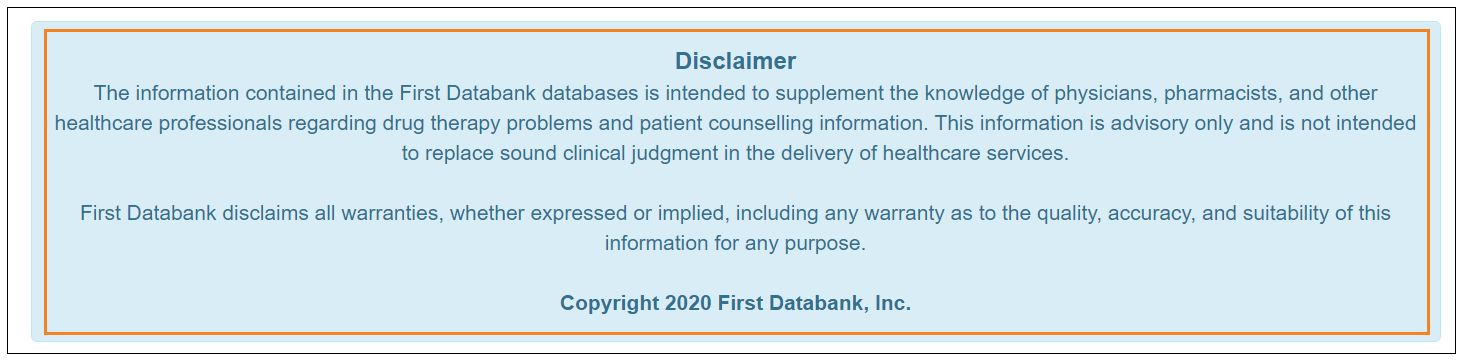
- A ‘Disclaimer’ section will appear at the bottom of the Medication History Form.
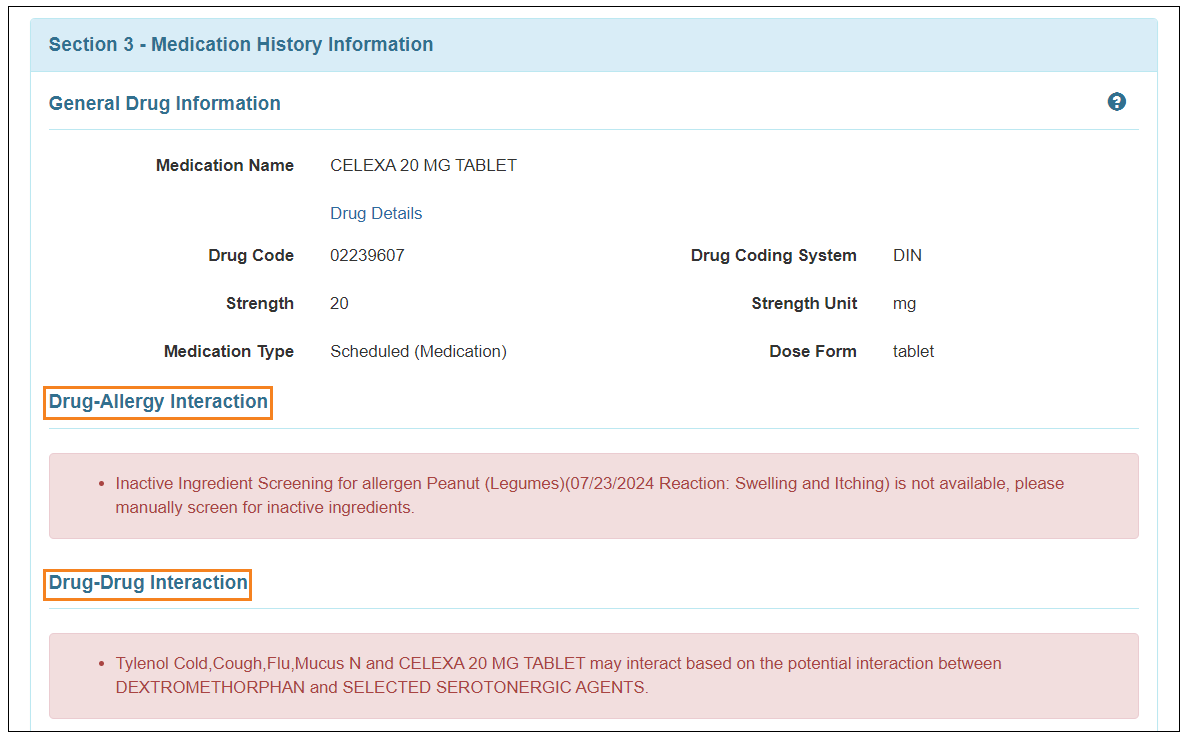
- After clicking on the Submit or Approve button on the Medication History form, users will be able to see a ‘Potential Interaction(s) with Individual’s current Medication(s) and Allergy(ies)’ page. ‘Drug-Allergy Interaction’ and ‘Drug-Drug Interaction’ will be displayed on this page if there is any interaction with the looked up medication. Users will need to click on the Yes button to successfully submit or approve the Medication History form.
-240804.png)
- After creating a medication the allergy interaction note will no longer be displayed in the ‘General Drug Information’ section. However, two new sections titled ‘Drug-Allergy Interaction’ and ‘Drug-Drug Interaction’ will appear displaying if the added medication has any interaction or not.
- A new ‘Drug Lookup’ sub-section will appear in the ‘Section 3 - Medication History Information’ section of the Medication History form where users will be able to Search drugs by a Drug Name or Drug Code. Users can add the searched drug to the Medication History form using the Add button and also view the details of the searched drug by clicking on the drug name in the Description column. If users search for the drug using the Drug Name, an autocomplete drop down list will appear with the matching keywords. Users can click on a Drug Name from the list to have it appear on the Drug Name field, and perform search using the Search button.
- If users enter a valid Drug Code in the Medication History Sample Excel file, then the drug will get linked to First Databank (FDB) and users will be able to access the Drug Details link for that imported medication.
- If Pharmacy sends valid Drug Code for a medication then the drug will get linked to First Databank (FDB) and users will be able to access the details of the drug using the Drug Details link in the Medication History form.
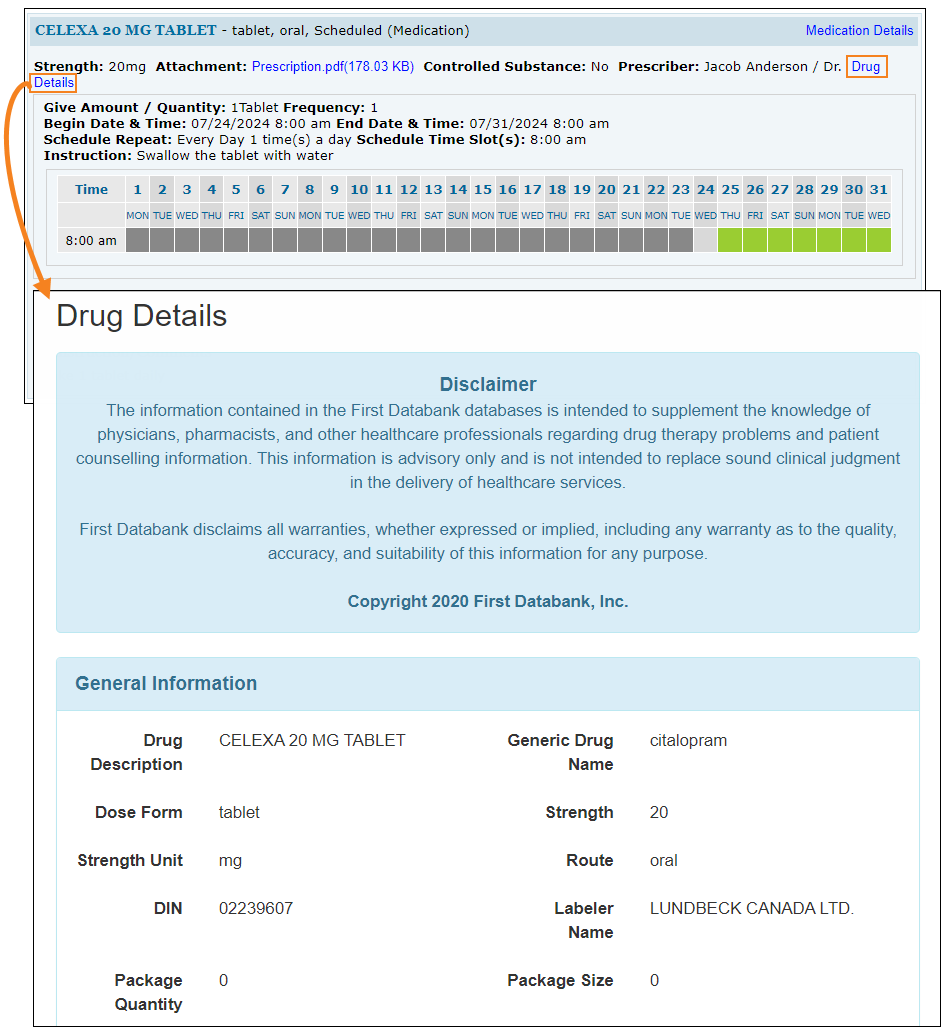
- The Drug Details link for the looked up medications will also appear on the MAR. Clicking on this link will open the ‘Drug Details’ page for that medication.
- The following changes will be available in the Allergy Profile for the First Databank (FDB) enabled providers:
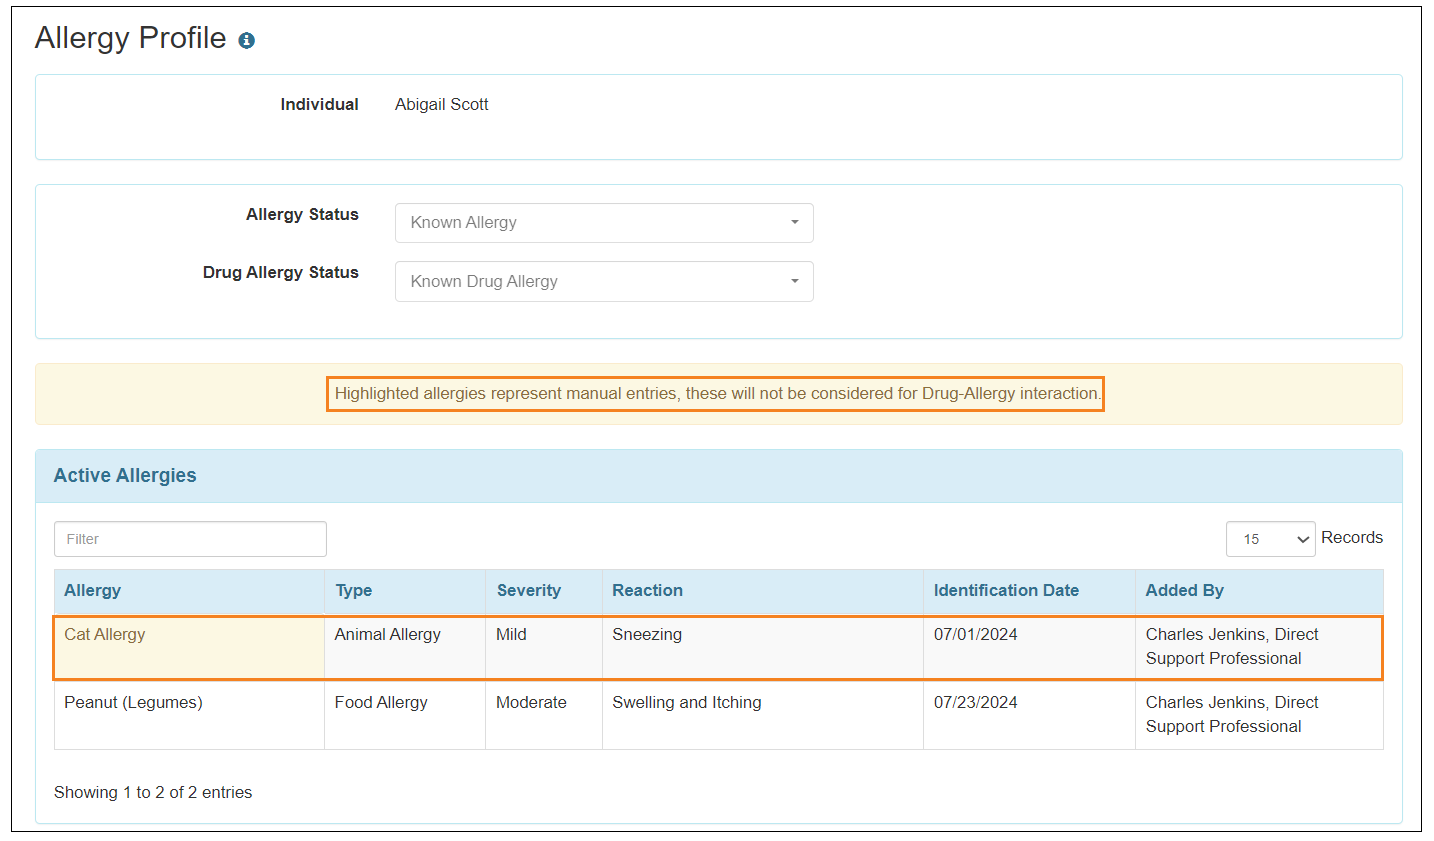
- Manually added allergy(ies) will be highlighted as yellow and will not be considered for Drug-Allergy interactions. A note stating that information will be displayed on top of the Allergy Profile form.
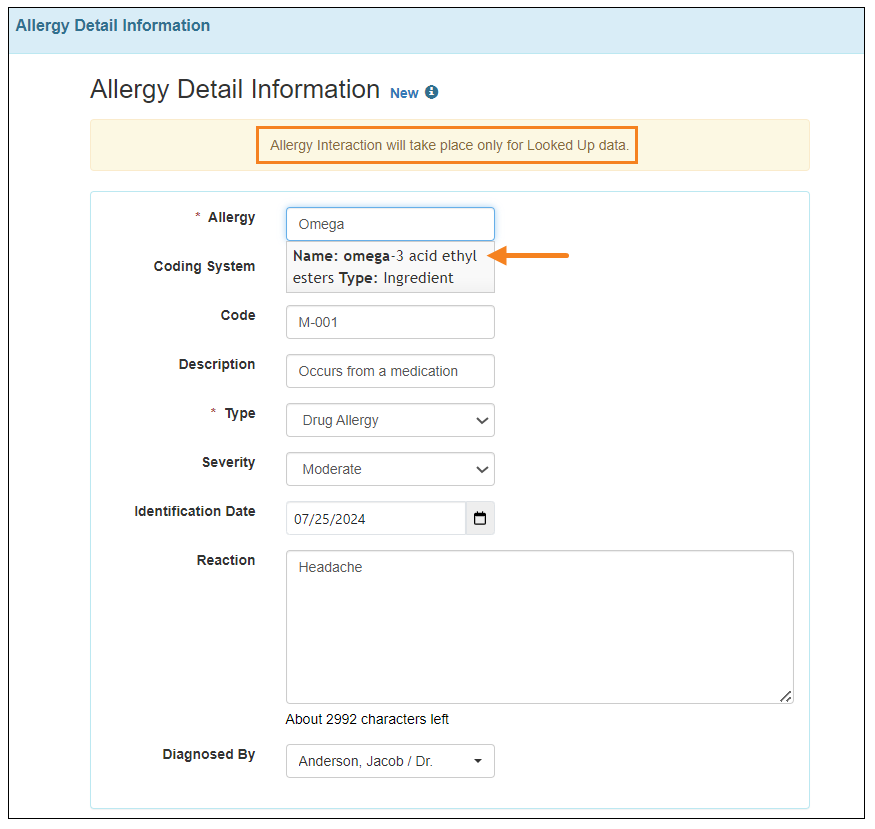
- Users will be able to lookup allergies from FDB. After entering the first few letters of the allergy name in the Allergy field users will see the matching allergies in the auto-complete dropdown. The allergy can be selected and added to the Allergy Profile.
- A note will be displayed on top of the ‘Allergy Detail Information’ page stating that the allergy interaction will take place only for the looked up data.
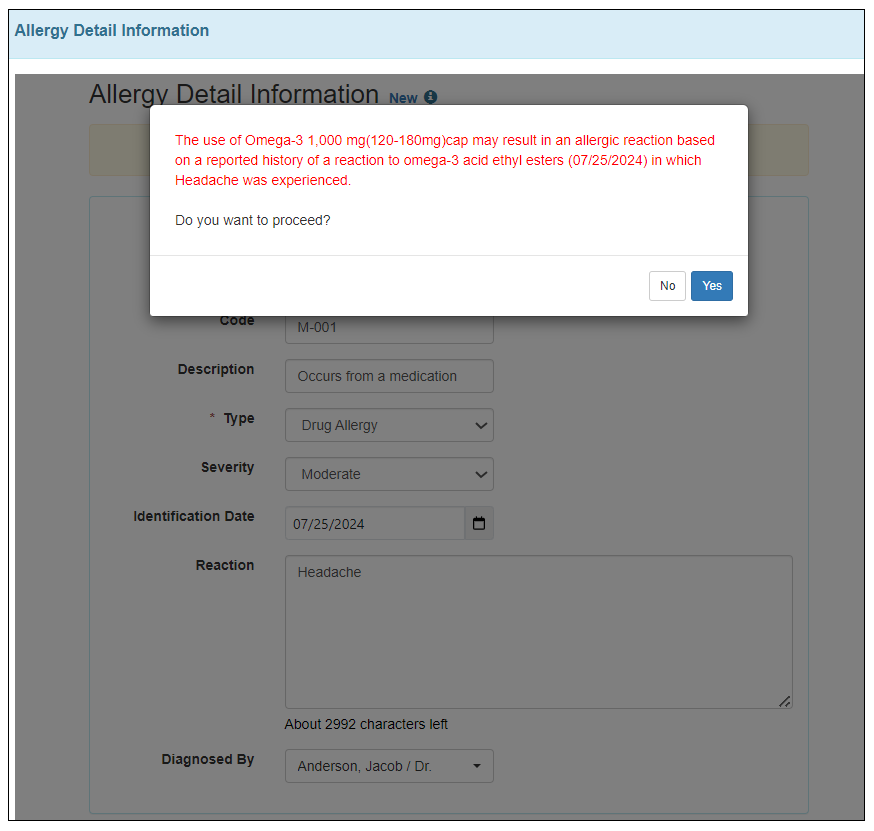
- After adding an allergy using the lookup feature, if users click on the Continue button, a warning message will be displayed showing any possible interaction between the newly added allergy and the active medication(s) of the Individual.
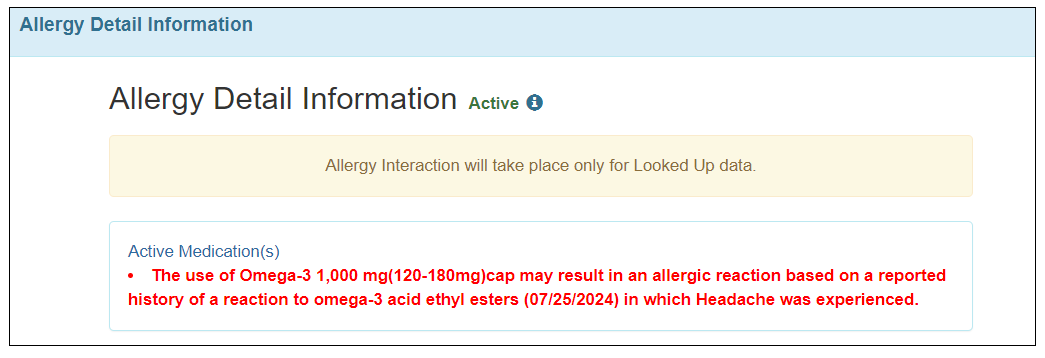
- If any allergy has an interaction with any active medication, then this information will be displayed in the 'Allergy Detail Information' form. Users will be able to view the individual's active medications from the Active Medication(s) link.
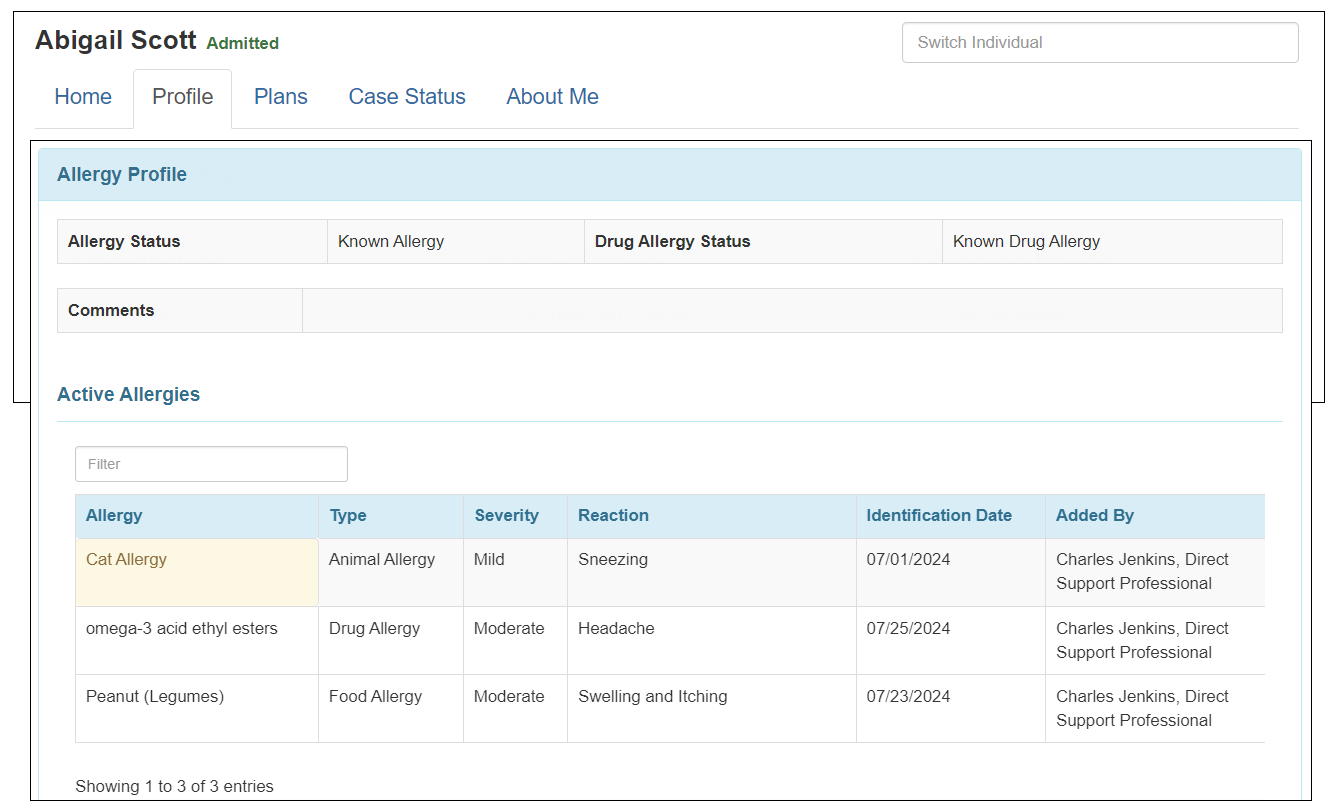
- Users will also be able to view the list of Active Allergies from the Profile Tab of the Individual Home Page under the ‘Active Profile’ section. If active allergy(ies) are manually added then it will now be highlighted as yellow and will not be considered as Drug-Allergy interactions.
- Manually added allergy(ies) will be highlighted as yellow and will not be considered for Drug-Allergy interactions. A note stating that information will be displayed on top of the Allergy Profile form.
General
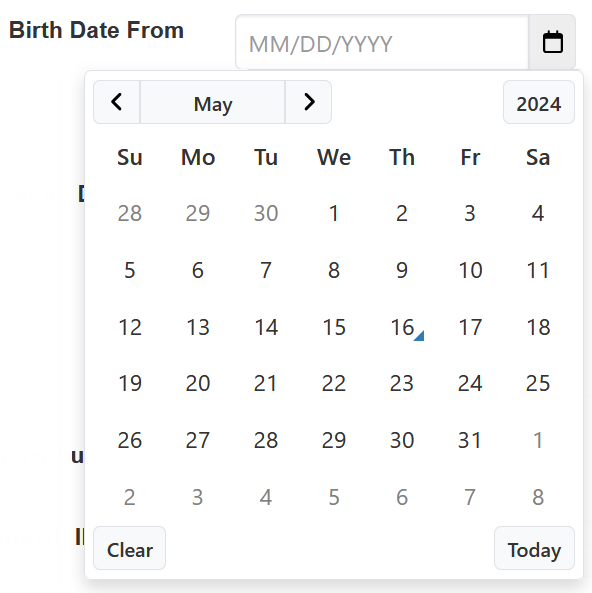
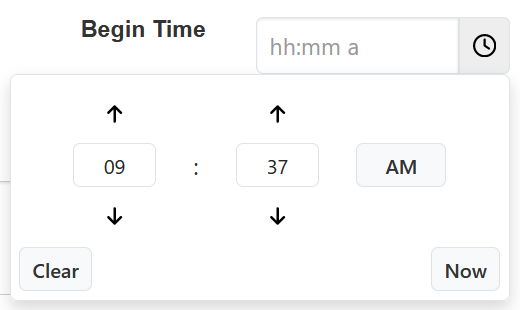
[Back to Top]- The Date and Time picker interface has been updated across Therap modules.
- Character limit of Phone Number Extension fields have been increased from 5 to 12 across Therap modules.

General Event Reports (GER)
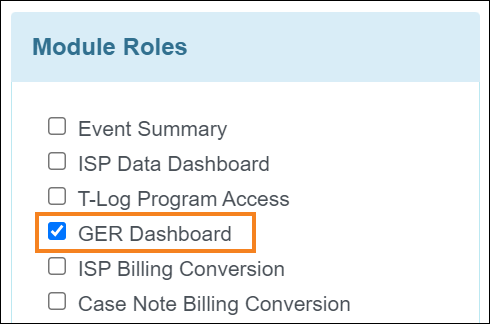
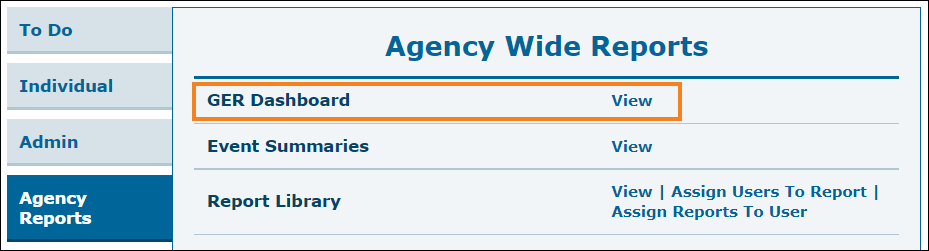
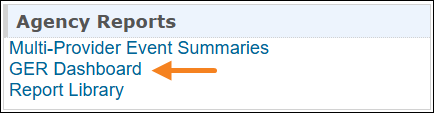
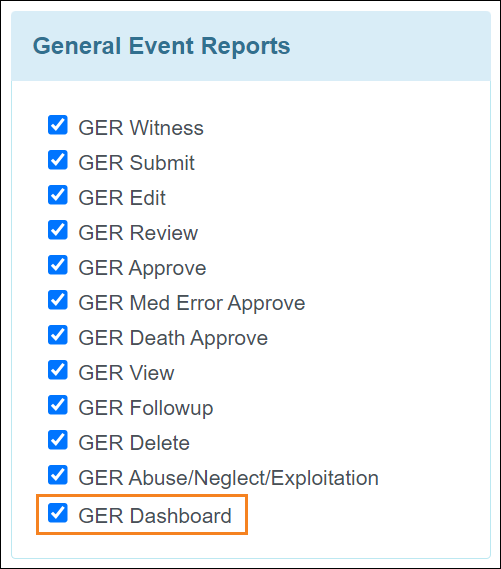
[Back to Top]- A new agency wide and administrative role titled GER Dashboard has been added in the 'Module Roles' section of the 'User Privilege' pages. Users assigned with this role will be able to access the new GER Dashboard for all individuals in the agency by clicking on the View link next to the new GER Dashboard option on the Agency Reports tab. Oversight users will be able to access the dashboard of linked providers.
Oversight users will find the GER Dashboard link in the ‘Agency Reports’ section on their Oversight Dashboard.
- A new caseload-based role titled GER Dashboard has been added in the ‘General Event Reports’ section of the 'Super Role' page. Users assigned with this role will be able to access the GER Dashboard for the individuals in their caseloads by clicking on the new Dashboard link next to the General Event Reports (GER) option on the Individual tab. Oversight users will be able to access the dashboard of linked providers.

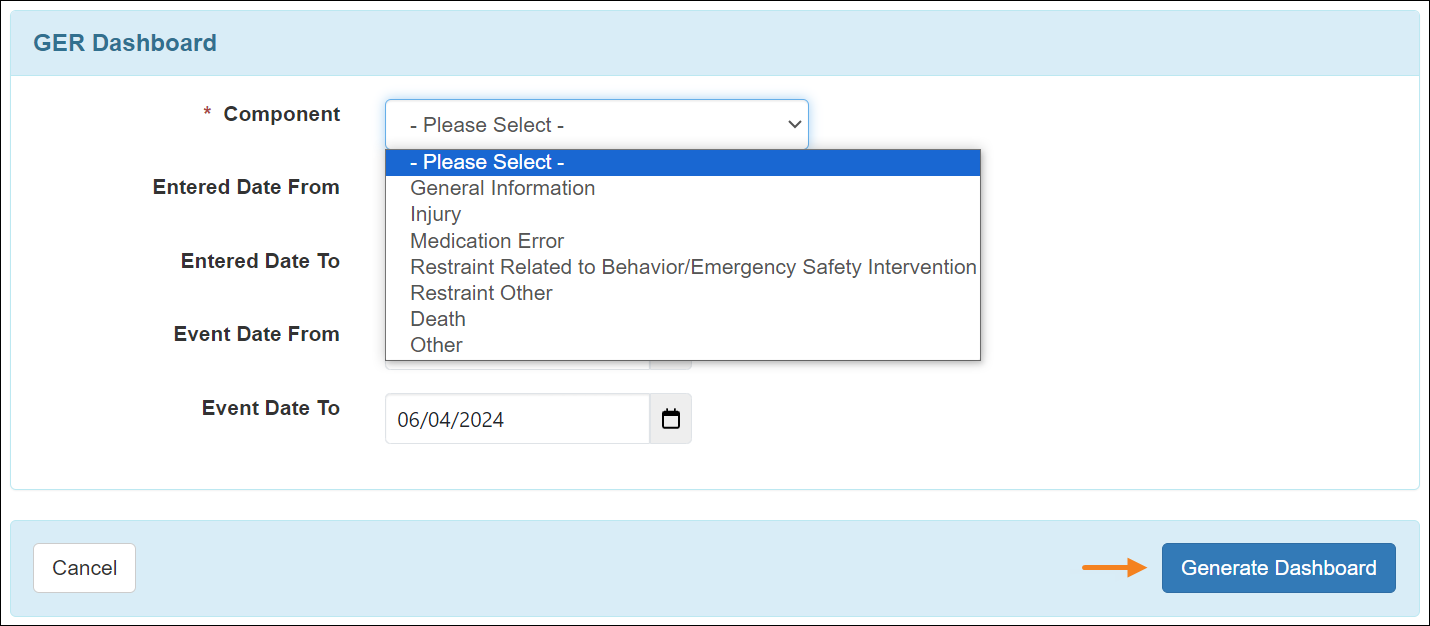
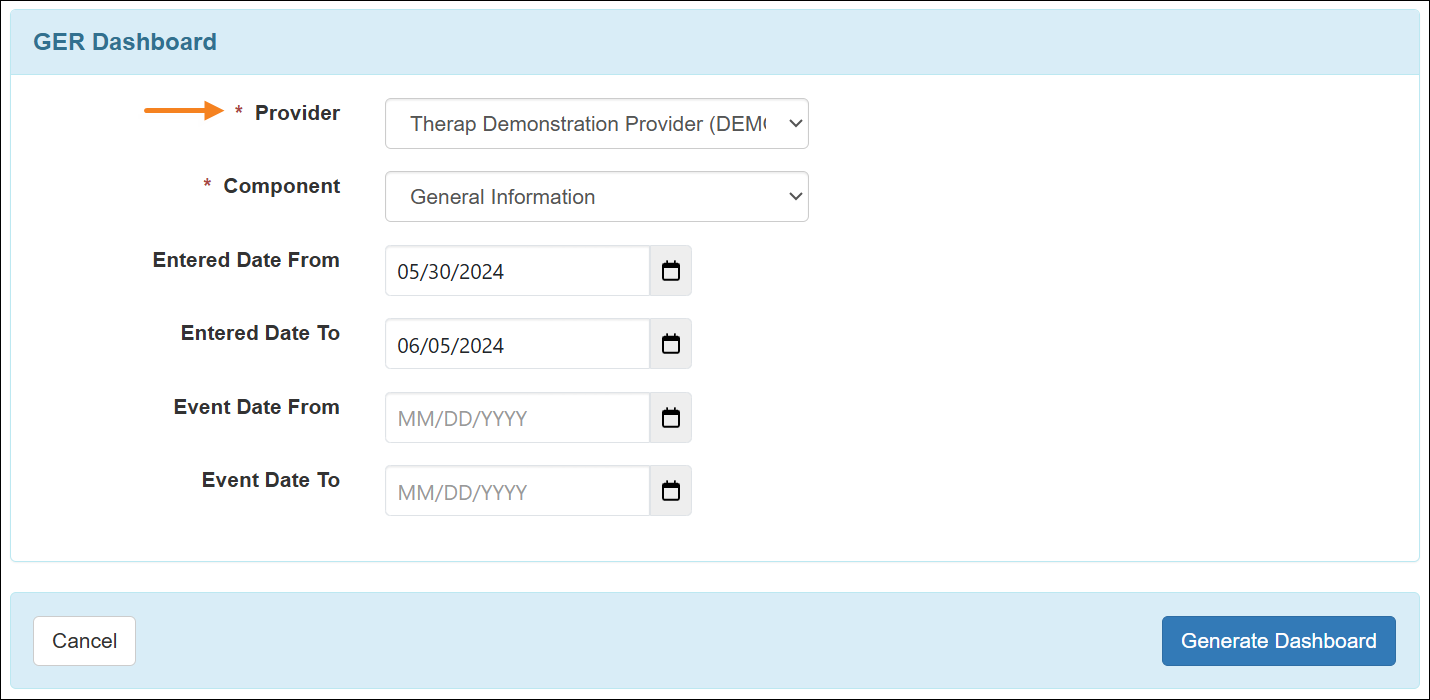
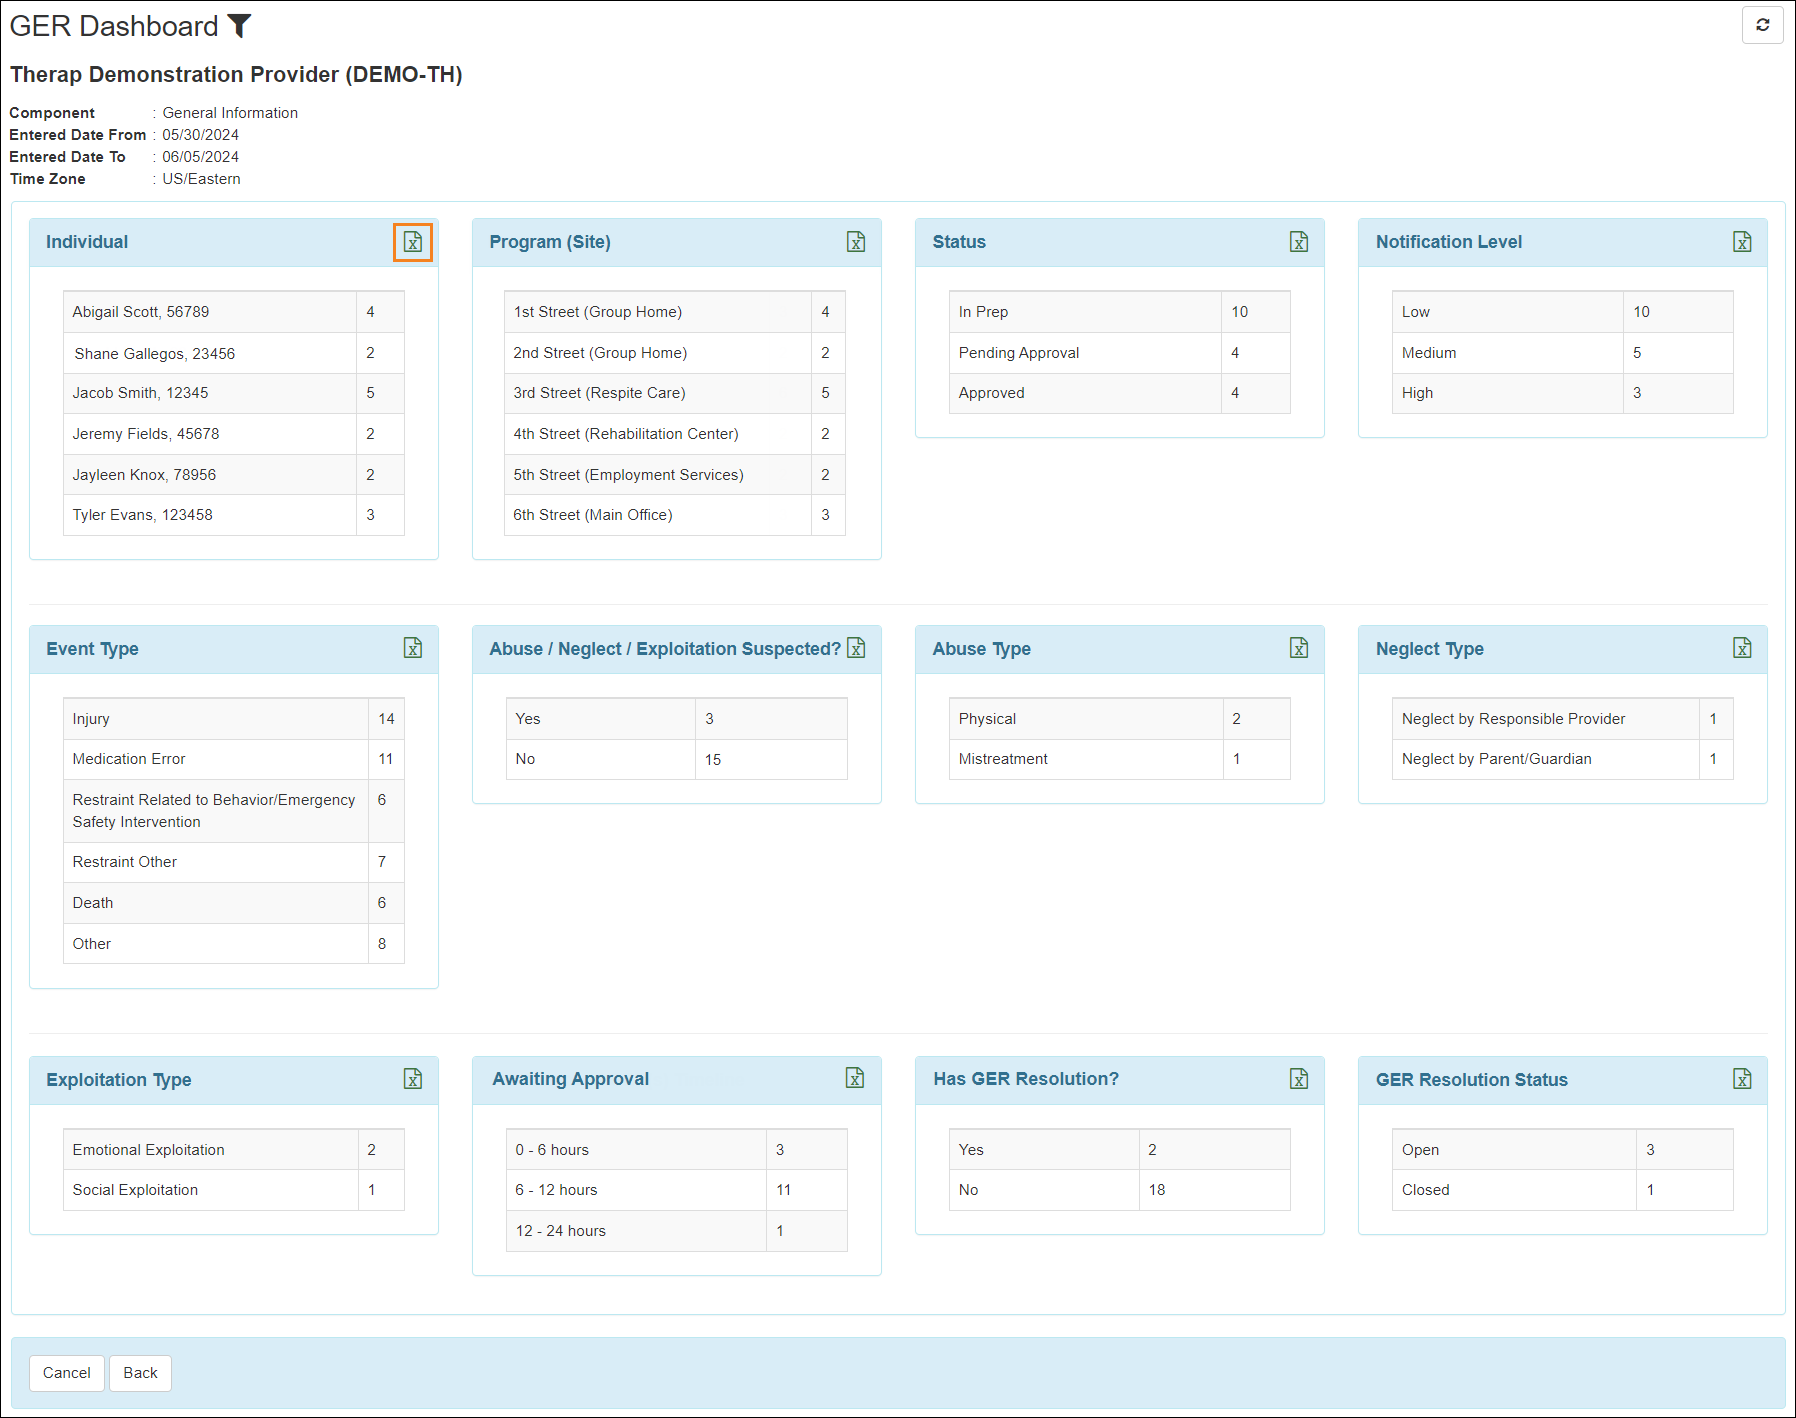
- For Regular and Case Management providers, clicking on the Dashboard link will open the ‘GER Dashboard’ search criteria page. Users will need to select a Component from the dropdown field and enter an appropriate date range for up-to 13 months to be able to generate the GER Dashboard.
For the Oversight users, the ‘GER Dashboard’ search criteria page will have an additional Provider dropdown field to select a linked provider.
- The GER Dashboard will display the search parameters and the user’s Time Zone on top of the page. The sections available on the GER Dashboard will display data for all statuses of GERs except for the Deleted, and users will be able to export the specific list and Excel report by clicking on the Excel icon in the top right corner of each section.
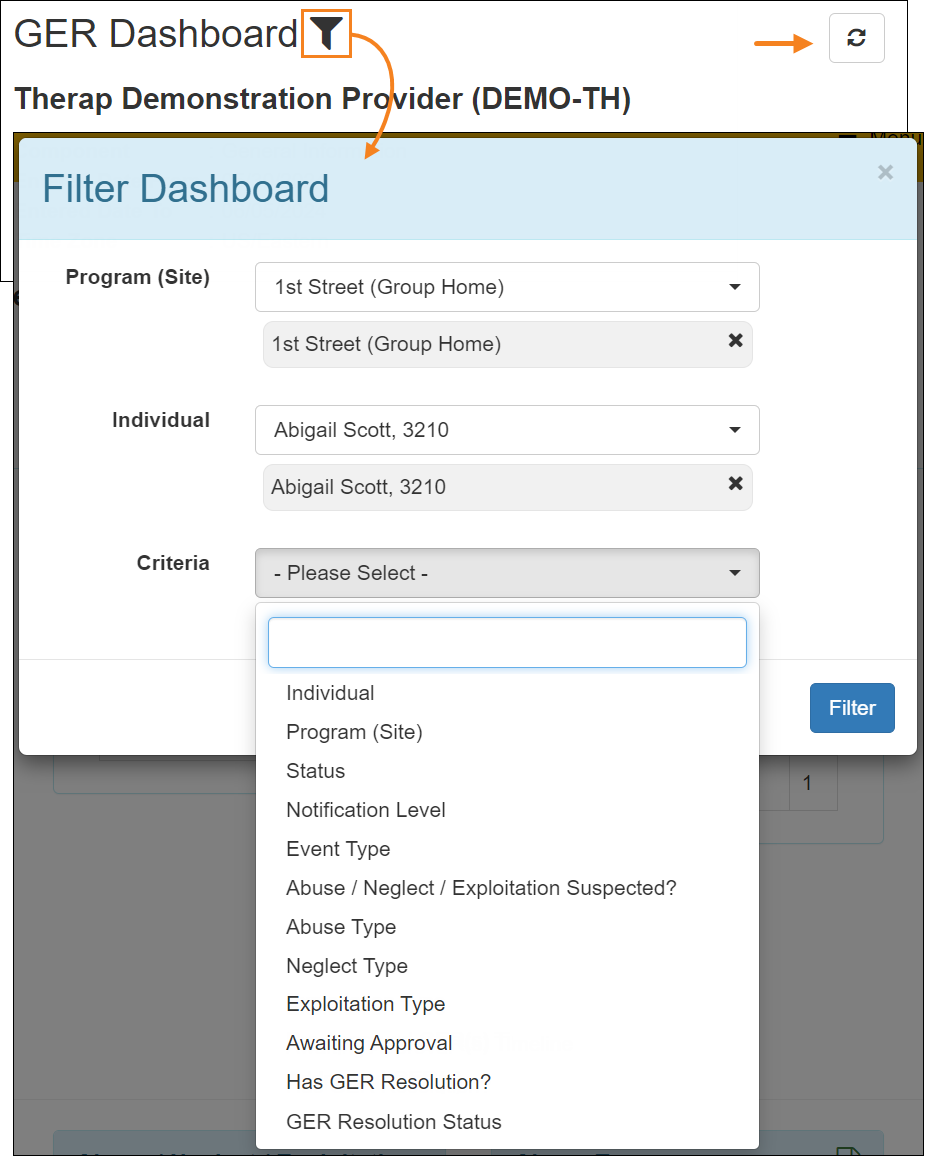
- If users want to narrow down the displaying GER Dashboard, then they can click on the Filter icon on top of the page, select appropriate information on the ‘Filter Dashboard’ popup window, and filter the GER Dashboard. Users can also use the Refresh button on the top right corner of the Dashboard to reset the searched data.
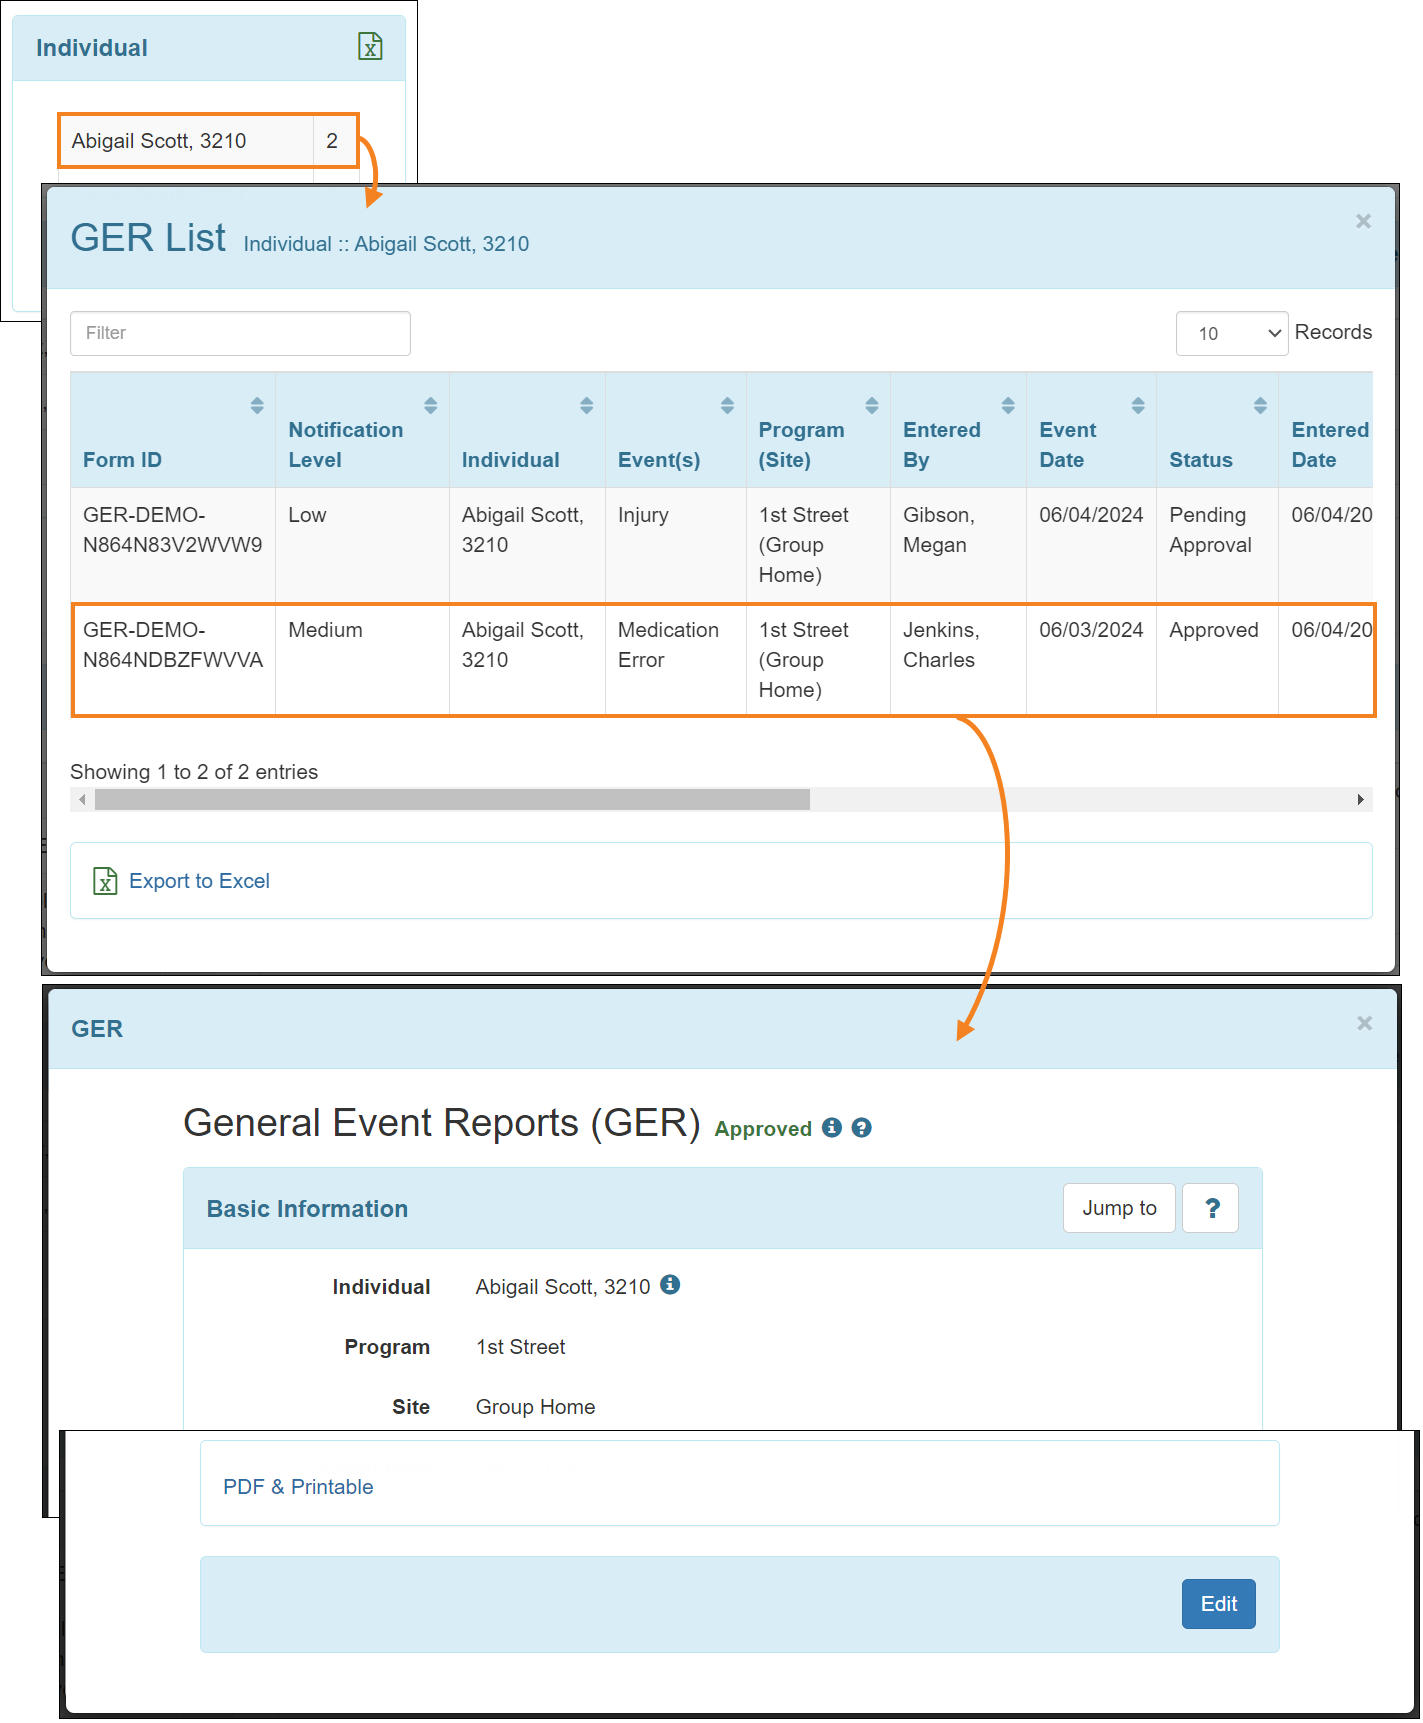
- Clicking on the rows of a section will display the list of GERs that make up the count for that row. Clicking on any row of the 'GER List' page will open the corresponding GER form in a 'GER' popup window. Users can also export ‘GER List’ into excel using the Export to Excel link at the bottom of the popup window.
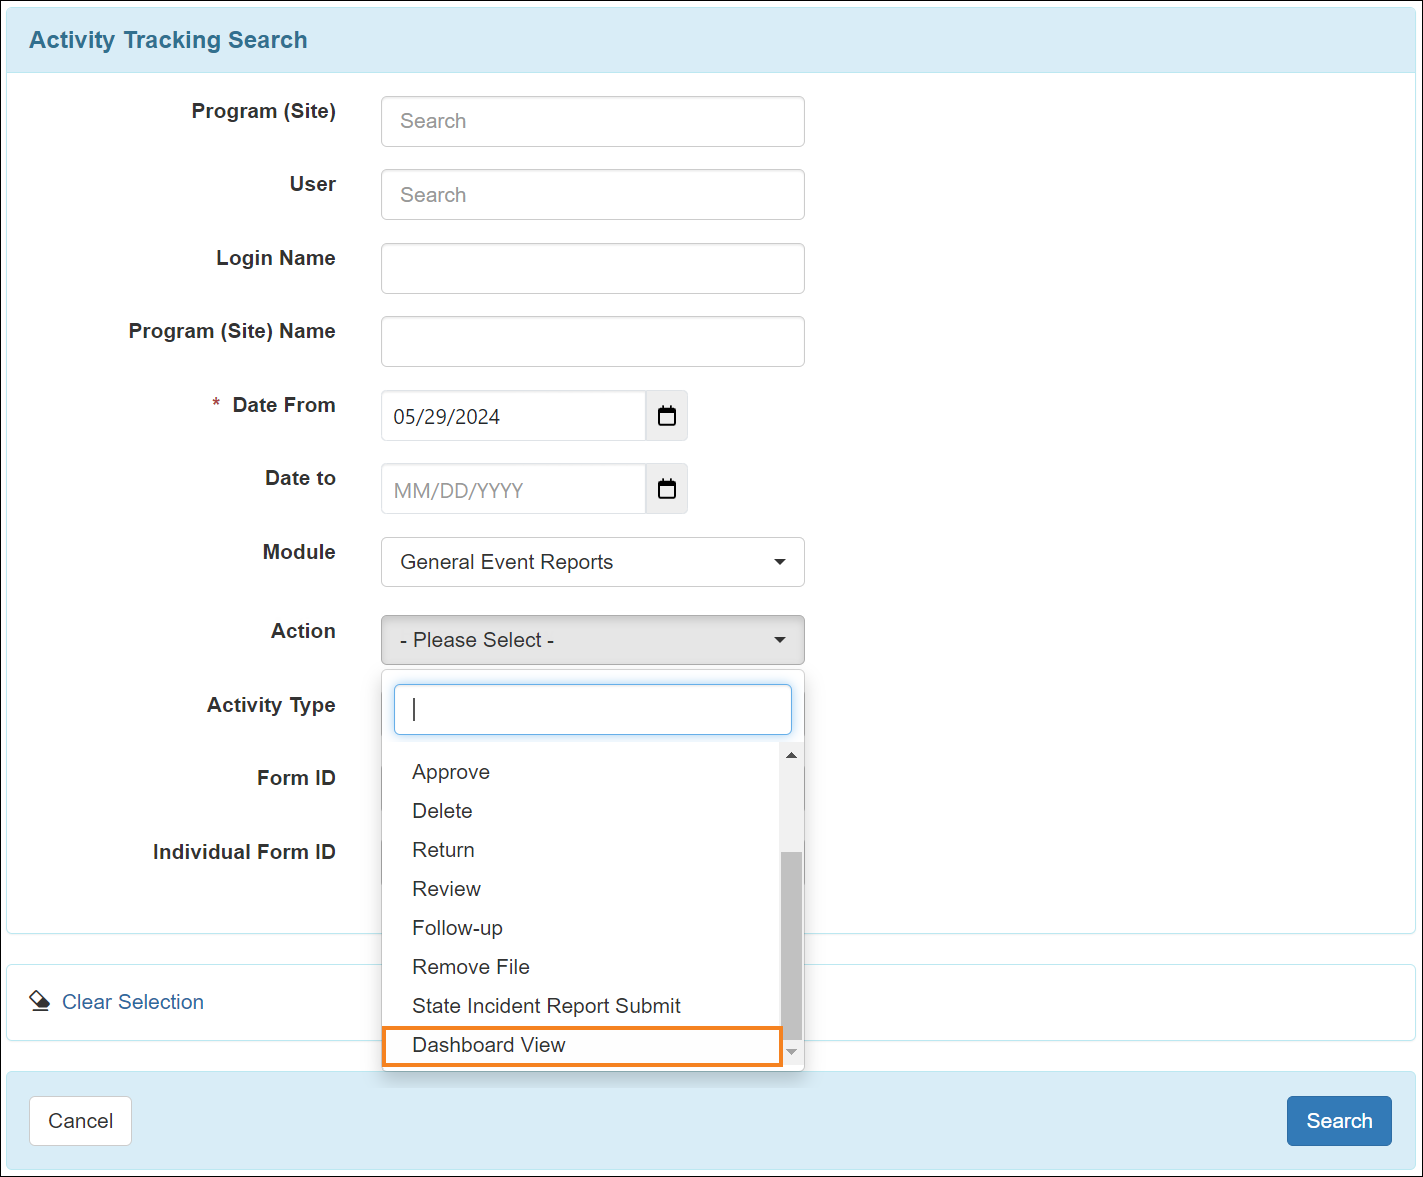
- On the ‘Activity Tracking Search’ page, a new Action titled Dashboard View has been added for the General Event Reports module.
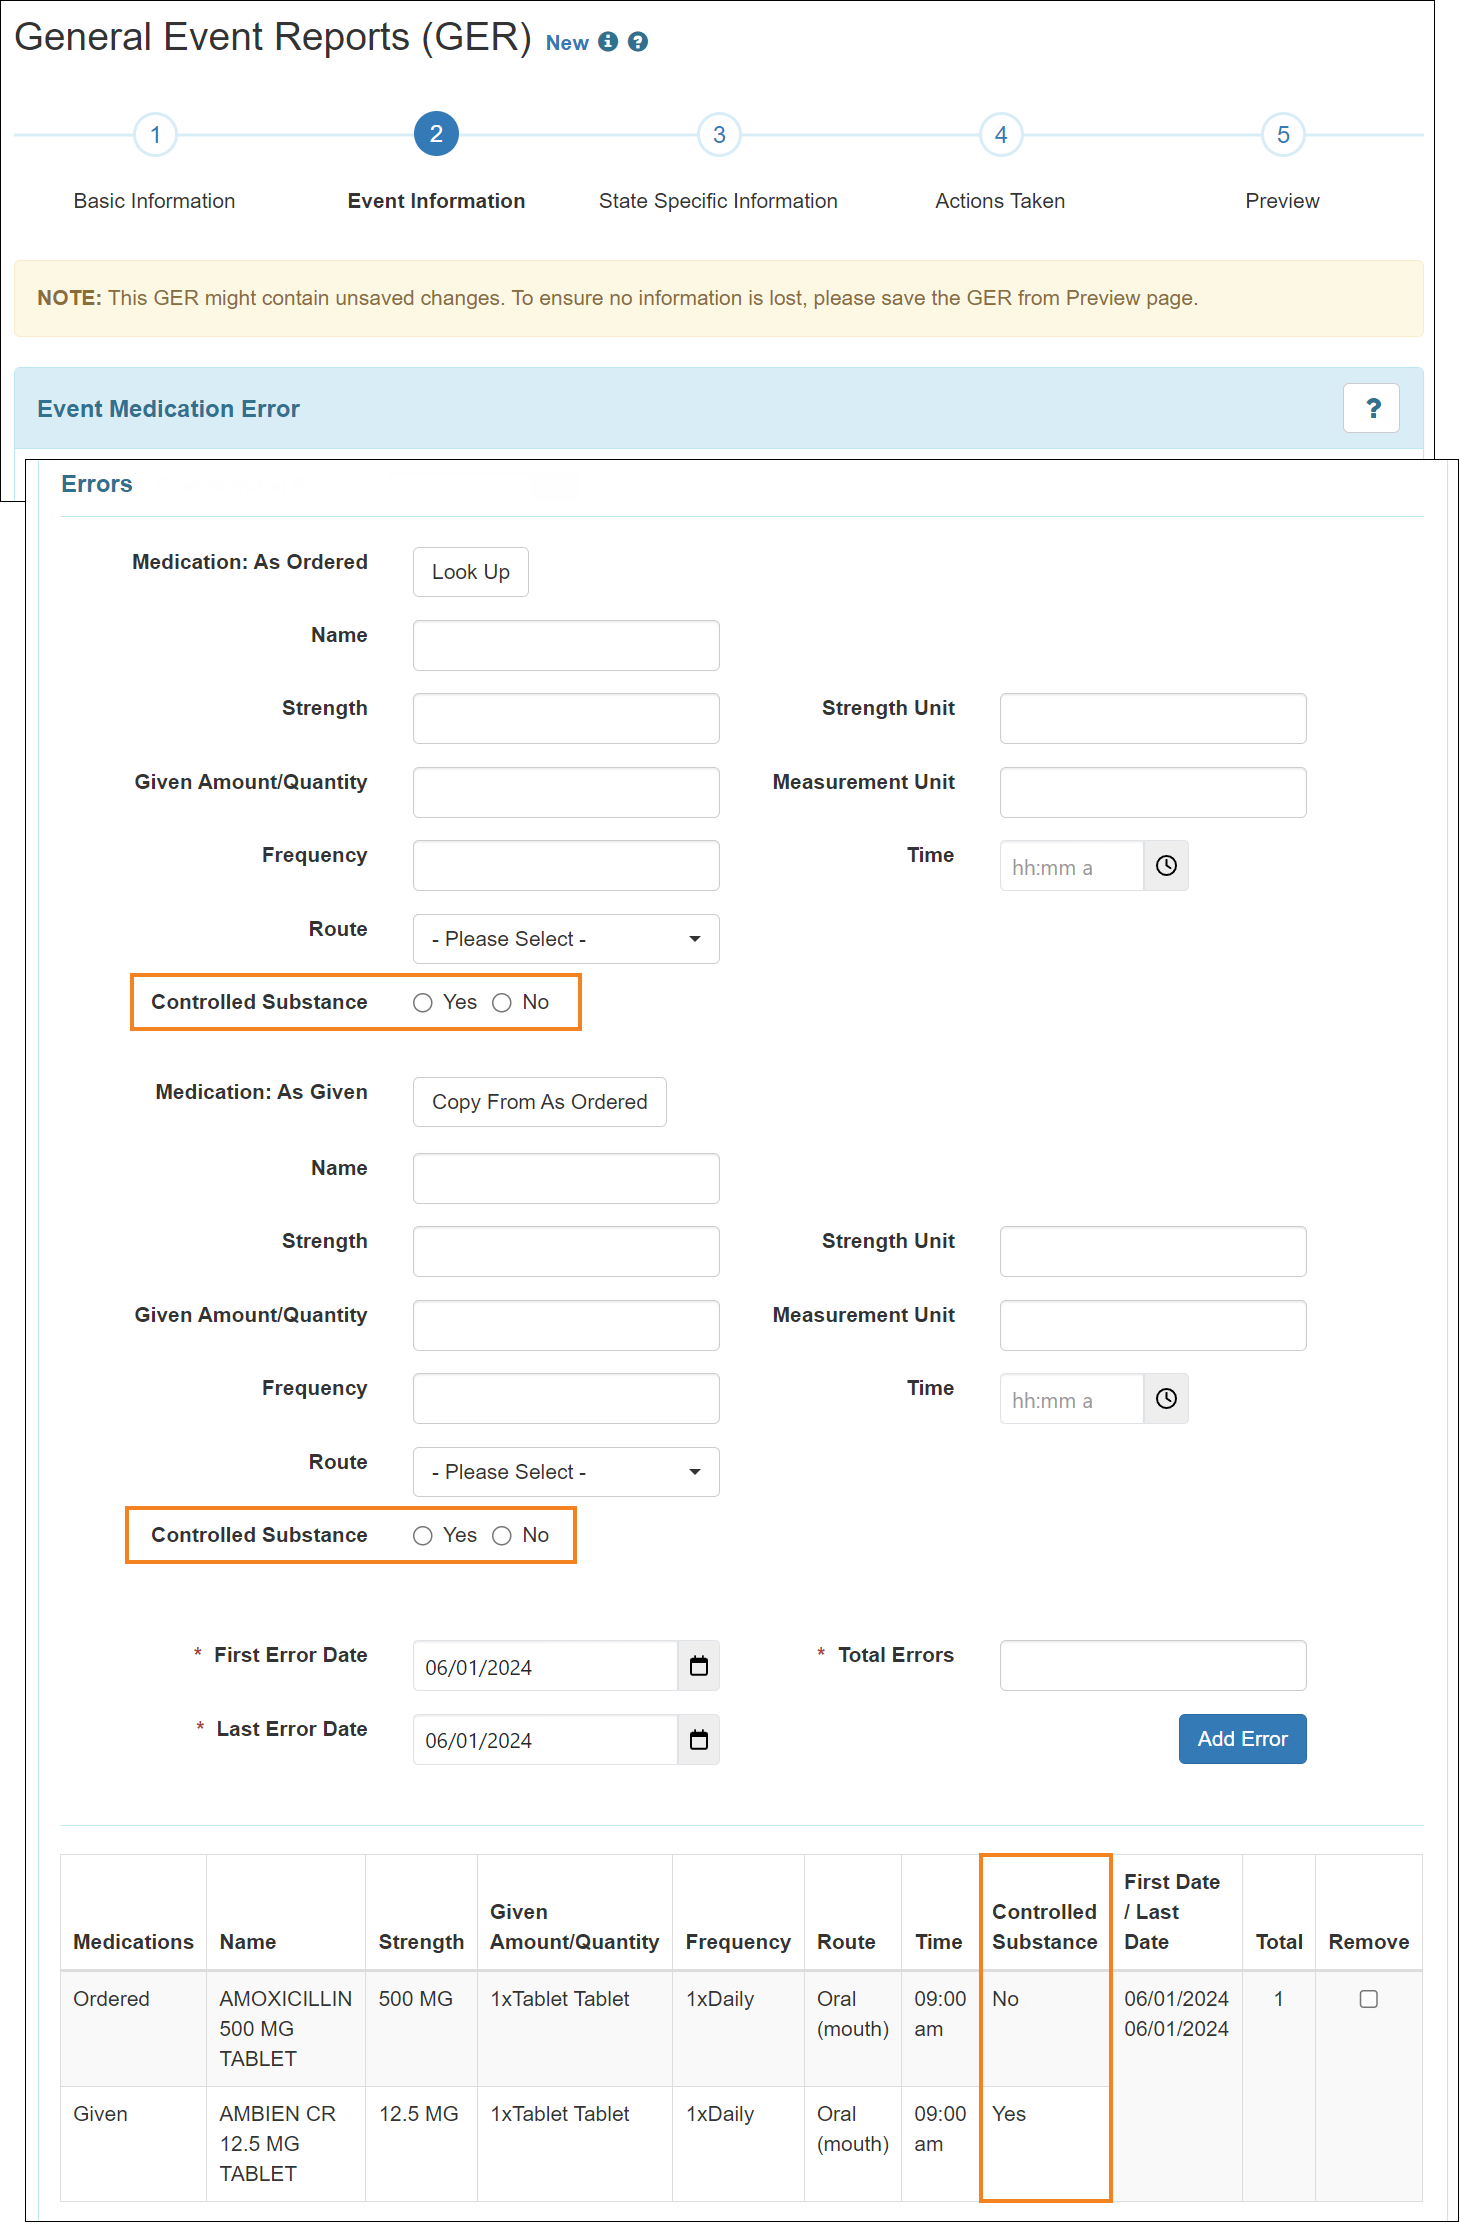
- A new field titled Controlled Substance has been added for the Ordered and Given medications in the ‘Errors’ section of the Event Medication Error type GERs. For the medications that are looked up using the individual’s Medication History, this information can auto-populate based on the information available on the Medication History form. The selected control substance will also appear in the new Controlled Substance column of the added error table.
- The following options have been added to the Person/Entity dropdown field in the ‘Notification(s)’ section of the GER ‘Actions Taken’ page and the ‘Notification’ section of the GER ‘Preview’ page:
- Payer/MCO
- State Agency

Immunization
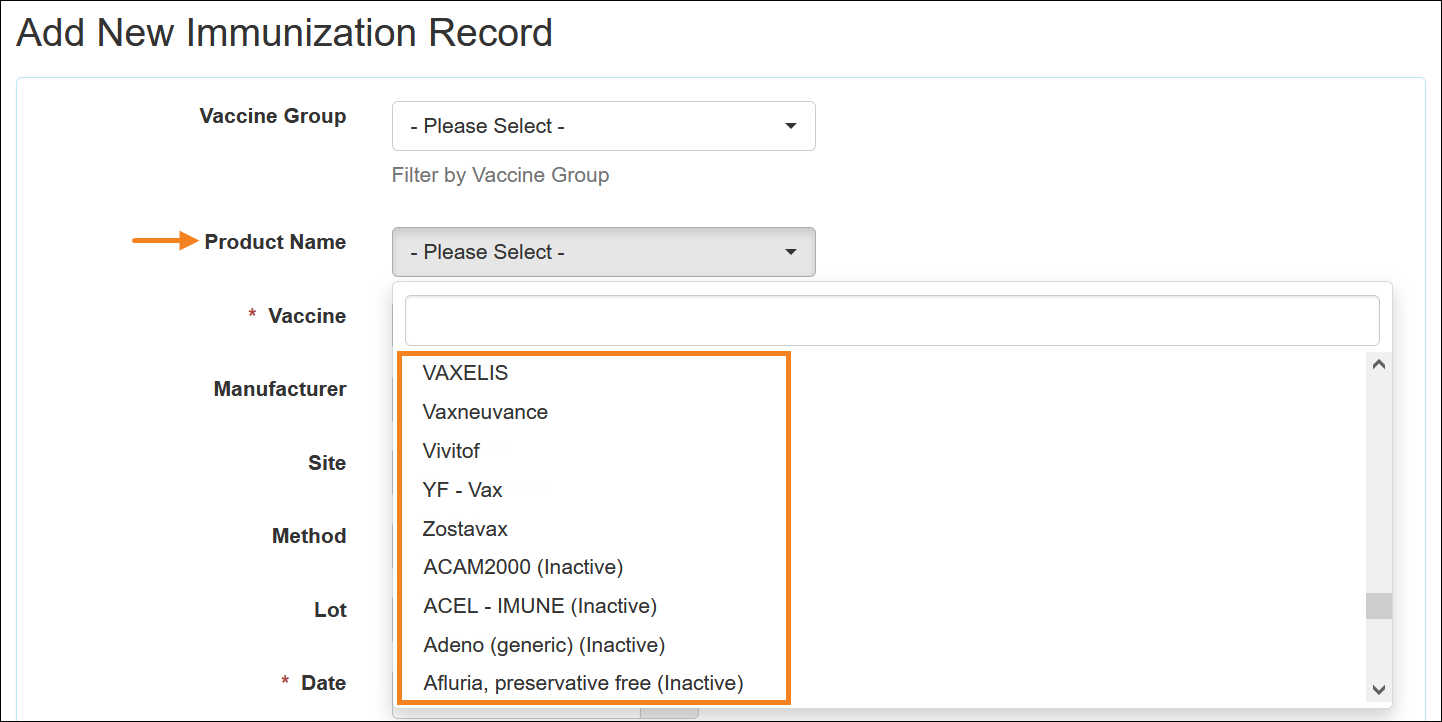
[Back to Top]- The options within the Product Name dropdown field of the Immunization Record page have been reordered. All the active products will now appear on top of the list and all the inactive ones will display at the bottom of the list in alphabetical ascending order.
Individual Plan
[Back to Top]- Previous and Next links will be available in all success message pages of Individual Plan, Individual Plan Change Form, Individual Plan Agenda, and Personal Focus Worksheet forms, if the form has been opened from a list page.
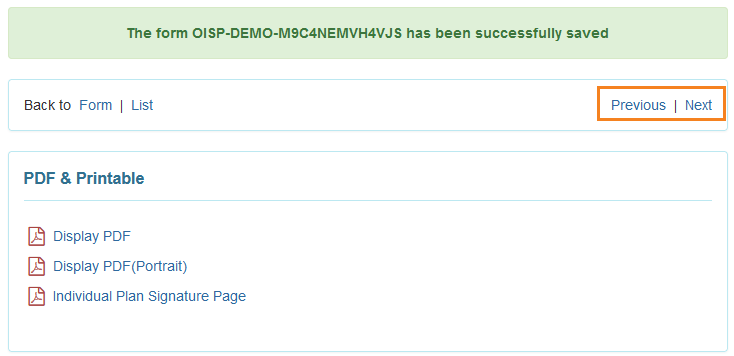
- If a form is the first item of a list, then the Previous link will be read-only on the success message page. Similarly, if a form is the last item of a list, then the Next link will be read-only.


- The Previous and Next links will not be available if the form was the only item in the list.

- If users open a form from a list, access another form from that original form, and take action on the second form which is not part of the original list (e.g., creating a new form by copying an Approved form), then the Previous and Next links will not be available in the success message page of the second form as it was not opened from a list.
Medication History
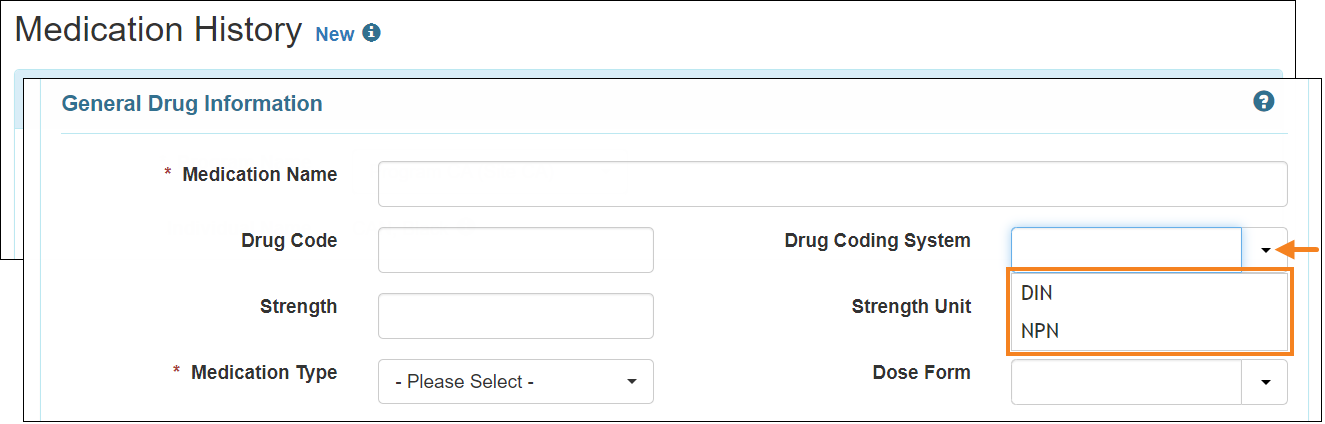
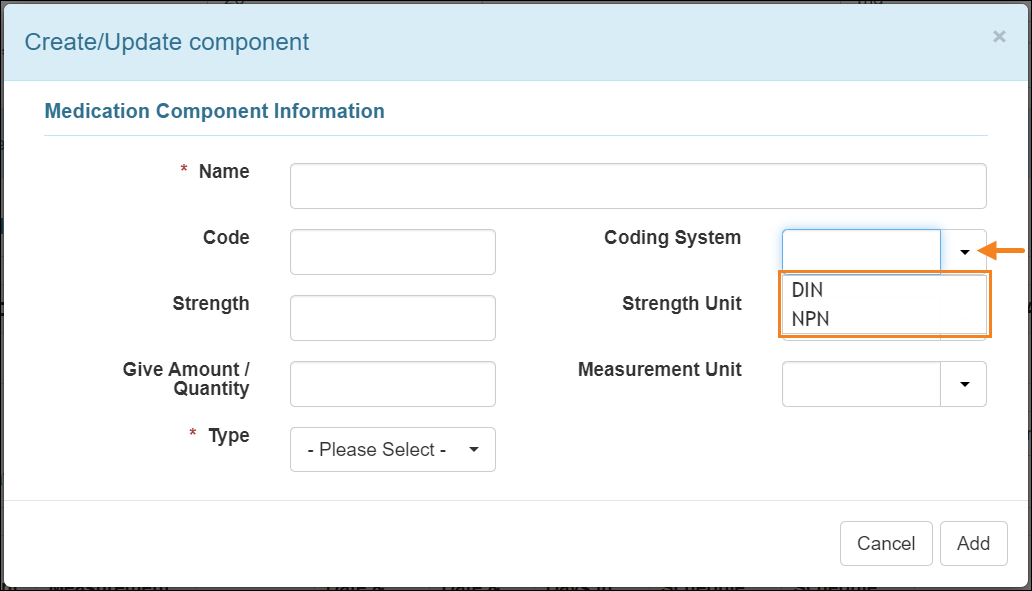
[Back to Top]- The following changes have been made to the Drug Coding System dropdown field in the ‘General Drug Information’ section and the Coding System dropdown field from the ‘Create/Update component’ popup of the Medication History form:
- Options removed:
- NDC
- UPC
- HRI
- Options added:
- DIN
- NPN
- Options removed:
Personal Finance
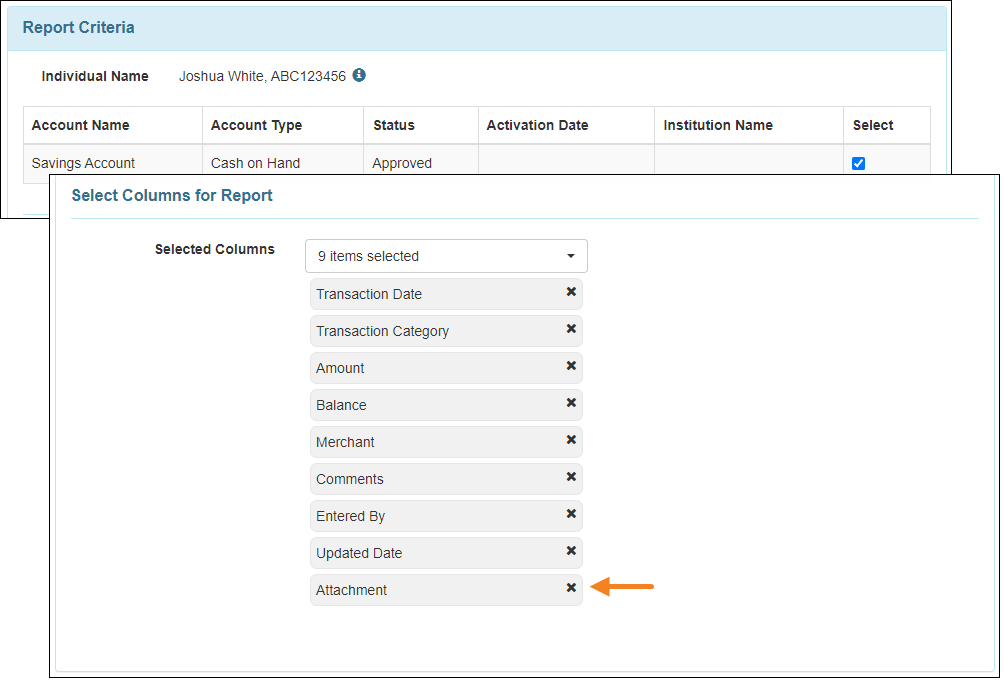
[Back to Top]- When generating the Personal Finance Transaction Report, the 'Attachment' option will now be automatically selected in the Selected Columns dropdown field in the 'Select Columns for Report' section.
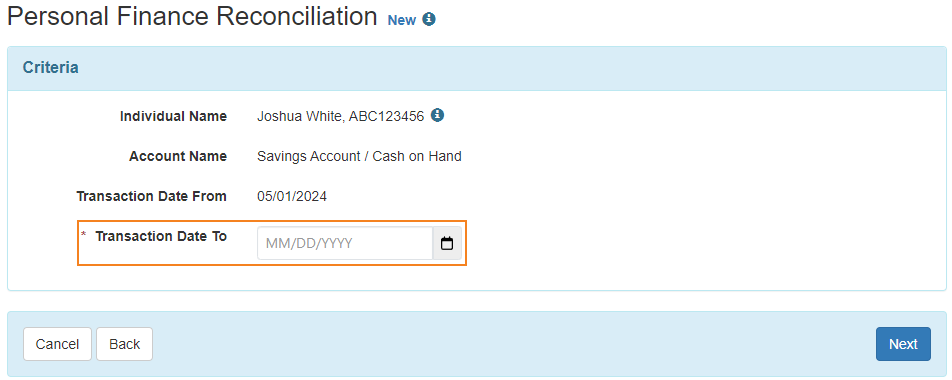
- When creating a new Personal Finance Reconciliation, the Transaction Date To field will no longer pre-populate a date. Users will now need to select a date using the calendar icon.
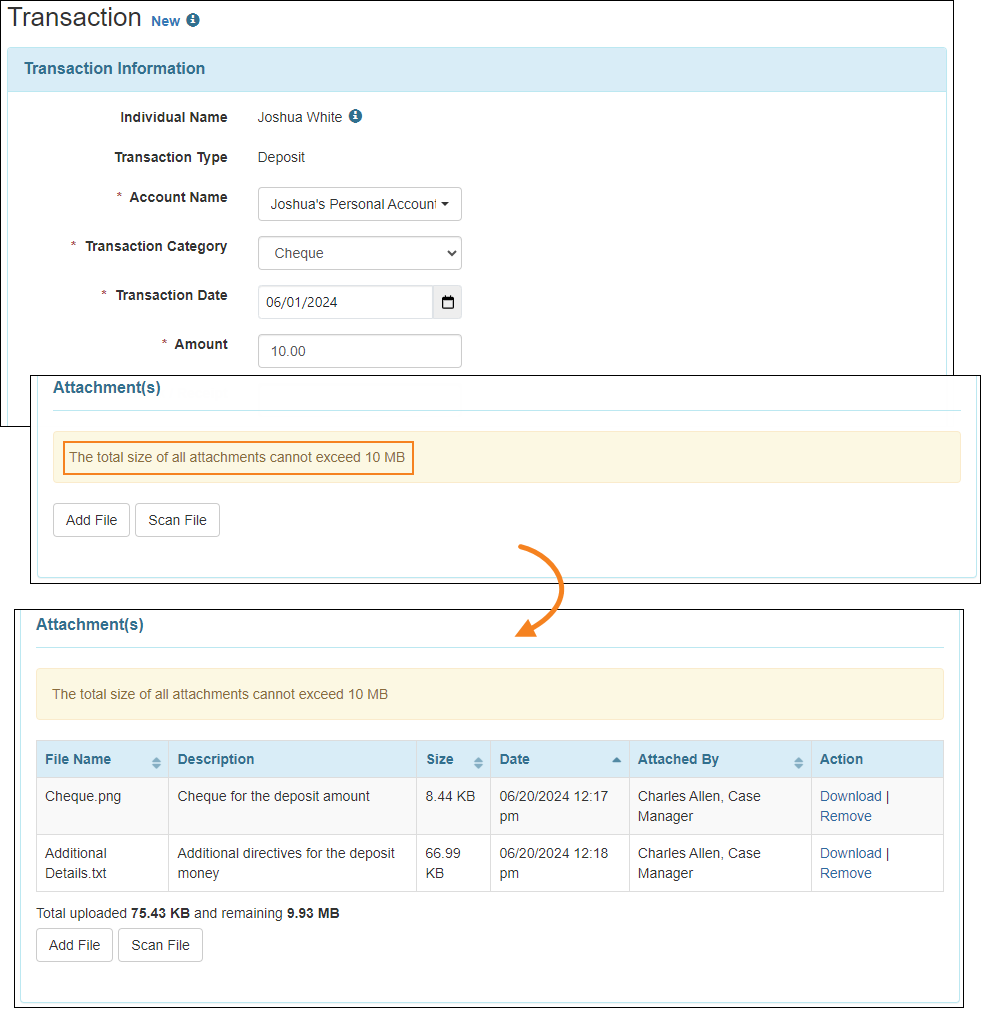
- Users can now attach multiple files to Personal Finance Transaction forms. The size of each file must be within 3 MB and the combined size of all attachments must be within 10 MB.
Secure Communication (SComm)
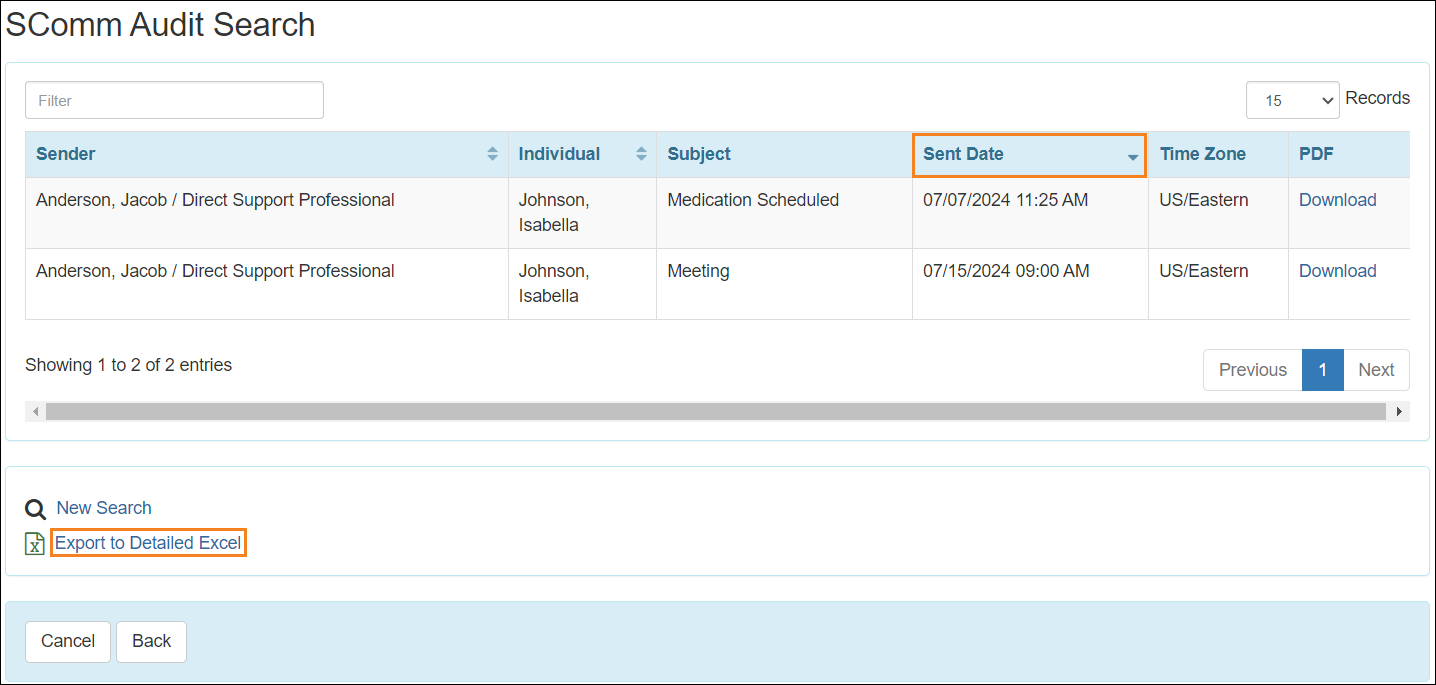
[Back to Top]- The Date/Time column and the Export to Excel link on the ‘SComm Audit Search’ result page have been renamed to Sent Date and Export to Detailed Excel respectively.
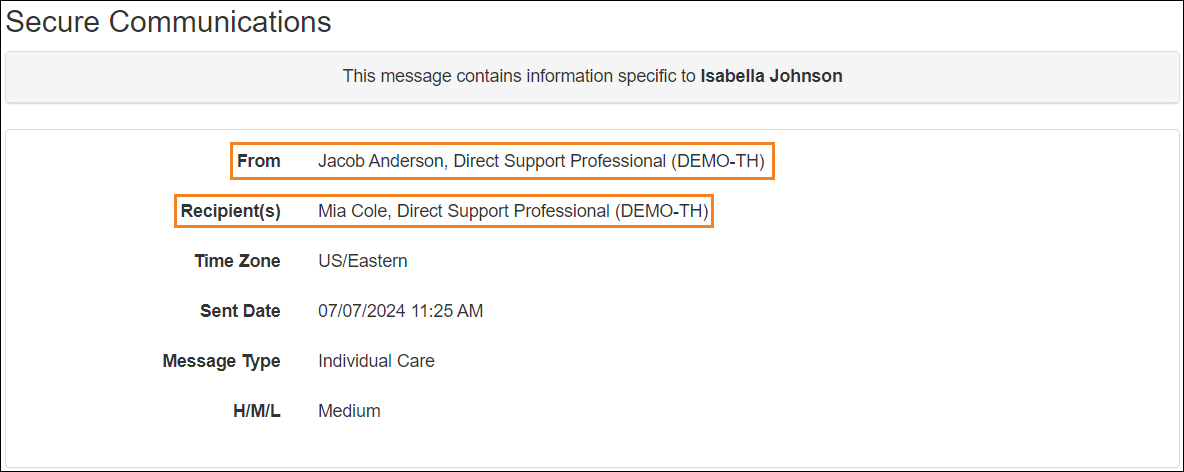
- The details of the From and Recipient(s) fields in both read-only and PDF version of the SComm Audit messages will be shown in the following format: ‘User Name, Title (Provider Code)’.
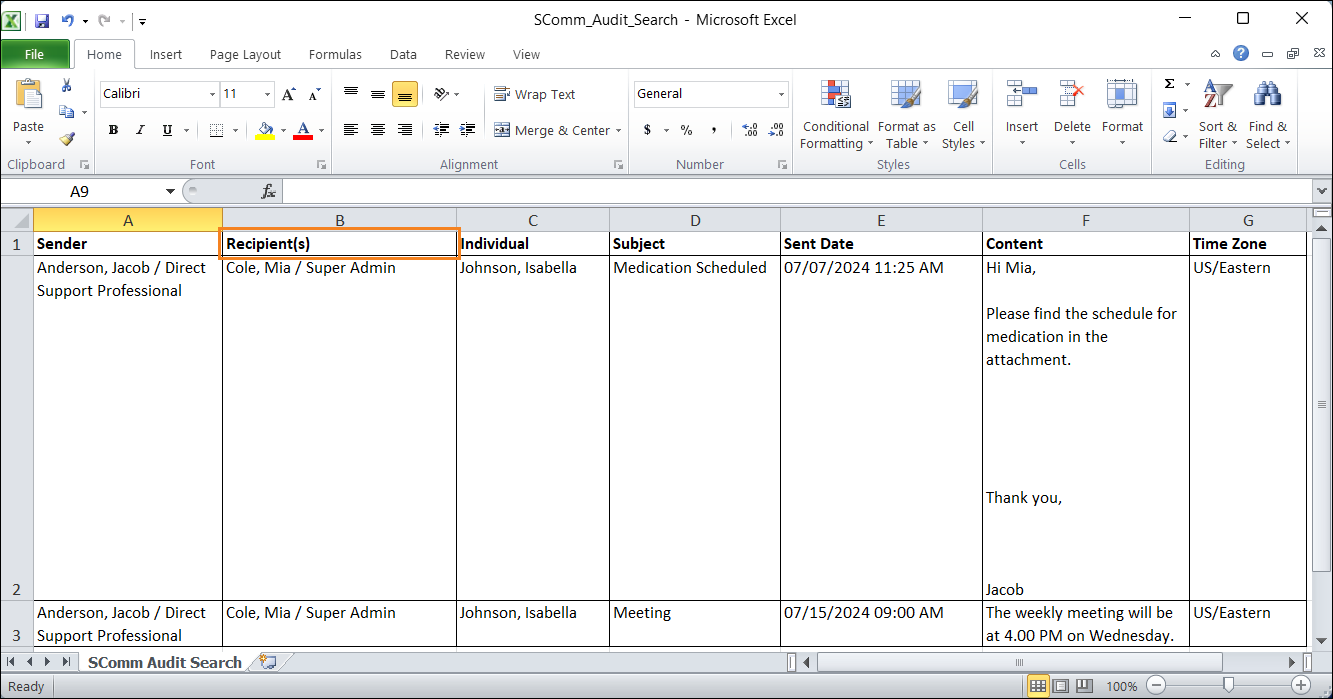
- The Recipient column in the exported Excel file of the ‘SComm Audit Search’ result page has been renamed to Recipient(s).
Service Authorization
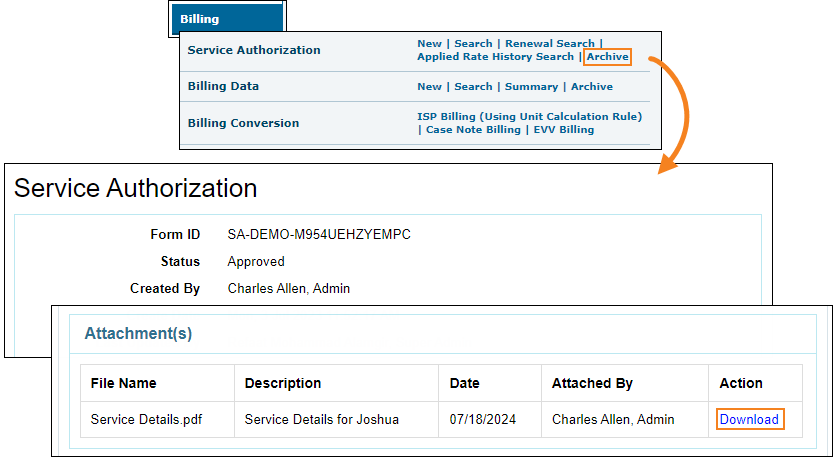
[Back to Top]- Attachments added to Service Authorizations can now be downloaded from archived Service Authorization forms using the Download link in the Action column.
Service Directory
[Back to Top]- A new link titled Update from Excel has been added in the 'Rate' sub-section of the 'Service Directory' section on the Oversight Dashboard.
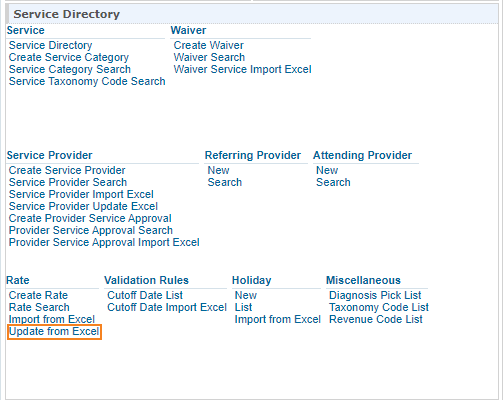
Users in the Linked Providers will get the new Update from Excel link beside the Rate option in the 'Service Directory' section from the Admin tab.
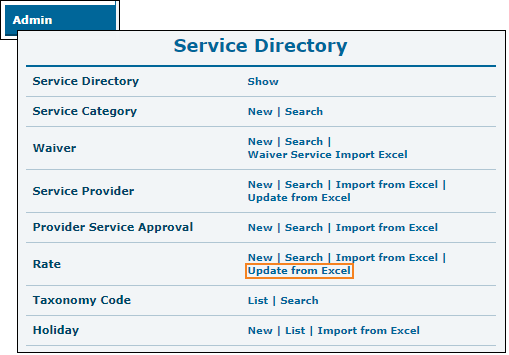
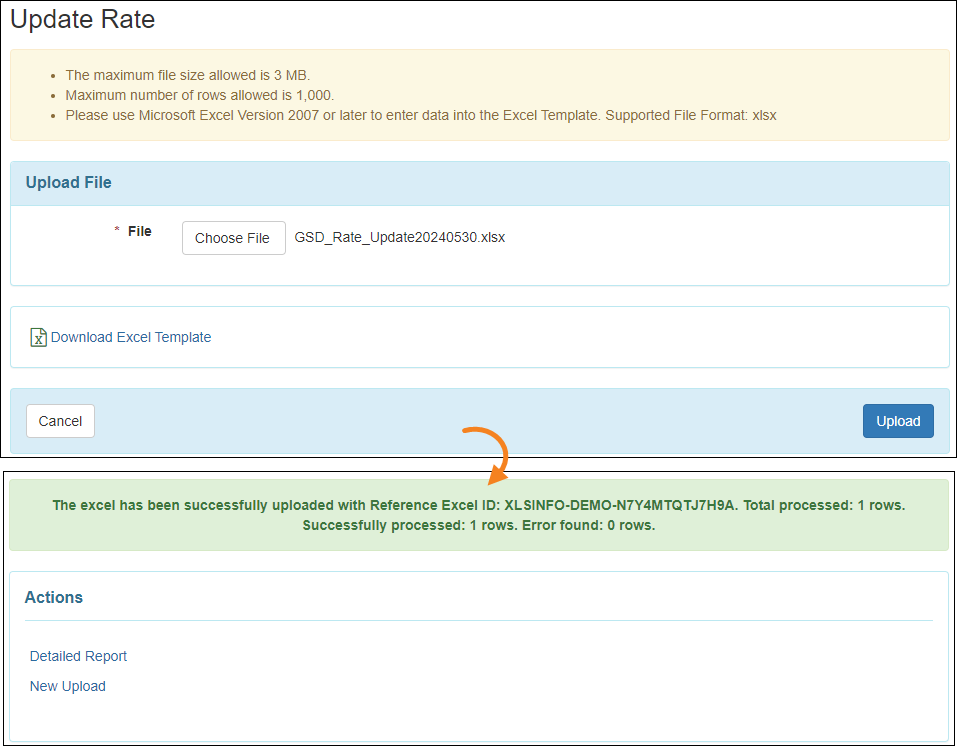
This option will enable users to update Approved Rates by uploading Excel files.
T-Log
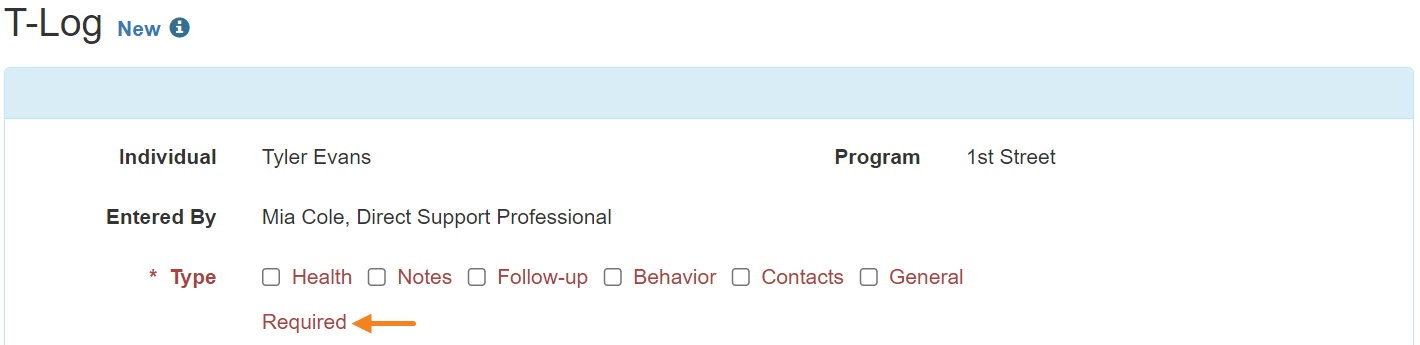
[Back to Top]- The validation message that appears on a T-Log form when users attempt to submit that T-Log without selecting a Type for it has been reworded from Type is required to Required.
- The validation message that appears on a T-Log form when users attempt to submit it without entering any information in the Summary field has been reworded from Summary cannot be empty to Required.
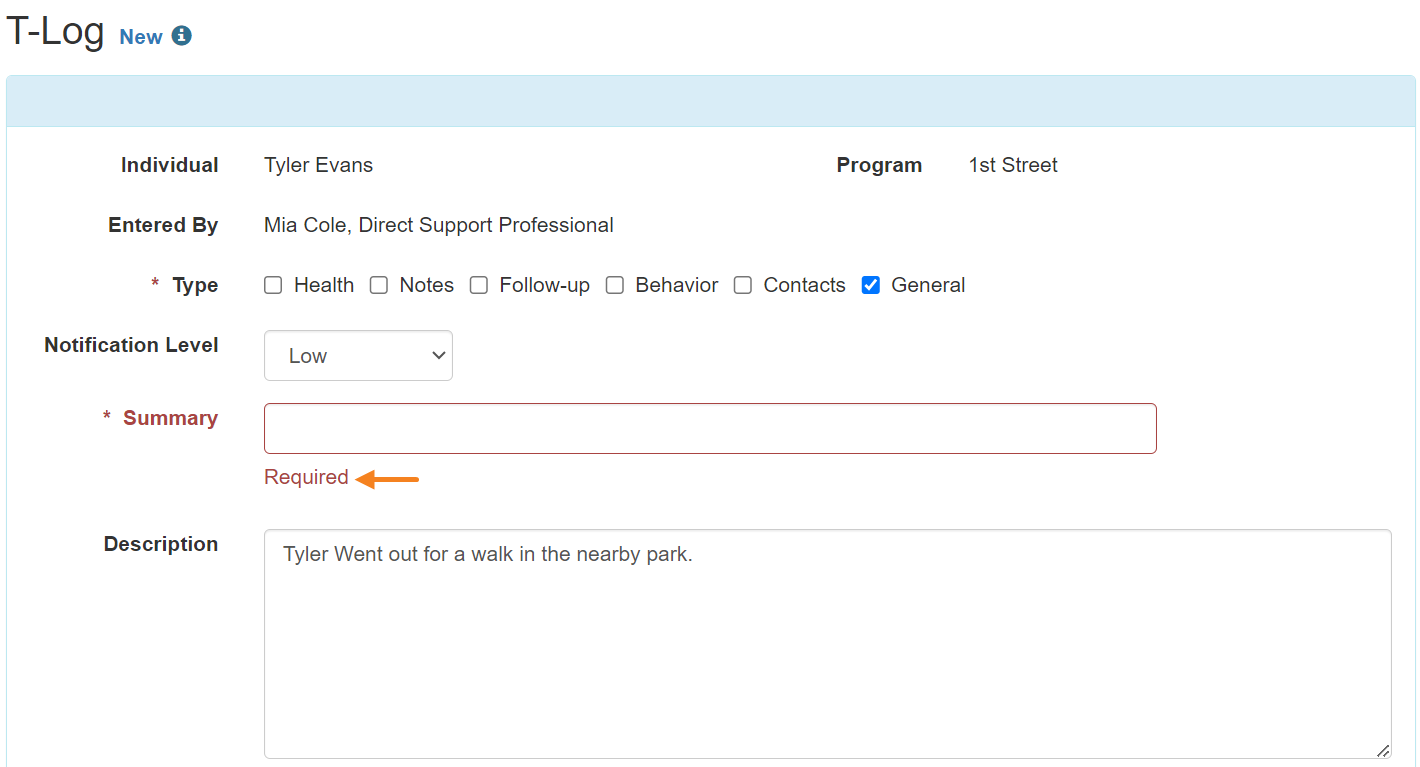
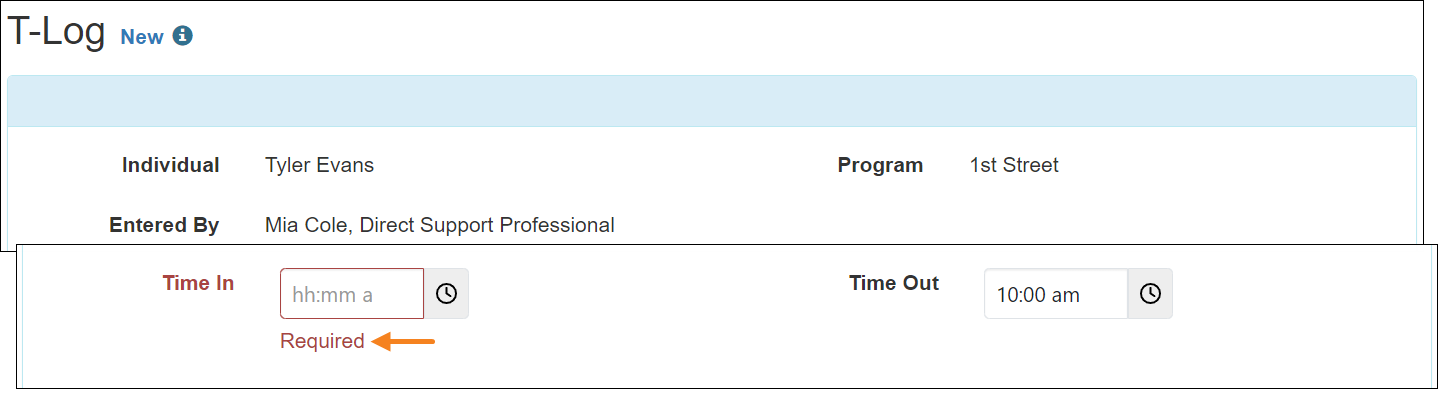
- The validation message shown on a T-Log form when users attempt to submit it with time entered in the Time Out field while keeping the Time In field blank has been reworded from Time In is required to Required.